
How to apply custom product layouts in SGEN
⏱ Quick answer below · full page ≈ 8 min · skim the bold lead-ins to move faster.
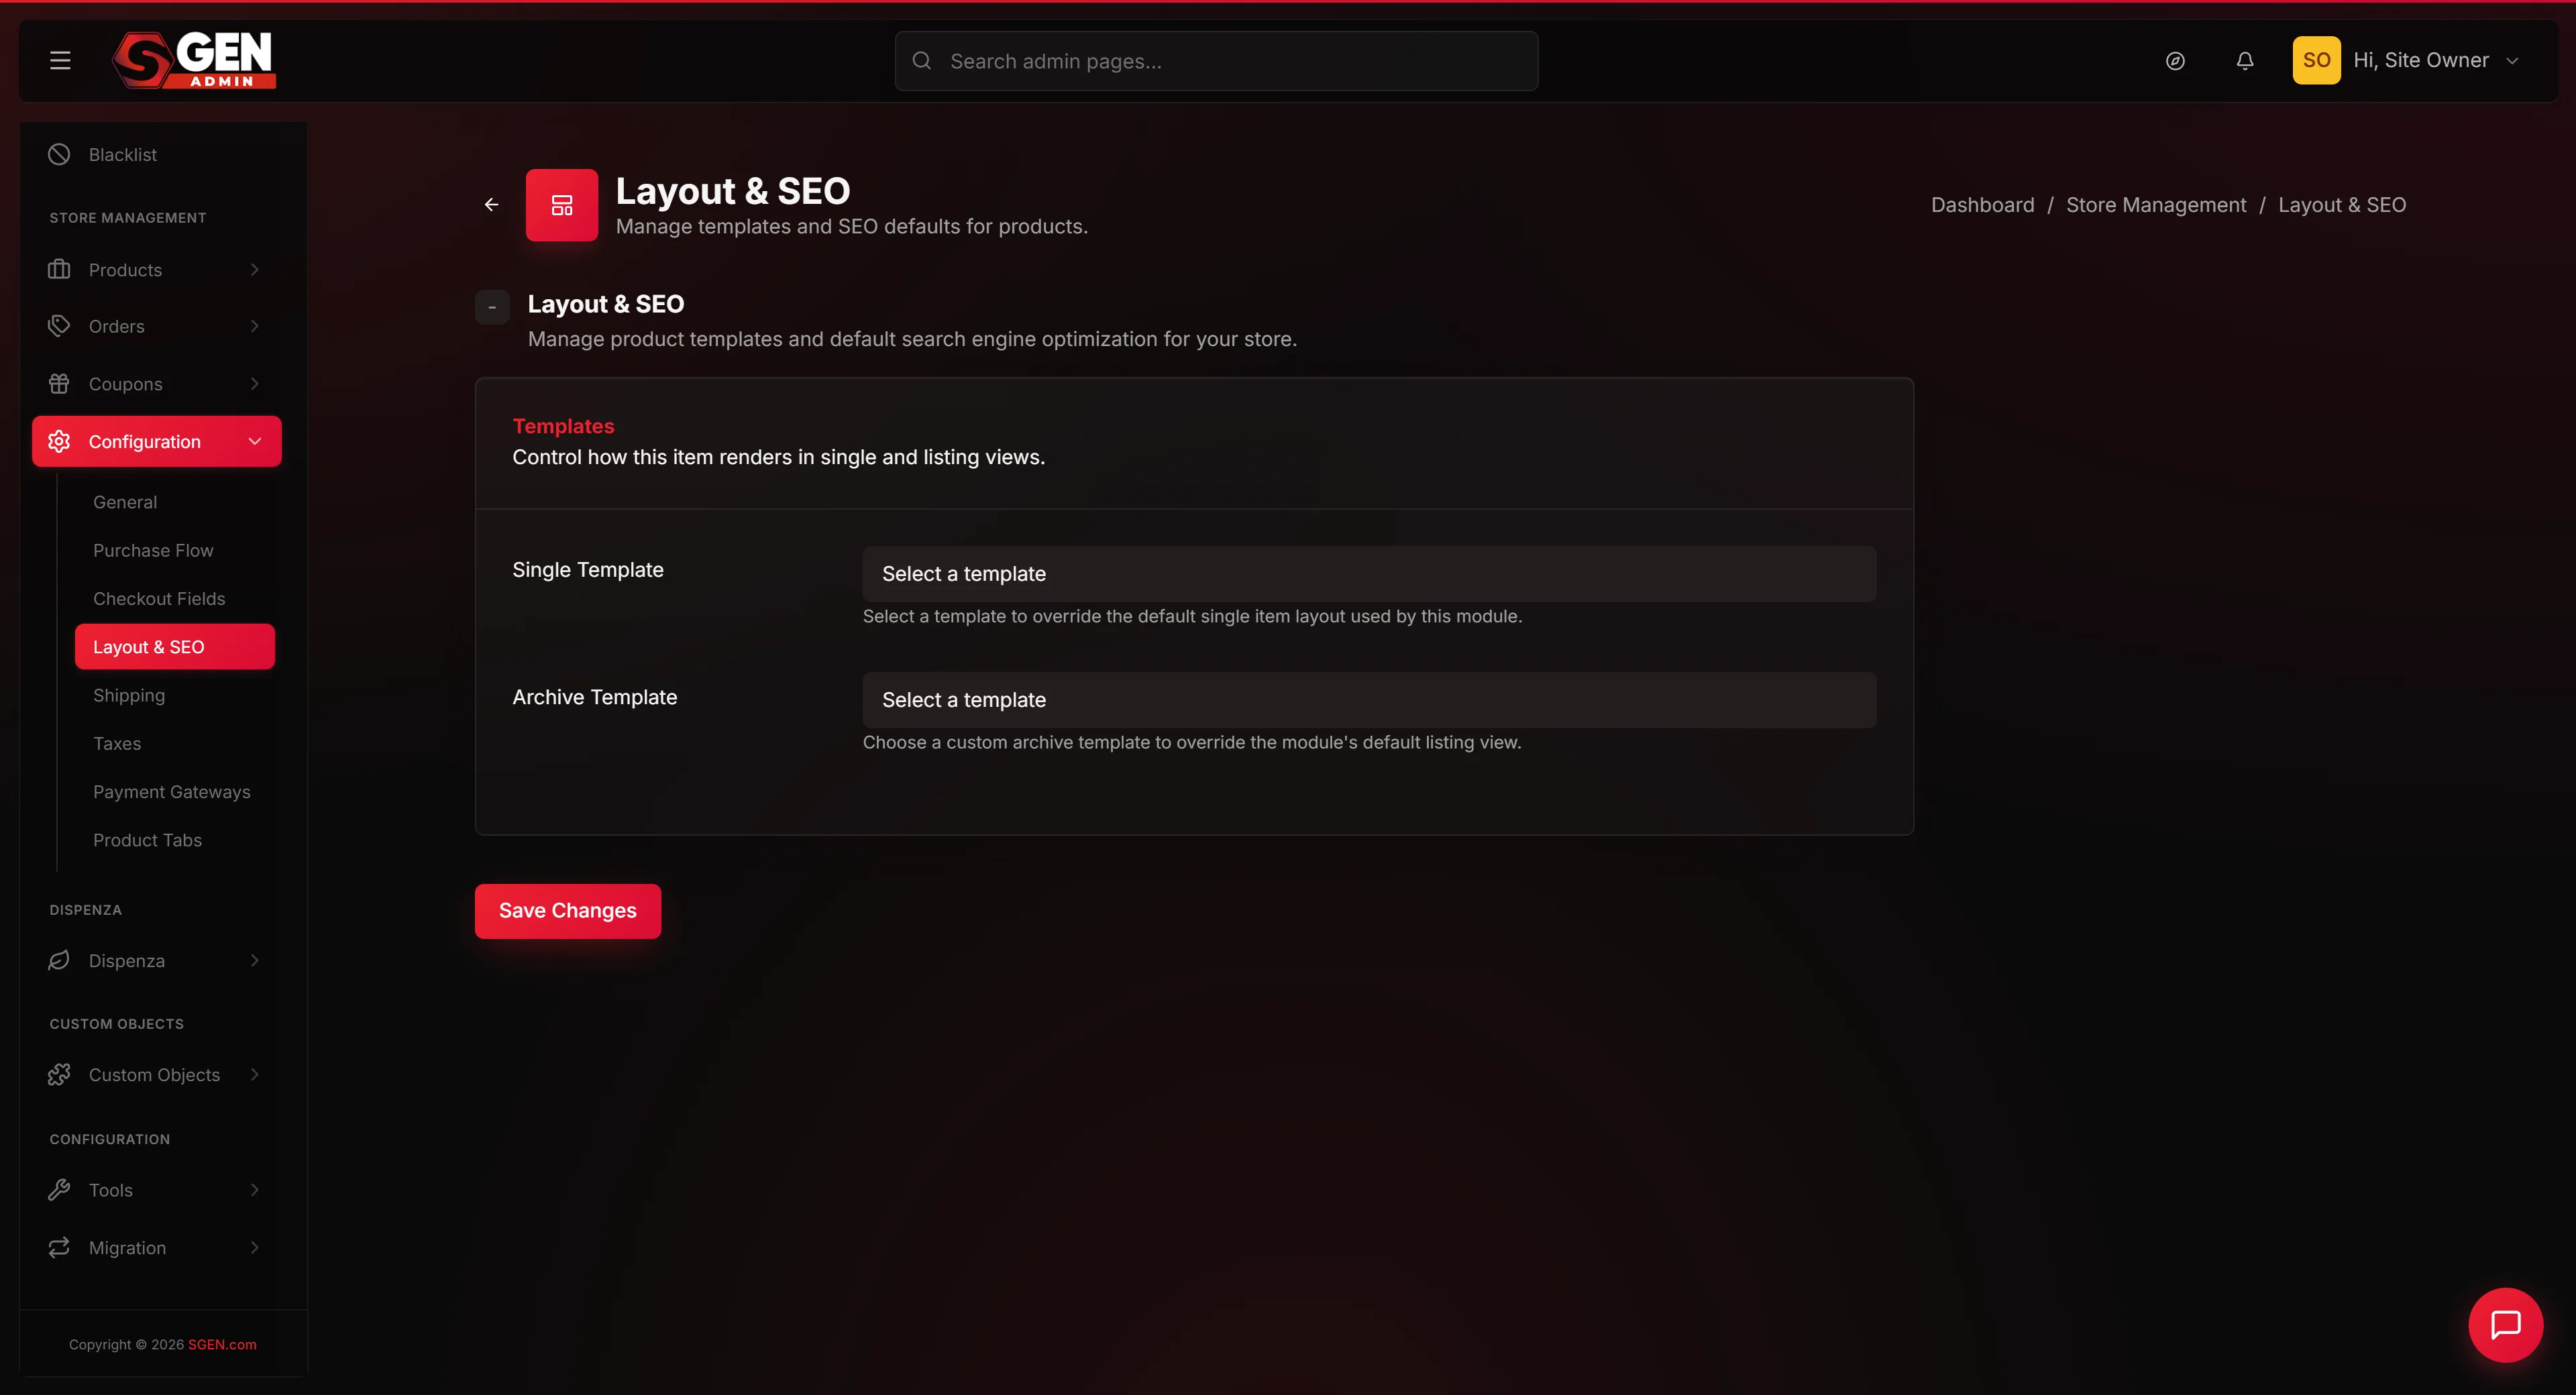
In short. SGEN lets you replace the default product detail and product listing layouts with custom templates you build in the page builder. Two dropdowns — Single Template (product detail pages) and Archive Template (listing pages) — control which template the storefront uses. Both selections are store-wide. Pick a template, save, done. If something breaks, select "Use default layout" and save to revert immediately.
On this page: Fields · What this is for · Steps — product detail · Steps — listing · Steps — revert · Troubleshooting
Scope
This doc covers the Layout & SEO tab under Store Configuration — specifically template assignment for product detail and product listing pages. It does not cover building templates (page builder under Templates), per-product or per-category overrides (managed on each product or category's edit page), or SEO meta fields (managed elsewhere in store configuration).
Fields
| Field | What it assigns | Applies to |
|---|---|---|
| Single Template | Custom page-builder template or default theme layout | Every /product/ URL |
| Archive Template | Custom page-builder template or default theme layout | /products and every /product_category/ |
| Use default layout (either dropdown) | Reverts to SGEN's built-in layout for that surface | Whichever surface the dropdown controls |
Templates must be published and tagged for ecommerce use to appear in either dropdown. Drafts are never listed. Per-product or per-category overrides always take precedence over the store-wide selections made here.
What is this for?
The Layout & SEO tab is a connector, not a builder. You build templates in the page builder under Templates, then come here to tell the storefront which template to use. The page itself has two dropdowns and a Save Changes button — simple interface, store-wide impact.
Single Template — every product detail page (/product/) uses this template. The product's title, price, description, and images flow into the template's placeholders automatically, so your custom design fills in with each product's real content.
Archive Template — your /products page and every /product_category/ URL use this template. The matching products flow into the template through repeating placeholders.
A note on the name: despite being called "Layout & SEO," this tab does not currently expose any SEO inputs. SEO defaults for product pages are managed elsewhere in your store configuration. This tab is functionally a layout-picker only.
This page also gives you an instant at-a-glance view of which templates are currently active, and a fast revert path — select "Use default layout" and save to return to a known-good state immediately.
Good use cases
| Scenario | Which dropdown |
|---|---|
| Apply a brand-aligned product detail page with a custom hero, lifestyle imagery, and sticky Add to Cart | Single Template |
Switch /products to a magazine-style grid instead of a plain thumbnail grid | Archive Template |
| Swap in a seasonal template (summer collection, holiday edition) for the duration, then revert | Either |
| Coordinate a full brand redesign — build new templates in the page builder, flip both here in one save | Both |
| Revert quickly when a custom template introduces a regression | Either → "Use default layout" |
What NOT to use this for
- Adding SEO meta fields — no SEO inputs exist here despite the tab name. SEO defaults live elsewhere in store configuration.
- Per-product or per-category overrides — selections here are global. Different templates per product or category are managed on each product or category's edit page.
- Building templates — build templates in the page builder under Templates first; this page only references already-built templates.
- Picking a non-ecommerce template — only templates tagged for ecommerce use have the product-data placeholders. Picking a generic landing page template will render static content with no product data merged in.
- Swapping during high-traffic moments — the change applies on the next page render. Schedule layout swaps during low-traffic hours.
How this connects to other features
- Templates (page builder) — If a template you expect is missing from a dropdown, check that its ecommerce tag is set under Templates.
- Products — The Single Template wraps each product. Edit a product to change its content; come here to change the layout that wraps it.
- Categories — The Archive Template renders
/product_category/URLs. Products belonging to that category flow into the template. - Theme — Your theme provides the default layouts that activate when you select "Use default layout." Switching themes can change what those defaults look like, even if your selections here stay the same.
- Cart and Checkout — Not affected by this tab. Cart and checkout layouts have their own settings under Purchase Flow and Cart Behavior.
- Analytics — Treat a template swap as a release event — annotate the date in your analytics to compare conversion pre-swap and post-swap.
- Search engine indexing — Layout changes do not change page URLs, so rankings carry over. Verify with your SEO tool that your custom template includes important headings and schema after a swap.
Before you start
Have at least one ecommerce-tagged, published template built in the page builder before visiting this tab. If both dropdowns show only "Use default layout," you have no ecommerce templates yet — build one first, tag it ecommerce, save and publish, then return here.
Know which surface you want to override: Single Template (product detail) or Archive Template (listing). You can swap one without touching the other.
Pre-flight checklist:
- Template is published (not just saved as a draft)
- Template has the ecommerce tag
- Template includes placeholders for product title, price, description, and Add to Cart
- No broken images or links inside the template
- Tested across desktop, tablet, and phone widths in the page builder preview
If you have a caching layer in front of your storefront, plan to clear it after saving so the new template appears immediately.
Where to go
In the admin sidebar, click Settings, then Store Management. The Store Configuration page opens with several tabs at the top. Click the Layout & SEO tab. You will see the Single Template and Archive Template dropdowns, with Save Changes at the bottom.
Steps — apply a custom product detail layout
1. Open the Layout & SEO tab
From the admin sidebar, click Settings, then Store Management, then the Layout & SEO tab.
2. Find the Single Template dropdown
The Single Template field is the first field on the page.
3. Select your custom template
Click the Single Template dropdown to open it. Pick the template you want to use as the product detail layout.
If the dropdown is empty or only shows "Use default layout," no ecommerce-tagged templates exist yet. Go to the page builder under Templates, build one, tag it ecommerce, save and publish, then return here.
4. Click Save Changes
Click the Save Changes button at the bottom. The change applies immediately.
5. Verify on a public product page
Open a product detail page in another tab — for example, /product/your-product-slug. The page should render with your custom template, with the product's real title, price, description, and images flowing into the placeholders.
If the layout looks different from what you previewed in the page builder, confirm the template is published. Templates can exist in draft state where they appear in the dropdown but do not apply to live URLs.
Steps — apply a custom product listing layout
1. Open the Layout & SEO tab
From the admin sidebar, click Settings, then Store Management, then the Layout & SEO tab.
2. Find the Archive Template dropdown
The Archive Template field is the second field on the page.
3. Select your custom listing template
Click the Archive Template dropdown and pick the layout you want for /products and category pages.
4. Click Save Changes
Click Save Changes at the bottom. The change applies immediately.
5. Verify on /products and a category page
Open /products in another tab. Verify the new listing layout renders with your products. Then open a category URL to confirm category pages also pick up the new template — Archive Template applies to both.
Steps — revert to the default layout
1. Open the Layout & SEO tab
From the admin sidebar, click Settings, then Store Management, then the Layout & SEO tab.
2. Choose "Use default layout"
Open the dropdown for whichever layout you want to revert (Single Template or Archive Template) and pick "Use default layout."
3. Click Save Changes
Click Save Changes. The change applies immediately.
4. Verify the default layout returns
Open a product detail page or /products in another tab. Confirm the default layout is back. This is your safety valve — if a custom template has a regression you cannot fix quickly, revert here and the storefront returns to a known-good state.
What success looks like
After saving, product detail and listing pages immediately use the templates you selected. You should see a green confirmation flash naming the template applied.
A successful apply means: product title, price, description, and images flow into the right spots; the Add to Cart button is present and works; the listing page shows your products in the layout you designed. If any of those are missing, your template is likely missing placeholder fields — open it in the page builder, fix the placeholders, save and republish, then verify again.
What to do if it does not work
| Symptom | Fix |
|---|---|
| Dropdowns are empty | No ecommerce-tagged templates are published. Go to Templates in the page builder, tag the template ecommerce, save and publish. |
| Template selected + saved, but public page still shows default | Template is in draft state. Open it, click Publish, then refresh the storefront. |
| Template applies but product title / price / description is missing | Template is missing placeholder fields. Open in the page builder and add the correct product placeholders (product_title, product_price, product_description, product_image, add_to_cart_button). |
| Archive Template renders but shows zero products | The "products list" or "loop" component is missing or misconfigured in the template. |
| New layout not appearing despite a successful save | Clear any caching layer in front of your storefront. |
| Custom template causes a regression you cannot fix now | Select "Use default layout" in the affected dropdown and save — storefront reverts immediately. |
| Template disappears from the dropdown after it was previously listed | It has been deleted, unpublished, or had its ecommerce tag removed. Restore or re-tag it under Templates. |
| Layout looks correct in page builder but breaks on a real product page | Usually a placeholder data edge case (very long title, missing image, unusual price format). Test with a few representative products before declaring success. |
| Save appears to work but reverts to the previous selection on reload | Admin session may have timed out. Log out and back in, then try again. |
Examples
Brand-aligned product detail. Your design team builds a custom PDP in the page builder — hero image, brand-story section, product details, sticky Add to Cart. They tag it ecommerce and publish it. Open Settings → Store Management → Layout & SEO, pick the new template from Single Template, save. Every product detail page immediately uses the new design, with each product's real data flowing in.
Seasonal swap. You have a summer PDP and a winter PDP built in the page builder. The day before a seasonal launch, open Layout & SEO, pick the new template, save — the entire storefront repaints. When the season turns, return to the same tab and swap again. Build the templates ahead of time, flip with one click on the day.
Magazine-grid listing. You want /products to read like an editorial feature rather than a plain grid. Build a magazine-grid Archive Template with large feature images and editorial card copy. Open Layout & SEO, pick it from Archive Template, save. Open /products to verify — your products now display in the new editorial layout.
Emergency revert. A custom template is missing the Add to Cart button on mobile. Open Layout & SEO, set Single Template back to "Use default layout," save. Every PDP immediately returns to the default layout. Fix the template in the page builder, republish, then swap back.
Next steps
- Build the templates you want to apply here: see the Templates section of the page builder docs.
- Configure store-wide settings (status, origin, units): Store Basics
- Choose which billing fields appear on checkout: Checkout Fields
- Connect Stripe or a payment provider: Payment Gateways
Layout template fields
| Field | What it assigns | Applies to |
|---|---|---|
| Single Template | Custom page-builder template or default theme layout | Every /product/ URL |
| Archive Template | Custom page-builder template or default theme layout | /products and every /product_category/ |
| Use default layout (either dropdown) | Reverts to SGEN's built-in layout for that surface | Whichever surface the dropdown controls |