
Orders
⏱ ~6 min read · find an order, update its status, issue a refund, export your sales to a spreadsheet, and fix the things that commonly trip people up.
In short. Orders is where every checkout on your store lands as a record. From the orders list you filter by status, open any order to read its line items and customer details, mark it shipped or completed, add a note, or issue a refund — and you can export a date range to a spreadsheet for your bookkeeping. Each order moves through a lifecycle, and every status change writes its own audit note so you always have a paper trail.
On this page: Where to find it · View and filter orders · What an order record holds · Update an order's status · Refund an order · Export orders to a spreadsheet · Order lifecycle · Worked examples · Troubleshooting
Where to find it
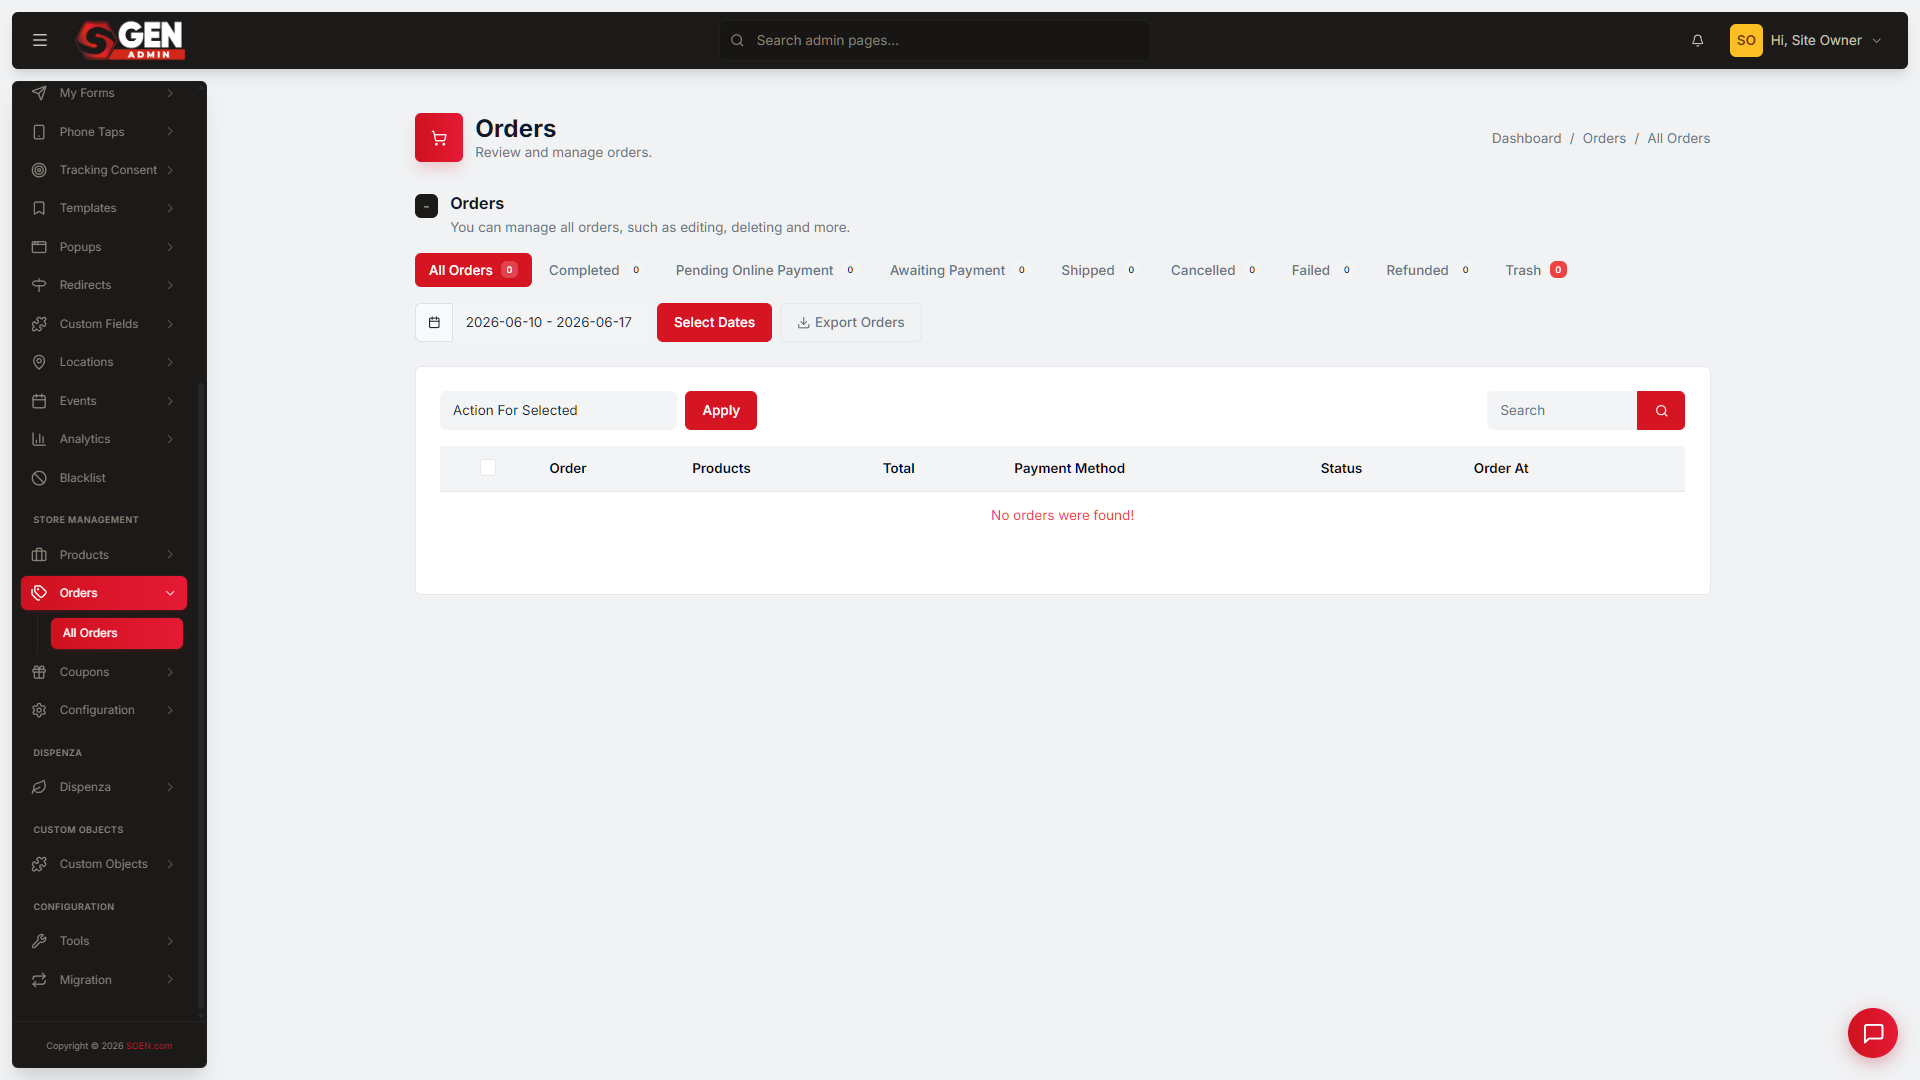
Open the admin for your site, then in the left navigation choose Store Management → Orders → All Orders. You'll land on the orders list — every purchase on your store, each with a status badge, and a row of status tabs across the top that each carry a live count. Editors and Administrators can view orders and act on them.
The list defaults to the last five days of orders. If you're looking for something older, use the date-range field above the list to widen the window, then apply your new dates.
View and filter orders
The orders list is your day-to-day work surface. The tabs across the top — All Orders, Completed, Shipped, Pending Online Payment, Awaiting Payment, Refunded, and more — let you narrow the list to just the orders in one state. Click a tab and the list reloads to show only those orders, with the count beside each tab telling you how many are waiting.
To find one specific order, type a customer name or an order number into the Search orders.. box and press Enter. To open the full detail page for an order, click its order number (for example, #1012) — that's where you read the line items, see the customer's details, change the status, add notes, and issue refunds.
What an order record holds
Open any order to see the full record. Each one carries:
| Field | What it holds |
|---|---|
| Order number | The unique identifier for the transaction (for example, #1012) |
| Order date | The date and time the order was placed |
| Customer | Name, email, phone, and shipping address |
| Items | Each product, variant, quantity, and per-line price on the order |
| Total | The amount charged for the order |
| Payment method | How the customer paid |
| Status | The order's lifecycle state, shown as a badge |
| Notes | System notes (added automatically on each status change) plus any you add by hand |
A purchase by someone who didn't create an account is recorded as a guest order — they check out with just their email and shipping details, and SGEN records it like any other order.
Site · SG-Admin · Orders — Recent transactions
| Order | Customer | Items | Total | Payment | Status |
|---|---|---|---|---|---|
| #1247 | Visitor A | 2 items | USD 138.00 | Visa ···· 4242 | Completed |
| #1246 | Visitor B | 1 item | USD 49.00 | Visa ···· 9876 | Shipped |
| #1245 | Visitor C | 3 items | USD 207.00 | Bank transfer | Awaiting Payment |
| #1244 | Visitor D | 1 item | USD 89.00 | Visa ···· 4321 | Refunded |
Update an order's status
When you pack and ship an order, or close one out, you update its status. There are two ways — a bulk update for a batch, and a single-order update from the detail page.
For a batch of orders:
- On the orders list, click the status tab that holds the orders you want to move — for example, click Completed to see packed-and-paid orders ready to mark shipped.
- Tick the checkbox on each order row you want to update. To select every row on the current page, tick the checkbox in the table header.
- Open the Action For Selected dropdown and choose the new status — for example, Mark as Shipped or Mark as Completed.
- Click Apply. The list reloads with the new status badges in place, and each customer's account page updates right away.
For a single order:
- Click the order number to open the Order Details page.
- In the right-hand sidebar, open the Update Order Status dropdown and pick the new status.
- Click Update Order. The page reloads with the new badge and a system note confirming the change.
Every status change writes an automatic audit note on the order's detail page. You don't need to add a note by hand for routine transitions — it's already recorded for you.
Refund an order
To return a customer's money, refund the order from its detail page:
- Open the order from the orders list.
- Use the refund option in the detail view.
- Enter the amount and confirm.
The refund goes back via the order's original payment method, and the order's status updates to Refunded.
Export orders to a spreadsheet
For bookkeeping or reporting, export a date range of orders as a .csv file you can open in any spreadsheet tool:
- On the orders list, click Export Orders in the top-right corner. The Export Orders form opens.
- Click the Select a Dates field, pick your start and end dates, and apply them in the calendar picker.
- To limit the export to specific customers, use the Select Customer/s picker and choose from the list — hold Ctrl (or Cmd on a Mac) to pick more than one. Leave it empty to include every customer.
- Click the Export Orders button. Your browser downloads the file automatically.
Each row in the file is one order, with ten columns: Order ID, Name, Phone, Email, Address, Items, Payment Method, Status, Total, and Order Date.
The date window for a single export is capped at 100 days. For a full year of data, run four exports — one per quarter — and paste the data rows together in your spreadsheet.
Order lifecycle
An order moves through a series of states, each shown as a badge on the list and the detail page. The status tabs at the top of the list mirror these states — All Orders, Completed, Shipped, Pending Online Payment, Awaiting Payment, and Refunded are the ones you'll see most. You advance an order yourself as you fulfill it (marking it shipped, then completed), and a refund moves it to the Refunded state automatically when you process one.
Worked examples
| Goal | What you do |
|---|---|
| Ship today's paid orders | Open the Completed tab → tick the rows you've packed → Action For Selected → Mark as Shipped → Apply. |
| Close out a delivered order | Open the order → in the sidebar set Update Order Status to the completed state → Update Order. |
| Refund a customer | Open the order → use the refund option → enter the amount → confirm. The order moves to Refunded. |
| Pull last month's sales | Export Orders → set the date range → leave customers empty → Export Orders → open the CSV in your spreadsheet. |
| Find one order fast | Type the customer's name or the order number into Search orders.. and press Enter. |
Troubleshooting
- I can't find an order I know exists. The list defaults to the last five days. Widen the date-range field above the list, then apply the new dates — older orders will appear.
- The order isn't on the tab I expected. Check a different status tab, or use All Orders and search by customer name or order number.
- A status change didn't seem to take. The list reloads after Apply (bulk) or Update Order (single). Refresh the page; the new badge and a system note should both be present.
- Orders won't load at all. Confirm you're signed in as a site admin, that you opened the correct site (staging vs live), and that the store is turned on for your site. Refresh and try again.
- I need older data than one export allows. A single export covers up to 100 days. Run several exports across the period and combine the rows in your spreadsheet.
Related reading
- SG-Admin Overview — the parent surface.
- Products — the product and variant records your order line items reference.
- Coupons — discounts applied to orders.
- Payment Gateways — the payment processors that handle checkout and refunds.