
How to Provision a New Site in SGEN
Provisioning a new site in SGEN crosses three surfaces — SG-Dashboard, SG-Admin, and SG-Builder. You start with Add Site, hand off to the admin to configure identity and settings, and finish in SG-Builder composing the homepage. This guide walks the full sequence so every handoff is clear before you begin.
Three surfaces, one workflow
SG-Dashboard creates the site, SG-Admin configures it, and SG-Builder composes the first page. Each surface has a clear entry point and a defined handoff.
Staging is ready immediately
After the provisioning event completes, the staging URL is live. DNS for the production domain follows separately and can take up to 60 minutes to propagate.
Check capacity first
Your account's plan controls how many sites you can provision. Verify available slots in Site Manager before you start — the Add Site button is disabled when you are at capacity.
Before you start
Have the following ready before you open SG-Dashboard. The provisioning flow completes in one session — pausing midway to look up details adds unnecessary friction.
Access
Owner or Agency operator role
You must be signed in to SG-Dashboard as an Owner or Agency operator. The Add Site action is not visible to non-owner roles.
Capacity
At least one site slot free
Open Site Manager and check the slot counter (for example, 1/2 used means one slot remains). If you are at capacity, upgrade your plan or delete an unused site first.
Domain
Production domain known
Have the production domain ready to enter. You will need it in step 2. DNS setup follows provisioning and requires access to your DNS host.
DNS
Access to your DNS host
After provisioning you will add an A record pointing to 34.144.203.31. Have your DNS provider login available.
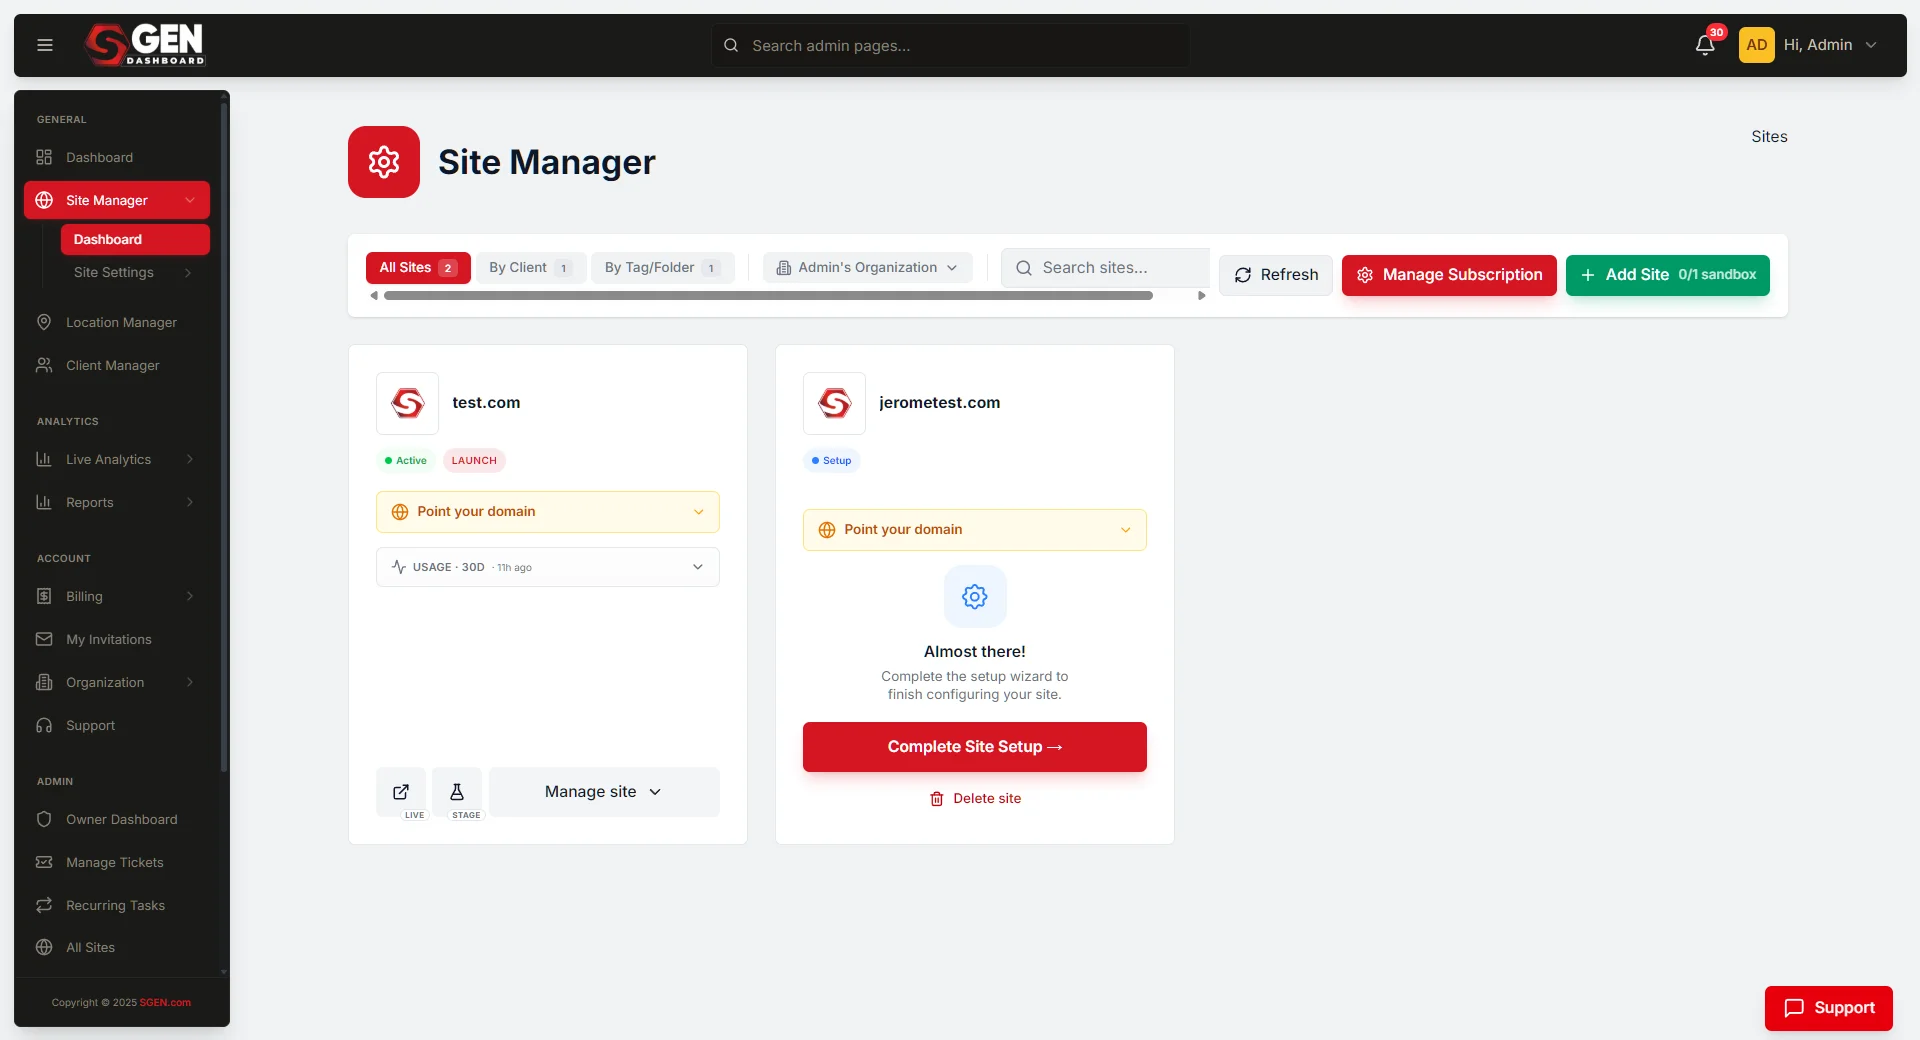
Provision the site
These five steps take you from a blank slot to a live staging URL with DNS pointed at the production domain.
1
Open Sites in SG-Dashboard
Sign in to SG-Dashboard. Select Sites from the left navigation. Site Manager opens showing your current sites and available slots.
2
Click Add New Site and enter the production domain
Click the Add New Site button. Enter the production domain in the field provided. Submit the form. SGEN runs a capacity check and begins provisioning.
3
Confirm the success message
A success message confirms: Tenant created successfully for <domain>. The new site card appears in Site Manager. The staging URL is ready to use immediately — open it to confirm the site is up before continuing.
4
Add the DNS A record
Sign in to your DNS host. Add an A record for the root domain:
Type: A
Name: @ (root)
Value: 34.144.203.31
DNS propagation takes 5 to 60 minutes. You do not need to wait before continuing to step 5 — configure the site in SG-Admin while DNS propagates.
5
Verify the live site
Return to Site Manager. Once DNS resolves and SSL provisions, the Visit Live Site and Login to Live buttons become active. Click Visit Live Site to confirm the production domain is resolving correctly.
What SGEN sets up for you
When provisioning completes, SGEN initialises the following automatically. You do not need to configure these manually.
Staging URL
A your-site.staging.sgen.com URL is assigned and live immediately. Use it to build and review content before the production domain resolves.
Default theme and global colors
The new site ships with the default SGEN theme. You can update the theme, global colors, and typography any time inside SG-Admin.
Owner role assigned
The account that created the site is assigned Owner role automatically. Additional team members can be invited from the Users module in SG-Admin.
Audit log seeded
The site's audit log begins recording from the provisioning event. Every subsequent admin and builder action is logged.
Automated backups enabled
Daily backups begin running for the new site immediately after provisioning. No manual configuration required.
Configure in SG-Admin, compose in SG-Builder
After provisioning, the workflow moves through two more handoff points before the site is ready to publish.
Handoff 1
SG-Dashboard to SG-Admin
Click into the new site's card in Site Manager. SG-Admin opens in the site's context. From here, configure site identity (name, logo, favicon), settings, and any modules your site needs — for example, the Your Store apparel brand would set up their product categories, team users, and site colors at this stage.
Handoff 2
SG-Admin to SG-Builder
Open the homepage record from the Pages module and click Edit with SG Builder. SG-Builder loads in the active site context. Compose your first page layout using the visual component system, then publish when ready.
If something does not work
Most provisioning issues resolve within a few minutes or with a single corrective action. The cases below cover the most common scenarios.
"No available site slot"
Your account is at capacity. Upgrade your plan to add more site slots, or delete an unused site from Site Manager first.
Staging URL returns "Site not available"
Wait 30 to 60 seconds and reload. If the staging URL is still unavailable after two minutes, contact SGEN support and include the tenant ID shown in Site Manager.
Live URL is never available
Verify that your DNS A record resolves to 34.144.203.31 using a tool like dig or a DNS propagation checker. Allow SSL up to 15 additional minutes after DNS resolves. If the live URL is still unavailable after 30 minutes of confirmed DNS resolution, contact support.
Live actions stay greyed out
SSL provisioning is still in progress. Wait up to 30 minutes from the time DNS fully propagated. If the buttons remain grey after that window, escalate to SGEN support.
Domain typo after provisioning
Open Site Manager, find the site, and go to Settings > Domain to correct the domain name.
Need to remove the site before any content is published
Go to Site Manager > Settings > Delete Site. Deletion before public content is low-risk. If you are on a paid plan with capacity concern, contact support before the next billing cycle.
Heads up — the production domain's live actions (Visit Live Site, Login to Live) stay greyed out until both DNS propagation and SSL provisioning complete. This is expected. Use the staging URL for all build and review work in the meantime.