
Set up the visitor location selector
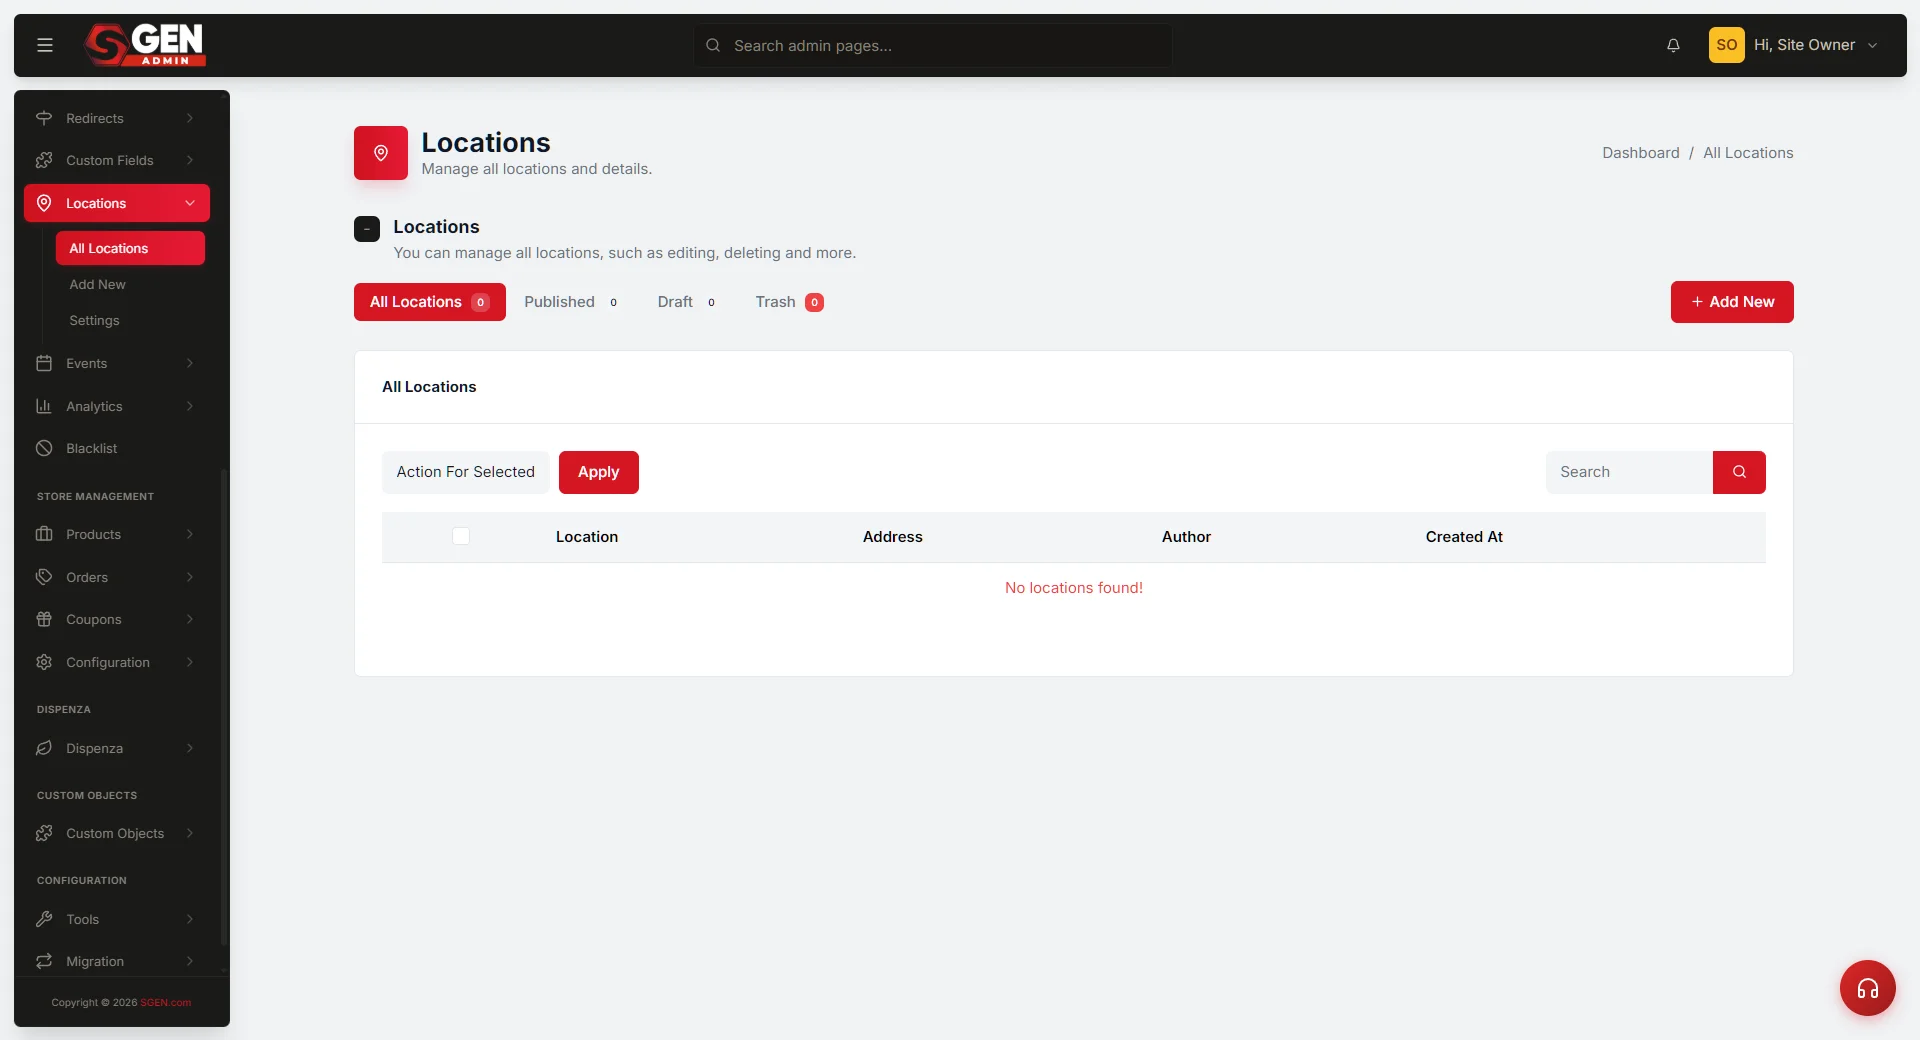 Locations All Locations table filtered to Published rows (admin-side prerequisite: confirm each Published location is fully populated before enabling the selector)" loading="lazy" style="width:100%;max-width:900px;height:auto;border-radius:8px;border:1px solid #e5e7eb;display:block;margin:12px 0">
⏱ Quick answer below · full page ≈ 15 min · skim the bold lead-ins to move faster.
In short. The visitor location selector is a front-end widget that lets visitors pick their nearest location. Enable it in Locations settings, confirm every Published location has complete data (hours, phone, photos), then coordinate with your designer to wire up the visible button. The visitor's choice persists across all pages for their browsing session and resets when they close the tab.
On this page: What it does · Good use cases · Before you start · Configure locations · Maintain · Troubleshooting
How to configure the public-side location selector so a customer's choice persists across pages
Multi-location businesses want visitors to pick their location once and have the rest of the site adapt — downtown customers see downtown hours, Embarcadero customers see Embarcadero photos. The visitor location selector makes this work: a visitor taps "Choose your store," picks a location, and every page from that point renders against that choice.
This guide covers the editorial and admin-side setup — deciding what to expose per-location and verifying the selector works. Theme-level button placement and developer integration are handled by your designer or developer.
Scope
| In scope | Out of scope |
|---|---|
| Deciding which content to make per-location | Theme-level button code or block configuration |
| Configuring which Published locations appear in the selector | Developer integration of the location-selector cookie/session |
| Verifying the selection persists across pages | Pickup and checkout flow configuration |
| Understanding session persistence (tab-scoped) | SEO implications of per-location dynamic content |
Reference
| Concept | Definition |
|---|---|
| Visitor location selector | A public-side UI element that lets a visitor pick their preferred location |
| Selected location | The location a visitor has chosen; drives per-location content rendering |
| Session persistence | The selection lasts for one browser session; resets when the tab is closed |
| Per-location content | Pages or blocks that render differently based on the visitor's selected location |
| Eligible locations | Only Published rows from All Locations appear as options in the selector |
| Content type | Per-location or global? | Notes |
|---|---|---|
| Location name and address | Per-location | Core data from the location record |
| Hours of operation | Per-location | Pulled from Hours of Operation field |
| Phone number | Per-location | Pulled from Phone Number field |
| Hero image | Per-location | Pulled from Shop Main Image field |
| Product catalog | Global (default) | Can be made per-location with custom theme work |
| Blog posts | Global (default) | Location-specific posts need category filtering |
Examples
See Example 1 and Example 2 below.
What is this for?
The visitor location selector is the public-site bridge between your All Locations admin table and a customer's actual browsing experience. Without it, your public site is a static catalog of every location — useful, but not personalised. With it, a customer's visit centres on one location at a time, and every page can adapt accordingly.
When a visitor selects a location:
- A "selected location" indicator persists across pages — typically the chosen location's name in your header ("You are viewing: Your Store — Downtown").
- Per-location templates render the chosen location's data — hours, phone, photos, menu, pickup options.
- A "switch location" link lets the customer change their mind without starting over.
- The choice resets when the browser tab closes. Customers move around; a fresh prompt on each new visit keeps the selection accurate.
Good use cases
The selector pays off when locations have meaningfully different content. Common fits:
- Multi-location businesses with different hours, phone, or photos per site — the most common driver.
- Wholesale partner directories — a customer picks their pickup partner; checkout pre-fills with that choice.
- Brands with per-location catalogs — an exclusive product collection visible only to visitors who selected the Flagship location.
- Medical or service practices with different practitioners per office — booking widgets pre-fill the right office.
- Promotional campaigns scoped to one location — a launch banner that only renders for visitors who selected the relevant branch.
What NOT to use this for
- Single-location businesses — nothing to select; the selector adds friction without payoff.
- Locations with identical content — if every location has the same hours and menu, a simple Locations page listing all of them is enough.
- Permanent customer preferences — the selection lasts one browser session. It is not a substitute for an account-based preference.
- Filtering admin views — the selector is public-facing only; admin staff see every location regardless.
- Geo-fencing or geographic restriction — the selector lets a customer choose; it does not enforce regional shopping.
- Replacing a store-finder map — the map is for discovery; the selector is for commitment. Most sites need both.
- Multi-select — a visitor selects exactly one location at a time.
- Long-term marketing personalisation — the selector is session-scoped. Cross-visit preference tracking requires a logged-in customer account.
How this connects to other features
- Browse all locations in your store directory — every Published row feeds the selector. Trashing or unpublishing a row removes it immediately.
- Save changes to a location — hours, phone, photos, and other per-location data shown after selection come from the location's edit form.
- Sync locations from Google Business Profile — synced locations appear in the selector just like hand-created ones.
- Trash a single location / Restore a trashed location — trashing removes a location from the selector immediately; restoring sets it to Draft (hidden) until you explicitly Publish it again.
- Public store-finder map — the map is for discovery; the selector is for commitment. Both read from the same Published locations data.
- Per-location page templates — the selector flips a "selected location" flag in the visitor's session; templates read the flag and render location-specific content.
- Pickup pickers and checkout flows — the selector pre-fills the pickup picker with the customer's chosen location, saving a step at checkout.
Before you start
Before enabling the visitor location selector, answer these questions:
- Is the selector worth the friction? A click to choose adds friction. If your locations have meaningfully different content, the click pays off. If not, skip it.
- Where will you place the selector? Options: sticky banner at the top of every page, a button in the site header, a modal on first visit, or an inline component on the homepage. Each placement has trade-offs in how proactively visitors engage with it.
- Required or optional? Required means every visitor must choose before browsing. Optional lets visitors browse generically and decide later. Optional is friendlier for newcomers but requires every page to handle "no location selected yet" gracefully.
- Have all Published locations been fully filled in? If a location is missing hours or photos and a visitor selects it, the experience looks incomplete. Audit before enabling.
- What is the "no selection" fallback? Decide whether to show a default location, generic content, or a "select your location" CTA on pages where no selection has been made.
- Are editors clear on per-location vs. global content? Editing a per-location field on one location does not propagate it everywhere. Each location has its own copy.
Where to go
The visitor location selector is a public-site feature — it is a button or banner on your visitor-facing pages, not a button in your admin dashboard.
To configure or place the selector, work with your designer or developer. Typical configurations:
- A "Choose your store" button in your site header.
- A sticky banner at the top of every page until the visitor selects.
- A modal popup on first visit that requires a selection before continuing.
- A dedicated landing page at
/locationsthat lets visitors pick from a map.
The admin-side prerequisites:
- Open Dashboard → Locations. Confirm at least 2 locations are Published.
- Open the public site in a new tab (logged out or private window). Visit the homepage.
- Verify the location selector is visible in your chosen placement (header, banner, modal, etc.).
- If not visible, your designer or developer has not yet wired up the visible button — coordinate with them.
Steps — Configure the locations available for selection
1. Open the All Locations page
Click Locations in the sidebar. Review the Published tab — these are the locations available for visitor selection.
The selector reads from Published rows only. Draft and Trash rows are not selectable. Hand-created rows and synced rows are both available; the visitor cannot tell the difference.
2. Confirm every Published row is fully populated
Click into each Published row. Verify:
- Location name — clear and customer-friendly.
- Address — accurate and complete (street, city, state, ZIP, country).
- Hours — current. If blank or showing placeholder times, fix before enabling the selector.
- Phone — local-line number, formatted readably.
- Photos — at least one storefront photo (the selector picker often shows this as a thumbnail).
- Description — a short customer-facing tagline (the picker may show this).
If a Published row is missing key data, either fill it in now or temporarily switch it to Draft so it is hidden from the selector until ready.
3. Decide your fallback location
If your design includes a fallback for visitors who have not yet selected, decide which location it is:
- Closest to headquarters — "When in doubt, default to our flagship."
- Highest-traffic location — "Most customers want this one anyway."
- None — render generic content — "Default to a city-level overview."
Document the fallback in your team's notes so editors know what to test against.
4. Coordinate with your designer or developer to wire up the visible button
Share with your designer:
- The list of Published locations the selector should expose.
- The fallback behaviour for visitors who have not selected.
- The visual placement (header, banner, or modal).
- The "switch location" affordance (a small text link in the header, a dropdown, etc.).
After your designer wires up the button, browse the public site and confirm the selector is visible in your chosen placement.
5. Test the full flow as a real customer
Open the public site in a private or incognito window (so you start with no selection). Walk through:
- Land on the homepage. Confirm you see the "Choose your store" affordance.
- Click the affordance. The selector picker opens — typically a list of every Published location with photo, name, and address.
- Pick a location. The picker closes; the page refreshes showing the selected location.
- Browse to several pages — contact, hours, menu, store-finder. Confirm each page reflects the selected location or shows graceful generic content.
- Find the "switch location" affordance. Click it. Pick a different location. Confirm the page updates.
- Close the browser. Open a fresh window. Navigate to the homepage. The selection should reset — confirm you see the "Choose your store" affordance again.
If any step fails, work with your designer to debug.
Steps — Maintain the visitor selector experience
1. Periodically audit Published locations
Visitors only see Published locations. Quarterly: walk every Published row, fix any data drift (wrong hours, outdated descriptions), confirm photos still load.
2. Trash defunct locations promptly
When a location closes, trash the row. The selector no longer exposes it. Customers who had previously selected the closed location see a "this location is no longer available — please select a new one" prompt or a fallback location, depending on your designer's implementation.
3. Coordinate location additions with your editorial calendar
When a new location opens:
- Add it to All Locations (hand-create or sync from GBP).
- Populate every field (hours, photos, description).
- Save as Draft until ready to appear in the selector.
- On launch day, switch to Published — the location appears in the selector immediately on the next page load.
Time any launch-day blog posts or banner promotions to coincide with the Status flip so everything goes live together.
4. Watch for analytics signals
If your site has analytics, monitor:
- Selection rate — what percentage of visitors choose a location?
- Per-location distribution — which locations are most or least popular?
- Bounce rate after selection — are visitors who select then leaving? May signal disappointing per-location content.
- Switch rate — a high switch rate may signal the initial selection is unclear or locations are confusingly named.
What success looks like
When the selector is well-configured:
- A visitor lands on your site and is gently prompted to choose a location. The prompt is unobtrusive — a banner or header button — not a blocking modal.
- The visitor picks a location in one click. The picker shows photos, names, and addresses; selection is clear and fast.
- Every page the visitor browses adapts to the chosen location. Hours, phone, photos, menu — all reflect the selection.
- The selected location is visible somewhere in the site header. The visitor never wonders "wait, which location am I looking at?"
- The visitor can switch locations in one click. A small "Change" or "Switch location" affordance lets them flip without re-selecting from scratch.
- Closing the browser resets the selection. Next visit, the visitor picks again — fresh, accurate to current circumstances.
What to do if it does not work
- The "Choose your store" button is not visible on your public site. Your designer has not wired up the visible button yet. The admin-side data is ready; the public-side button is theme-level work.
- The button is visible but clicking it does nothing. Likely a JavaScript error in your theme. Ask your designer to check the browser console for errors.
- The picker shows fewer locations than I have published. Confirm in Locations → All that the missing locations have status Published (not Draft, not Trash). Refresh the public-site page after fixing.
- The picker shows Draft or Trashed locations. Refresh both the admin page and the public-site picker. If still showing the wrong rows, contact your support team.
- The chosen location's hours or photos do not appear on subsequent pages. Your per-location templates are not yet picking up the selection. Coordinate with your designer.
- The selection resets between page loads. The selection should persist across pages within a session. Check whether the browser's privacy mode is blocking session storage. If not the cause, contact your support team.
- The selection survives across browser closes. Selections should reset when the browser tab closes. If customers report the selection persisting across days, your designer may have stored it in long-lived cookies — coordinate on the desired session-only behaviour.
- A visitor who has selected a now-trashed location sees broken content. Ask your designer to handle this case (e.g., show a "this location is no longer available" message and prompt for re-selection).
- The picker shows broken or low-resolution photos. Re-upload high-resolution photos in the location's Photos card. Reload the public-side picker to confirm.
- A visitor's location switch did not propagate to a specific page. That page's template may not be wired up to read the selection. Note the URL and share it with your designer.
Example 1: Your Store onboards the visitor selector
Your Store runs three locations — Flagship, Downtown, Embarcadero — each with different hours, phone, and featured products. Customers regularly call the wrong store because the homepage shows generic contact info.
The marketing manager works with her designer to enable the location selector. The designer wires up a sticky banner reading "Choose your Your Store experience" with a picker modal listing all three locations with photos.
Before launch, she audits All Locations — all three rows are Published with current data. The Flagship photos were thumbnail quality from a sync; she re-uploads high-res versions.
Launch day: the banner goes live. On day one, 64% of visitors engage with the selector. Customer service reports a sharp drop in "wrong store" phone calls — customers see the right phone number on every page.
Example 2: Your Store routes wholesale pickup customers to specific partners
Your Store has 22 wholesale partner pickup locations. Without the selector, customers had to scroll through all 22 at checkout. The wholesale director enables the selector with a "Choose your pickup partner" prompt. At checkout, the partner the customer chose earlier in their session is pre-filled. If they did not select, checkout shows the full list with the geolocation-suggested closest partner.
Pickup error rates drop sharply in the first month.
Tips for a polished location-selector experience
- Photos in the picker matter. A grid with crisp storefront photos converts at far higher rates than a text-only list.
- Keep location names short and distinguishable. "Your Store — Downtown" is clear; a 10-word title is not. Customers scan the picker; clarity wins.
- Place the trigger where customers look first. The site header is the most common spot. A sticky banner is more aggressive but ensures every visitor sees the prompt.
- Make the "switch location" affordance discoverable. A "Change" link next to the displayed name in the header is the sweet spot.
- Keep the picker fast. Photos should be thumbnail-quality (resized for the picker); data should fit in one network round trip.
- Handle the "no selection" case gracefully. Generic content is fine for the homepage; a hard-blocking modal is over-aggressive for most use cases.
Per-location vs. global content — a reference table
| Content type | Per-location? | Notes |
|---|---|---|
| Hours of operation | Yes | The most common reason to use the selector. Each location has its own hours. |
| Phone number | Yes | Local-line per location. Customers want the right number when they call. |
| Storefront photos | Yes | Each location's interior and exterior is different. |
| Address | Yes | Per-location. |
| Menu items | Sometimes | Some chains have identical menus everywhere; others vary by location. |
| Special promotions | Sometimes | A whole-brand promotion is global; a single-location promotion is per-location. |
| Brand logo | No | The brand is the brand. Consistent everywhere. |
| Brand "About" copy | No | Story of the brand is one story. |
| News blog posts | Usually no | Most blog posts are brand-wide. A few may be location-tagged. |
| Loyalty program rules | No | Whole-brand program. |
| Loyalty stamp count | Yes | Stamp counts may vary by location depending on your program structure. |
| Order pickup form | Yes | Pickup location must default to the visitor's selection. |
| Career postings | Sometimes | A "Hiring at Embarcadero" posting is per-location; a brand-wide hiring post is global. |
| Press releases | No | Brand-wide announcements. |
How long the selection persists
| Action | Selection state |
|---|---|
| Visitor selects a location | Stored for the browsing session |
| Visitor browses to other pages | Selection persists across all pages |
| Visitor switches location | Old selection replaced with new |
| Visitor clears their selection | Selection removed; pages fall back to default or generic |
| Visitor closes the browser tab | Selection lost; next visit prompts again |
| Visitor opens a different browser | Selection is per-browser; new browser starts fresh |
| Visitor uses private or incognito mode | Selection lost when private window closes |
| Selected location is trashed by admin | Visitor's session falls back to default; some implementations show a "this location is no longer available" prompt |
Selections are intentionally short-lived. Customers move around, locations change, and a stale selection becomes inaccurate.
Next steps
- See Browse all locations in your store directory for managing the Published rows the selector exposes.
- See Save changes to a location for updating the per-location content the selector reveals.
- See Sync locations from Google Business Profile for bulk-importing locations into the selector pool.
- See Add a new location for hand-creating a location to expose in the selector.
- See Trash a single location from the list for removing a defunct location from the selector.