
Browse and find your uploaded media
⏱ Quick answer below · full page ≈ 7 min · skim the bold lead-ins to move faster.
In short. The media library is the central home for every image, video, document, and file you have uploaded to your SGEN site. Use the filter tabs to narrow by type, the Sort dropdown to surface the newest or largest files, and the search box to find any file by name. From each file card you can Preview, Edit, Copy the URL, or Delete — nothing changes until you take an explicit action.
On this page: What it's for · Find a file · Sort · Bulk delete · Troubleshooting · Examples · Tips
How to browse and find your uploaded media
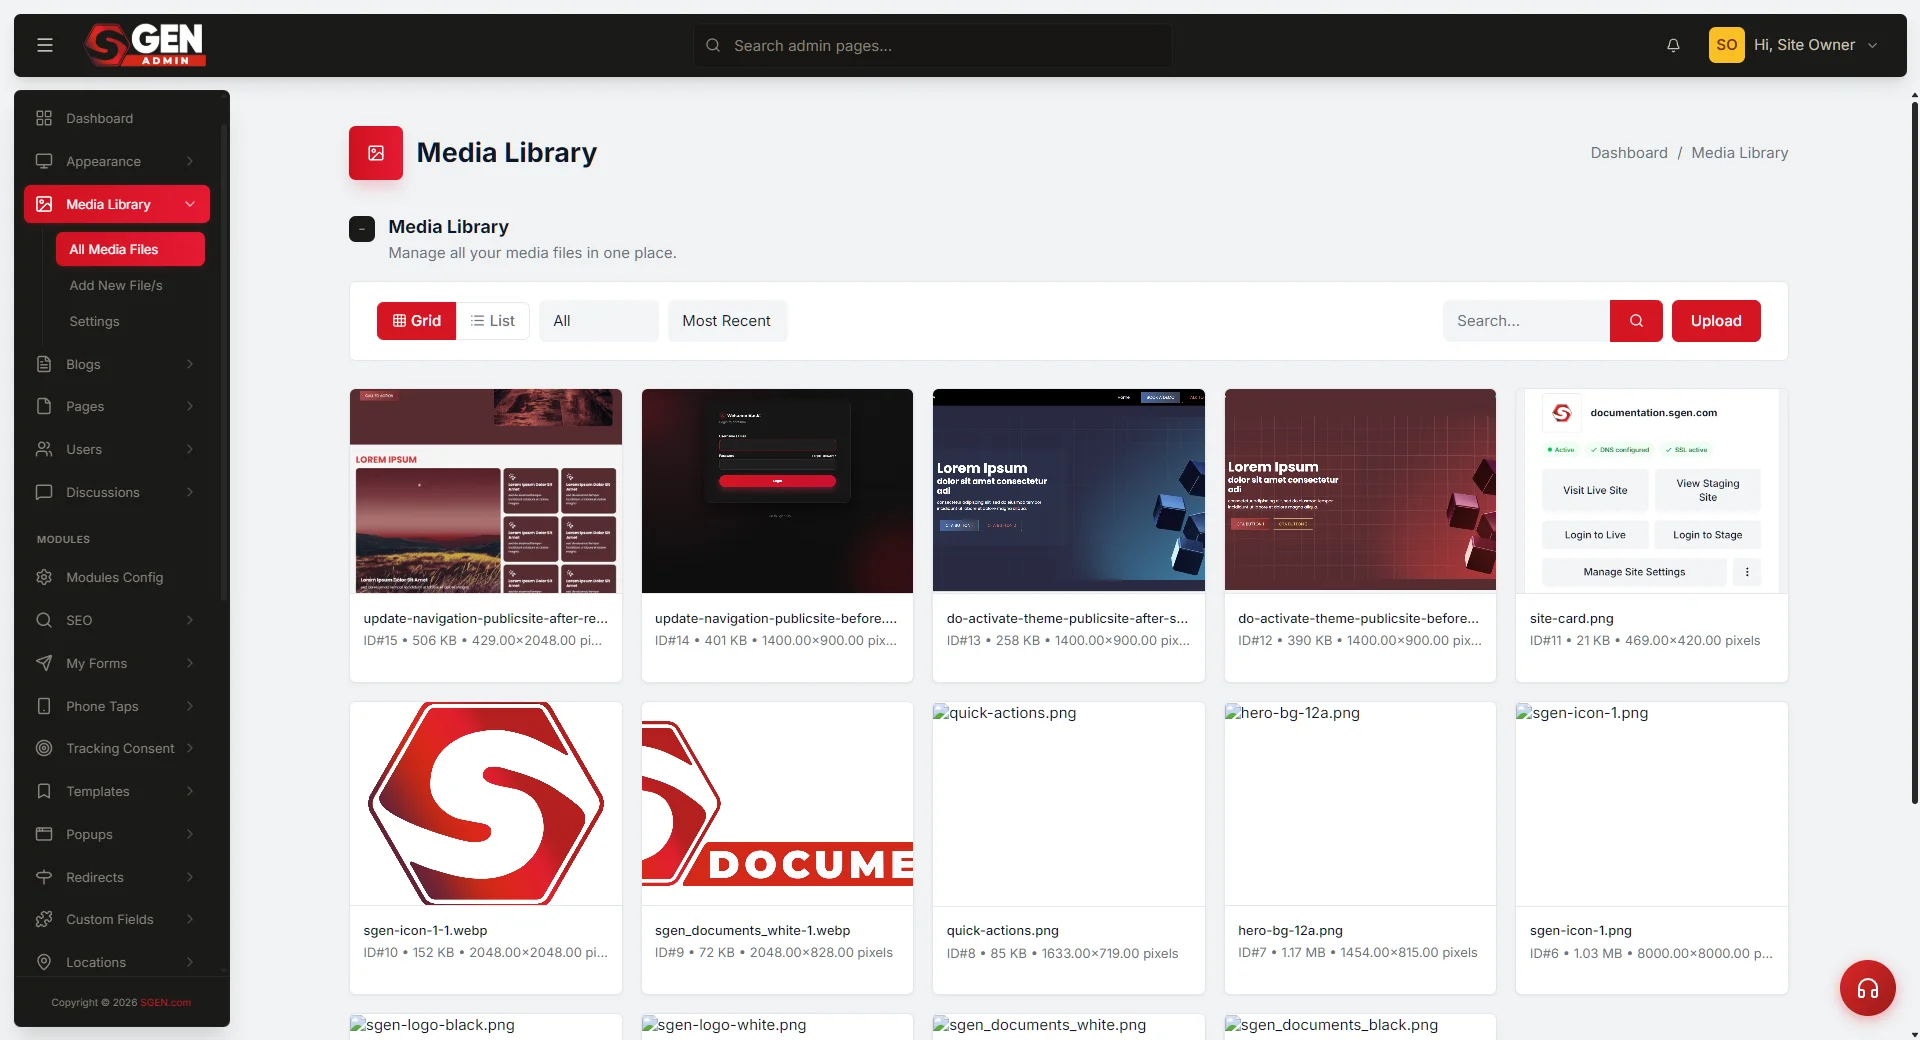
Your media library is the central home for every image, video, document, and downloadable file you have uploaded to your SGEN site. From one page you can filter by type, sort by date or size, search by file name, and reach the four per-file actions: Preview, Edit, Copy Link, and Delete.
Browsing, filtering, and searching are read-only — nothing changes until you take an explicit action.
What is this for?
Use this page to find any file you have already uploaded — a hero image, product photo, PDF, or team headshot. When you need to reuse a file, copy a link for a colleague, or clean up old assets, this is where you do it.
The filter tabs double as a file-count dashboard, so a single glance tells you how many images, videos, and PDFs are in your library. Visitors never see this page — it is the backstage for every asset that appears on your public site.
Scope
| In scope | Out of scope |
|---|---|
| Viewing, filtering, sorting, and searching uploaded files | Uploading new files — use Add Media |
| Copying a file URL | Editing alt text or captions — use the file detail panel |
| Bulk-selecting for delete | Configuring upload defaults — use Media Settings |
Good use cases
| You want to | How |
|---|---|
| Reuse a photo in a new post | Find it, click Copy Link, paste |
| Confirm a recent upload landed | Sort by Most Recent, check the top row |
| Share a PDF URL with a colleague | Search by filename, click Copy Link |
| Update alt text on a product photo | Find the photo, click Edit |
| Audit storage at end of quarter | Filter by type, sort by File Size |
| Find everything a former teammate uploaded | Search by their username |
What NOT to use this for
- Editing the image itself — no crop or rotate tool. Edit externally, then re-upload.
- Replacing an existing file — there is no "replace this file" button. Upload the new version as a fresh entry.
- Folder organisation — the library is a flat list. Use filters, sort, and search.
- Private file sharing — every uploaded file is publicly reachable via its URL. Do not upload anything sensitive.
- Backups or version history — deleted files are gone permanently. There is no recycle bin.
How this connects to other features
- Upload media — the + Upload button takes you to the upload page. New files appear here after upload. Full detail: Upload files to your media library.
- Page builder, blog posts, and products — every image or file picker in SGEN reads from this same library. Anything visible here is available there.
- Edit media — the Edit action on each row opens a modal to rename the file, update alt text, and add a caption. Changes ripple to every place the file is displayed.
- Media Settings — controls upload defaults (compression, format conversion). Full detail: Configure media library defaults.
Before you start
You must be signed in as a site admin. The library is admin-only; there is no customer-facing version. All uploads from every admin are visible in the same shared library — there is no per-user view.
If you are about to bulk-delete, confirm first that the files are not still used on a live page or post. Deleting a file in use leaves a broken image or link. Click Edit on the row to check where a file is referenced before removing it.
Where to go
In your admin sidebar, click Media. The page loads with all files visible, sorted by most recent first. The count in the All tab is the size of your entire library. Bookmark the direct URL if you want to skip the sidebar click.
Steps — Find a specific file
1. Open the library
Click Media in the sidebar. All files load, sorted by most recent first. If the library is empty you will see an empty state with an Upload button.
2. Switch view if you prefer a different layout
Use the Grid / List toggle in the toolbar. Grid shows thumbnails — best for recognising images on sight. List shows a sortable table — best when you remember the upload date or uploader. Your choice persists as you change filters.
3. Narrow down by file type
Click a type tab — Images, Videos, PDFs, Docs — to hide everything else. The count next to each label tells you how many files of that type exist. Filters compose with sort and search, so you can filter to Images then sort by File Size to find your largest photos.
4. Search by filename
Type a term into the search box and press Enter. The search matches against file name and the uploader's username — typing "hero" surfaces every file containing "hero" anywhere in its name. If you get no results, clear other active filters and try a shorter substring.
Steps — Sort the library
1. Pick the sort dropdown
Click the sort dropdown in the toolbar. Three options: Most Recent (default), Name A-Z, File Size (largest first).
2. Pick a sort
- Most Recent — confirm a recent upload landed, or browse by recency.
- Name A-Z — find a file when you remember its first letter.
- File Size — largest files first; use this for storage audits.
3. Combine with filters
Sort and filter compose freely — filter to Images and sort by File Size to find your biggest photos, or filter to Videos and sort by Most Recent to see your latest uploads.
Steps — Delete a file in bulk
1. Select files via the checkboxes
Tick the checkbox on each file to delete. The header checkbox selects every visible row at once — useful after you have filtered or searched down to exactly the set you want.
2. Pick Delete selected from the bulk action menu
From the bulk action dropdown at the top left, choose Delete selected and click Apply.
3. Confirm in the modal
A modal lists every file about to be deleted. Click Cancel to back out, or Confirm to proceed. This is your last chance to review the list before the files are gone.
4. Verify the result banner
The library refreshes and a banner reports how many files were deleted and how much storage was reclaimed.
What success looks like
Hover over a file to reveal four action buttons. Preview opens a full-size popup. Edit changes the alt text or display name. Copy Link copies the public URL to your clipboard — paste it into a post, product, or email. Delete removes the file permanently after a confirmation prompt. Copy Link is the most common action.
What to do if it does not work
- A file you uploaded is missing — sort by Most Recent. If the newest visible file predates your upload, the upload may have failed. Try again and contact your site administrator if it fails repeatedly.
- Search returns nothing — clear all filters first, then try a shorter substring. The stored filename may differ slightly from what you remember.
- The Delete button does not appear — action buttons show on hover. On touch devices, tap-and-hold the row or switch to a desktop browser.
- Copy Link does not copy — your browser may be blocking clipboard access. Click Preview instead and copy the URL from the popup address bar.
- Thumbnail is wrong or missing — refresh the page. If the problem persists, the file may be corrupted; re-upload it.
- Filter count looks stale — counts are computed at page load. Refresh after uploading or deleting in another tab.
- File Size sort feels backwards — largest first is the intended default for storage audits. There is no smallest-first option in the toolbar.
- Pagination resets to page 1 after a filter change — expected behavior. Bookmark the filtered URL to return to a specific view.
- A file appears duplicated — uploading the same image twice creates two separate entries. Delete the older one.
- Author column is blank — the file was uploaded by an admin whose account has since been removed. The file is intact.
Examples
Example 1: Your Store — find product photos by name
You are updating a product page. You click Media, type tote into the search box, and get the four matching photos immediately. You copy each link into the product gallery. Total time: 90 seconds — because descriptive filenames make search instant.
Example 2: Your Store — sort by upload date
You cannot remember the filename of a press photo — only that it was from March. You open Media, leave the sort on Most Recent, and scroll to the March entries. Grid view thumbnails let you recognise the black-and-white shot on sight. One click of Copy Link and you send it to the journalist.
Example 3: Your Store — filter by file type
You are auditing storage. You click Videos, sort by File Size, and find three 2023 storefront clips no longer linked anywhere. You delete them and reclaim 30 MB. The filter-tab counts give you the breakdown at a glance without scrolling the whole library.
Example 4: Your Store — empty library state
When Your Store first launched, the library showed an empty state with a prominent Upload button. The same state appears any time a filter or search returns zero results — it means nothing is broken, just nothing matches the current criteria.
Example 5: Your Store — bulk delete old test files
After launch, you filter to Images, sort by Most Recent, and select the six test images using the row checkboxes. You choose Delete selected, click Apply, review the confirmation modal, and confirm. The library refreshes and the banner reports the result. Always glance through the modal before confirming — once you click Confirm, the files are gone.
Tips
- Descriptive filenames before uploading — the underlying filename is hard to change after upload.
yourstore-canvas-tote-bag.jpgis far faster to find thanIMG_4892.jpg. - Optimize before uploading — the upload page has a Compress + Convert to WebP option. A 2 MB photo becomes around 200 KB with no visible quality loss.
- Sort by File Size to find storage hogs — switch to List view, sort by File Size, and the heaviest files float to the top.
- Audit before deleting — click Edit on a row. The modal shows where the file is referenced. Deleting a file in use breaks the page where it appears.
- Search by uploader — type a teammate's username to surface every file they uploaded.
- Copy Link gives you the public URL — paste it anywhere on your site or in an email. Every uploaded file is publicly reachable by its URL.
Vocabulary
| Term | Meaning |
|---|---|
| Filter type | Narrows the library to Images / Videos / Documents / Others. |
| Sort | Orders files by upload date (newest/oldest), filename (A-Z/Z-A), or file size (largest/smallest). |
| Copy Link | Copies the direct URL of a file to clipboard so you can paste it into a post, page, or email. |
| File detail panel | Opens when you click a file — shows metadata fields (title, alt text, caption) and the file URL. |
| In use | Indicates a file is referenced by at least one page, post, or product. Deleting it will break that reference. |
| Storage | The total size of all files in your library. Shown in the library header; plan limits vary by tier. |
Next steps
- Upload files to your media library — supported formats, optimization tips, drag-and-drop.
- Delete a file from your media library — single and bulk delete, confirming files are not in use.
- Configure media library defaults — compression, format conversion, thumbnail sizes.