
How to configure your media library defaults
⏱ 30-second answer below · full page ≈ 4 min
In short. The Media Settings page controls two site-wide defaults: whether AI auto-captions new image uploads, and where the public site fetches your media from (local server or a GCP cloud bucket). Most admins configure this once during setup — and again if they add the cloud storage add-on. These defaults apply to every new upload from the moment you save; they do not change files already in the library.
On this page: What the settings do · Before you start · Steps · What success looks like · Troubleshooting · Vocabulary
How to configure your media library defaults
The Media Settings page controls two things that touch every image and file on your site: whether the system auto-captions new uploads using AI, and where the public site fetches your media from. Most admins visit this page once during setup, and a second time when they move to a cloud storage backend.
What is this for?
AI captioning — when enabled, the system generates a short alt-text suggestion for each new image at upload time. Your team reviews and refines those suggestions rather than writing from a blank field. Storage backend — your media can live on the same server as your site (default) or in a Google Cloud bucket that scales separately. This page is also where you trigger the one-time sync between backends when migrating.
This page sets policy. You will not edit individual images, upload files, or change anything visible to visitors here. The Library and Upload pages are where you do that work; this page sets the defaults they follow.
Scope
These settings apply to every new upload — they do not retroactively change files already in the library. Changes to individual files (alt text, caption, title) are made from the file detail panel in the library.
| Setting | What it does |
|---|---|
| Enable AI Media Captions | Auto-generates an alt-text suggestion for every new image upload using AI |
| Serve Media From | Local Server (default) vs GCP Bucket — where the public site fetches media |
| Default compression | Applied compression level for new uploads where available |
Good use cases
- Accessibility audit prep — turn on AI captions before a large photo upload so every new image arrives with a suggested caption to review rather than a blank field.
- Cloud migration — flip the storage backend after provisioning the cloud add-on, using the built-in sync to copy existing files before switching.
- Catalog refresh — confirm AI captioning is on before uploading a large batch of product photos.
What NOT to use this for
- Editing a specific image's caption — use the Media Library's file detail panel.
- Per-upload format or compression choices — use the Upload page's per-batch options (they override these site-wide defaults for that batch only).
- Renaming, deleting, or moving individual files — library-level actions.
- Controlling who can access the Media Library — a user-permission setting, not a media setting.
How this connects to other features
- Media Library — files live and are edited there; the defaults you set here apply to new uploads going forward and do not affect existing files.
- Media Upload — the upload screen has its own per-batch format and compression options that override these defaults for a single upload only. Use this page for site-wide policy; use the Upload page for one-off choices.
- Cloud storage add-on — the Media Storage card only appears when your account has this add-on enabled. Without it, all files live on the local server and the storage card is hidden.
- Plan / billing — AI captioning requires the AI captioner module on your plan. If you do not see the AI toggle, the feature may not be included. The cloud storage add-on is also a paid feature — confirm in your account section if the storage card is missing.
Before you start
Decide before you save: which AI captioning behavior do you want as the default for new uploads? And which storage backend should serve your media?
If you are switching storage: plan to run the built-in sync immediately before saving the change. Switching the serving mode without syncing first means the public site will request files from a location where they are not yet copied — causing broken images for visitors. Allow extra time for large libraries (a large site can take an hour or more to sync).
If your deployment locks the storage mode at the account level, the serve-from selector appears but is disabled, with a "Locked by environment configuration" note. Contact support to unlock before proceeding.
Where to go
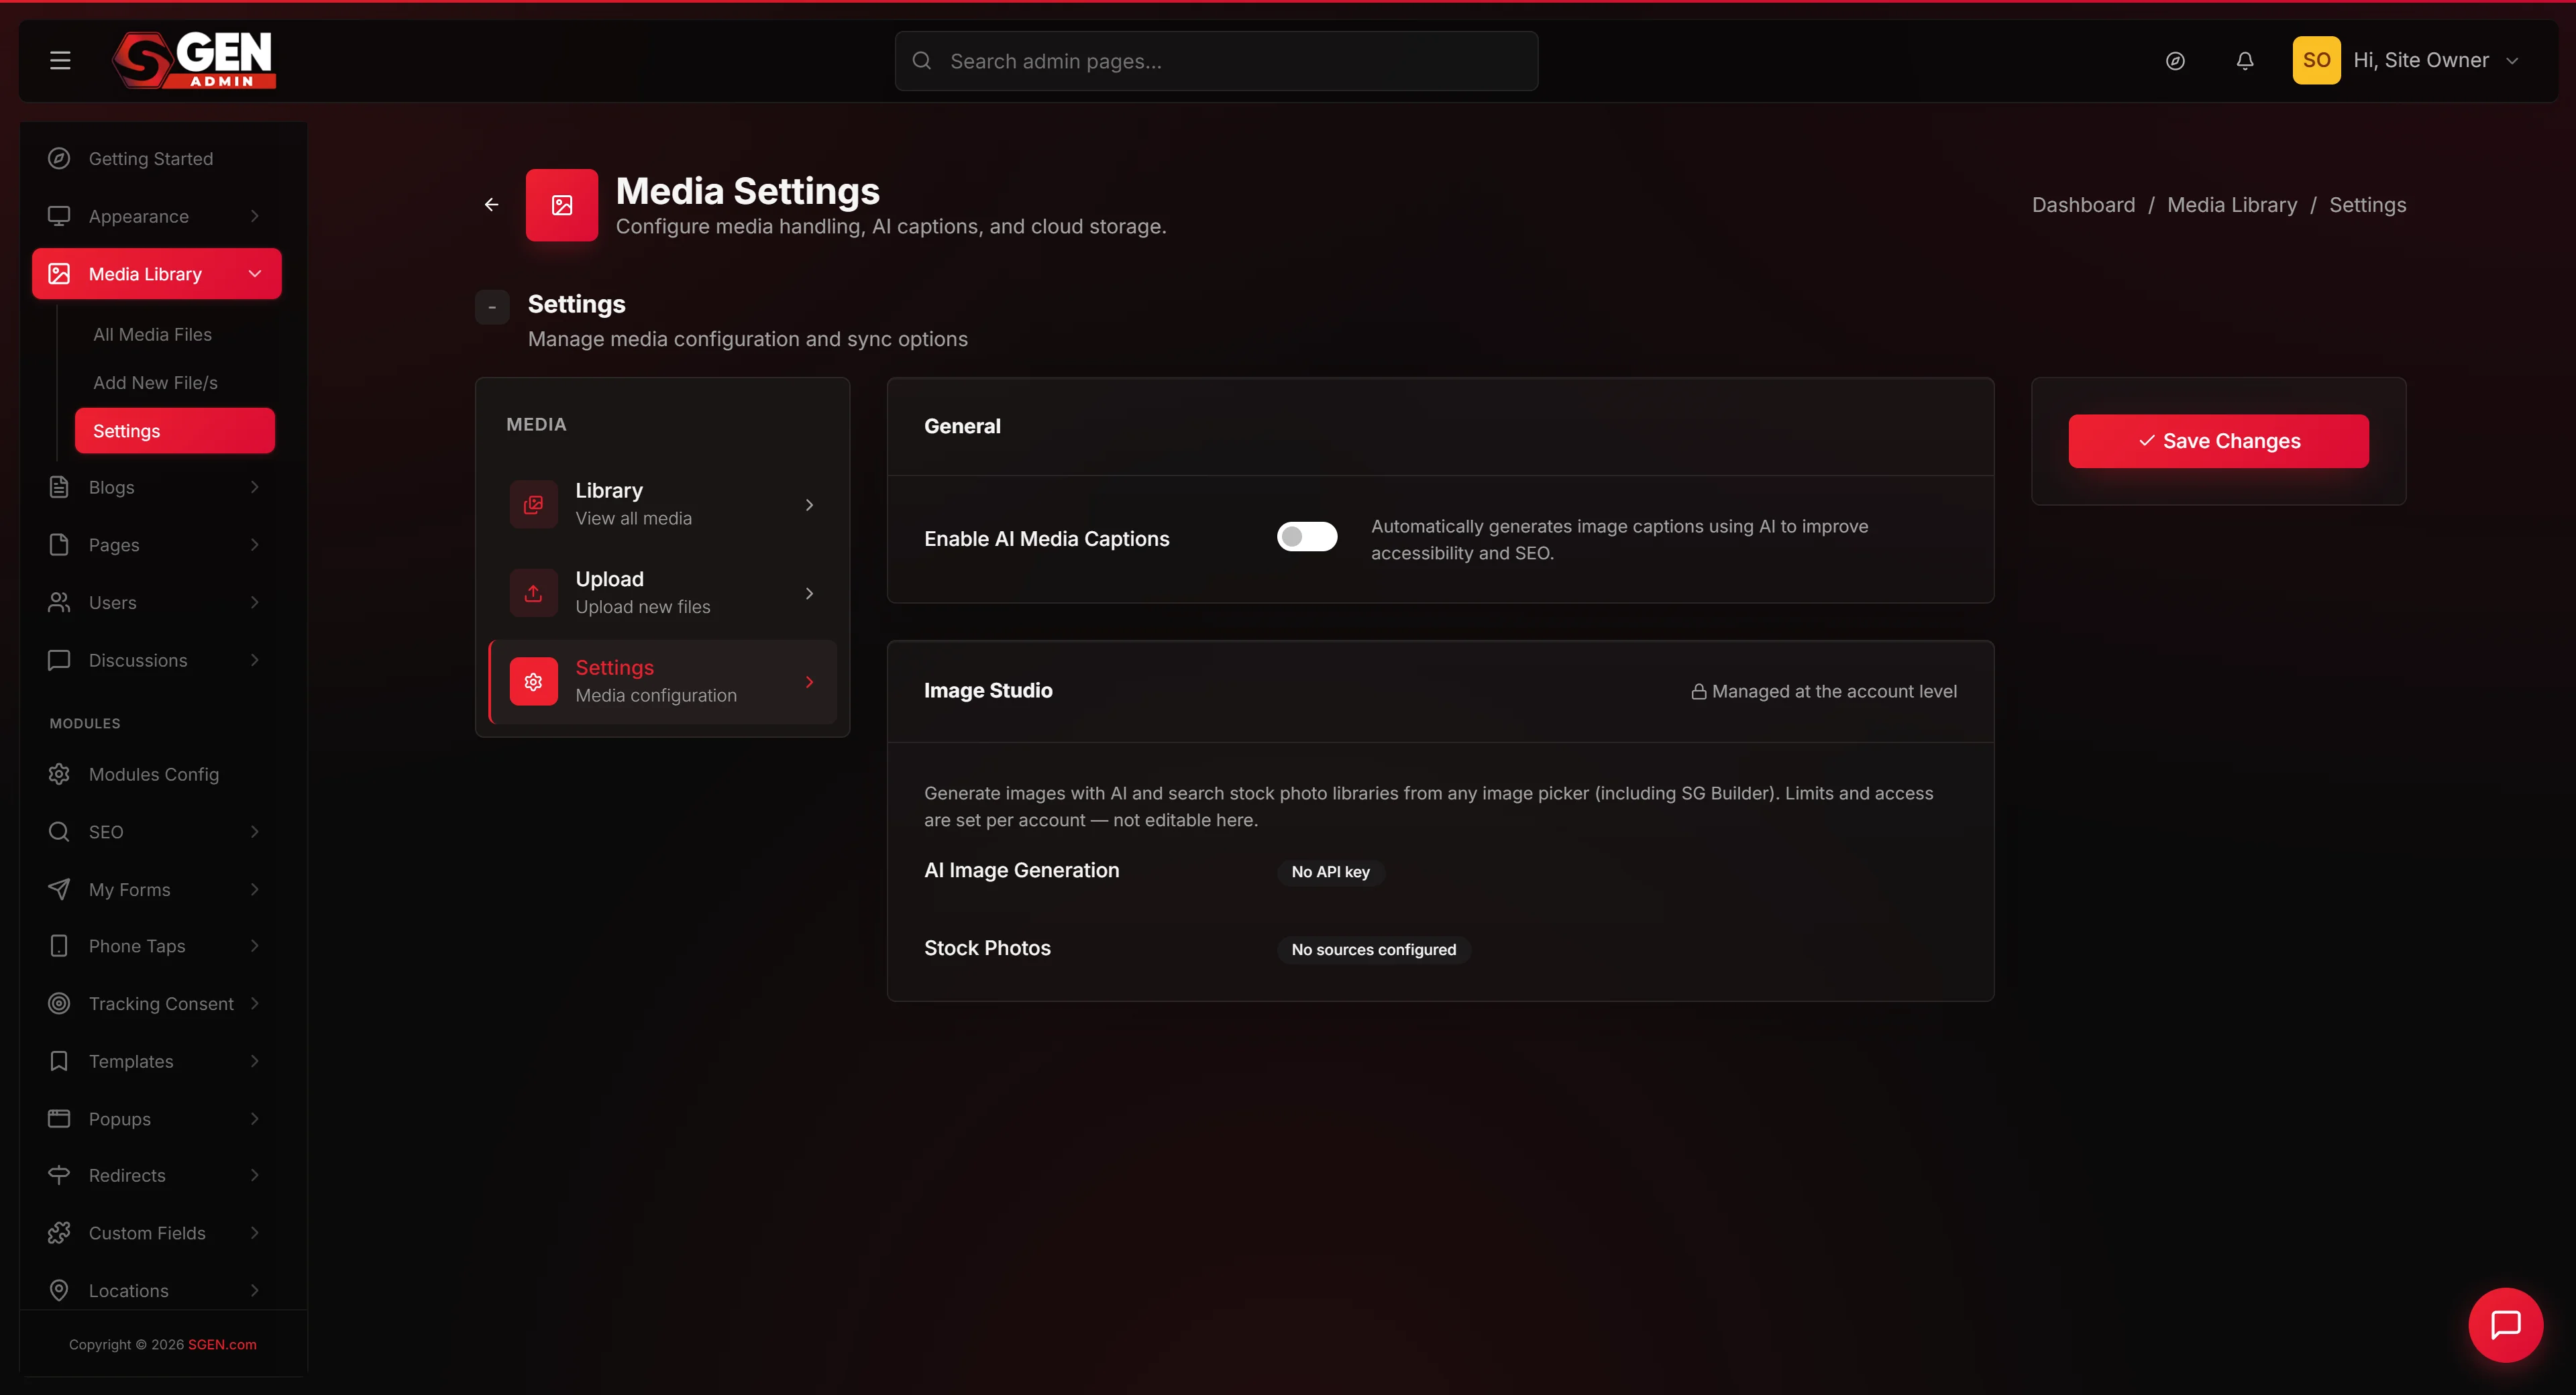
Open the admin sidebar → Media Library → click the Settings tab. The page title reads "Media Settings." You will see one or two cards depending on your account plan.
Steps — Set your media defaults
1. Decide whether to enable AI captions
In the General card, find the checkbox labeled Enable AI Media Captions (helper text: "Auto-generate captions for new image uploads"). Turn it on to have the system suggest captions for every new image upload going forward. Turn it off to write all captions manually. You can change this at any time — the change takes effect on the next upload, not on images already in the library.
2. Choose your storage backend
If your account includes the cloud storage add-on, scroll to the Media Storage card. You will see a status pill showing the current mode and a Serve Media From selector with two options: Local Server (default) and GCP Bucket. Choose GCP Bucket only after confirming your bucket is provisioned and reachable. If there is no cloud storage add-on on your account, skip to step 4.
If the selector is grayed out with a "Locked" hint, your deployment locks this option — talk to support before continuing.
3. Run a sync if you are switching storage
If you changed the storage backend, click Sync to GCP (moving local → bucket) or Sync from GCP (moving bucket → local) before saving. The sync runs in the background; a status pill tracks progress. A small site may finish in under a minute — a large site can take an hour or more. Wait for the status pill to read Done before you save the storage change.
4. Save your changes
Scroll to the bottom and click Save Changes. A success banner appears at the top of the page. Reload the page to confirm your selections persisted. If they did not, your session may have expired — log in again and repeat.
5. Verify on a fresh upload
Go to the Upload tab and upload one test image. If AI captions are on, a generated caption should appear in the Library within a minute or two of the upload completing. Open the image in the Library to confirm. If no caption appears, check the file's detail panel for an error indicator.
What success looks like
After saving, the green "Saved" banner appears at the top of the form. Reloading the page shows the toggles and selectors in their new positions. New uploads from this point reflect the policy. Existing files are unchanged — they keep their current captions and storage location until you act on them individually.
What to do if it does not work
Save button does nothing — your session likely expired while the page was open. Reload and try again.
AI toggle saves but reverts on reload — the change did not persist. Contact support and reference this page.
Sync button errors — check that your cloud storage credentials are still valid in Account → Add-ons.
AI toggle not visible — your plan likely does not include the captioner module. Check your plan summary or talk to your account manager.
Images break after a storage switch — switch the storage mode back to its previous value, save, and reload your site. Then run the sync, wait for it to complete, switch again, and save.
Sync stuck "in progress" for several hours — reload the page once. If the status does not refresh, contact support.
Examples
Example 1: Enabling AI captions for an accessibility audit
Your site's auditor finds that hundreds of product images have no alt text. The marketing manager opens Media Settings, turns on Enable AI Media Captions, and saves. From that point, every new product photo gets an AI-suggested caption. The manager reviews suggestions in batches in the Media Library, editing any that miss the mark. The next audit shows zero new images without captions.
Example 2: Migrating from local server to a cloud bucket
A site owner provisions the cloud storage add-on after filling 38 GB of local server storage. They open Media Settings, click Sync to GCP, and wait for the sync to complete (~90 minutes). Once done, they change Serve Media From to GCP Bucket, click Save Changes, and verify in a fresh browser tab that every image still loads. Their local server is freed for the next phase of growth.
Tips
- Switch storage during your lowest-traffic window. The brief moment during a save where some images may fall back to a placeholder is invisible at 3 am; it is very visible on a launch day.
- Always sync before you switch. Do not flip the storage selector without running the sync first.
- Treat AI captions as a first draft. Reviewing them in batches is faster than writing from scratch, but they benefit from a human eye — especially for specialized product names or visual details the model cannot infer.
- Confirm add-on availability before scrolling for a storage card that may not exist on your plan. Check your account section first.
Vocabulary
| Term | Meaning |
|---|---|
| AI Media Captions | Automated alt-text suggestions generated for each new image at upload time. Requires the AI captioner module on your plan. |
| Local Server | The default storage mode — media files served directly from the SGEN application server. |
| GCP Bucket | Google Cloud Platform object storage. Available as an add-on for plans that need extra capacity or CDN delivery. |
| Sync | The one-time process that copies existing local files to the cloud bucket after you switch storage modes. Must complete before the switch takes effect site-wide. |
| Default compression | The compression level applied to qualifying new uploads when no per-file override is set. Does not affect files already in the library. |
| Caption coverage | The percentage of images that have usable alt text — either AI-suggested (reviewed) or manually written. Reported in the Media Library list view. |
Next steps
- Visit the Media Library to apply your new defaults to the next upload batch.
- Read the Media Upload guide for per-batch format and compression options.
- If you enabled AI captions, plan a weekly review session for the next month to build the habit.