
Build an Agency Portfolio Site on SGEN in 30 Minutes
A hand-held tutorial from a fresh SGEN account to a working agency portfolio site — three case studies, four services pages, a team grid, a project-inquiry form, and the SEO basics that get prospects to find you. Sample data is included on every step; swap in your real work on the second pass.
Start with the Agency Starter
The Agency Starter template ships every page you need — Home, Case Studies index, case-study detail, four services pages, About with team grid, and Contact with a project-inquiry form. Pick it, name the site, and build from there.
Eight steps, thirty minutes
Each step has a target time and a clear success signal. Accept the sample data on the first pass and move on — polish happens in the second pass, not the tutorial.
A site that scales forward
Every page you build here is your real site — not a sandbox you throw away. Add a blog, logo wall, lead magnets, or client portal on top once the foundation is working.
What this tutorial is for
Reach for this tutorial when you want to see what an agency site looks like on SGEN before committing real client work, team bios, and inquiry routing to it. The tutorial is built around the smallest shape that still feels like a working agency site — three case studies, four services, a team grid, and a project-inquiry form. Logo wall, awards page, blog, and lead-magnet downloads are later additions; this one is the foundation.
Good use cases
This tutorial fits a specific range of situations. Check that your situation matches before starting.
Solo
Independent operators
Independent designers, developers, or strategists launching their first portfolio site. Also works for a consultancy or studio that needs a credible web presence for new business outreach within a week.
Agency
Small agencies rebuilding
Small agencies (two to ten people) rebuilding their site without a freelancer's three-month engagement. Also works for agencies leaving WordPress because the maintenance burden stopped making sense.
Pitch
Category pitch sites
Agencies of record building a pitch site for a specific category — B2B SaaS, restaurant branding, healthcare — who need a credible, fast-to-stand-up presence for a specific prospect or vertical.
Scope
What this tutorial does not cover
Fully bespoke design systems, WordPress migration with custom fields, client portals (Members module), and multi-language sites are separate engagements. This tutorial starts from a blank Agency Starter.
Before you start
You need four things. Three short case studies prepared in a text file before you start will save about ten minutes of typing inside the editor.
An SGEN account
If you don't have one, run the 5-minute quickstart first. No credit card required to sign up.
About thirty minutes
A first-time user lands between 28 and 33 minutes. A returning operator lands closer to 20. If you go over 35 minutes, the most common cause is rewriting case study narratives inside the editor.
A current browser
Chrome, Edge, Firefox, or Safari. No plugins or extensions required.
Optional: case studies + bios in a text file
Three short case studies (problem, approach, outcome, one image each) and team bios prepared before you open SGEN. Saves ten minutes. You do not need a custom domain, logo, headshots, or a credit card.
The eight steps
Read top to bottom. Each step names a target time and a success signal. Accept the sample data on the first pass and move on.
1
Pick the Agency Starter template (≤ 2 minutes)
Sign in to SG-Dashboard. Click Create Site. Pick Agency Starter from the template grid — it ships with every page you need. Name the site, accept the suggested preview subdomain, and click Create Site. SGEN provisions in three to five seconds and opens the admin.
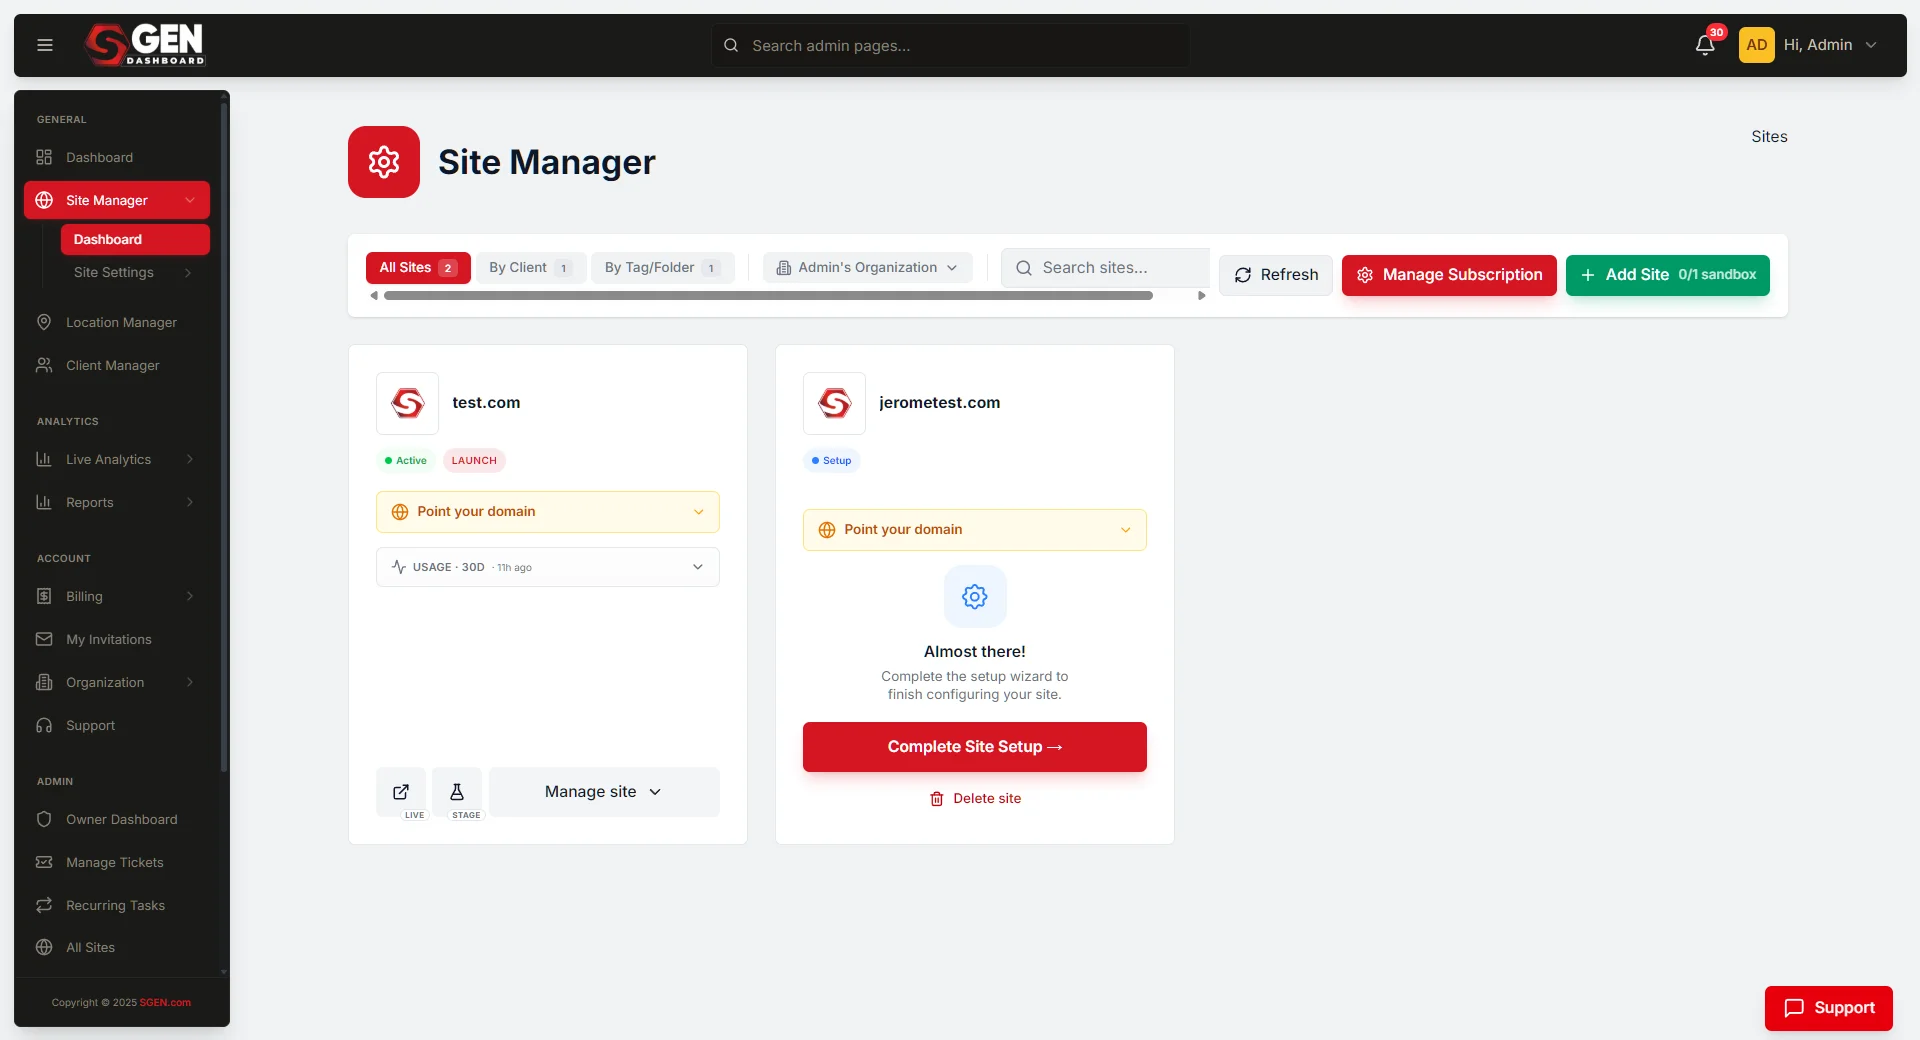
Success signal: SG-Admin loaded for the new site, every starter page in Draft status, and the pre-populated sample case studies visible in the Case Studies list.
2
Customize the Home hero and services-overview block (≤ 4 minutes)
Open Pages → Home. The page opens in SG-Builder. Replace the hero headline with something specific to your agency. Scroll to the Services Overview block — the Agency Starter ships four service cards. Click each card and replace the title and one-line description with your actual services. Delete extras or add new ones as needed. Click Publish.
Success signal: the Home page shows a green Published badge, the hero shows your headline, and the services overview shows your services.
3
Build three case study detail pages (≤ 8 minutes)
Open Pages → Sample Case Study 1. The case-study detail template has defined slots: project hero, at-a-glance stats, the problem, the approach, the outcome, a gallery, and a next-case-study link. Fill each slot with short, scannable copy — two to three sentences per section. Accept the sample images for now. Publish each case study as you finish.
Success signal: three case study detail pages are Published. The Case Studies index shows three entries with hero images, titles, and one-line summaries.
If your real client work is under NDA, write a generic version — "a B2B SaaS startup in the analytics space" instead of the real client name. Run the generic version past the client if you're uncertain; most clients are fine with anonymized case studies.
4
Customize the four services pages (≤ 6 minutes)
Open Pages → Service: Strategy. Each services page uses the services-detail template: service hero, what we do, how we work, a recent-work auto-list, and a CTA to the Contact page. Fill the slots — aim for one screen of content per service. Then open each case study from step 3, scroll to Tags, and add the tag for the matching service. This wires the "Recent work" auto-population. Publish each service page.
Success signal: four services pages are Published. Each one's "Recent work" section shows the case studies tagged with that service.
5
Build the team grid on the About page (≤ 4 minutes)
Open Pages → About. The Agency Starter ships three placeholder team members. For each one, fill in name, role, headshot, a one-to-two sentence bio, and a social link (LinkedIn is the safe default). If you have more than three team members, click + Add Team Member. If you're a solo operator, delete the extras and show one large card. Customize the agency story at the top — three short paragraphs. Publish.
Success signal: the About page shows your customized agency story and a team grid with your team members. Each card shows headshot, name, role, and social link.
6
Wire the project-inquiry form (≤ 3 minutes)
Open Pages → Contact. Click the form, then Settings. Set the Recipient email to your real new-business inbox. Enable the Auto-reply — a default "Thanks for reaching out, we respond within two business days" message. If you want high-budget inquiries to route to a separate inbox, open Conditions and add a routing rule. Save.
Success signal: the Contact page shows the project-inquiry form. The settings panel shows the recipient inbox and the auto-reply enabled.
7
Set the SEO basics and OG image (≤ 3 minutes)
Open Settings → SEO. Fill in the site title (format: "[Agency Name] — [Discipline] agency in [city]"), the meta description (one sentence, 150 characters or less), and the Open Graph image (1200x630 — the hero shot from your best case study works well). Confirm the sitemap is enabled and robots.txt is set to allow indexing. Then open Settings → Structured Data and enable Organization schema.
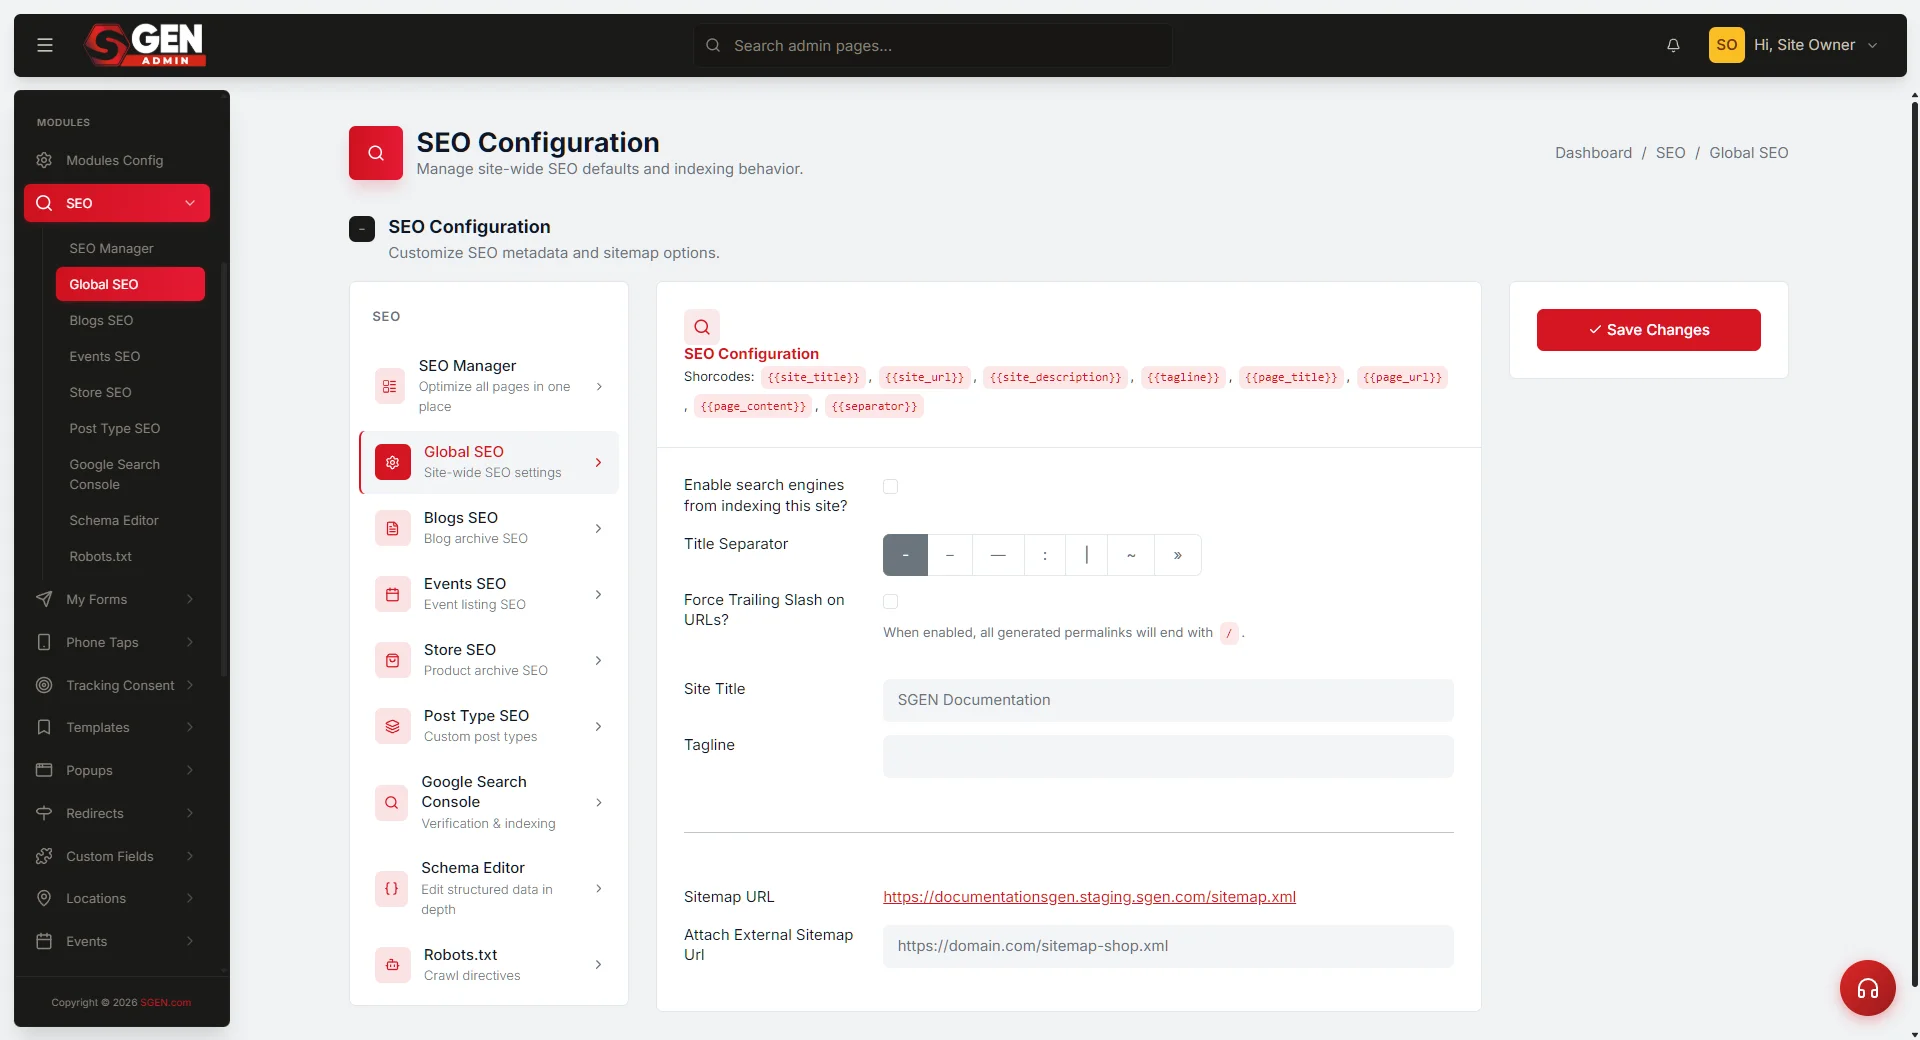
Success signal: the SEO settings show your title, description, and OG image. The Organization schema preview shows your agency name, logo, and social links. The sitemap is reachable at https://<preview>.sgen.com/sitemap.xml.
8
Publish everything and view the live site (≤ 2 minutes)
Walk through the Pages list and confirm every page shows a green Published badge: Home, Case Studies index, the three case study detail pages, the four services pages, About, and Contact. Click View Site in the top-right. Walk through the live site: Home hero on desktop and mobile, services overview, each case study, each services page's Recent work list, the team grid, and the project-inquiry form. Submit a test inquiry and confirm delivery and the auto-reply.
Success signal: a fully working agency portfolio site at https://<your-preview>.sgen.com. Total elapsed time from step 1: about thirty minutes.
Common pitfalls
Three things go wrong most often on a first agency site. Each has a one-step fix.
Writing exhaustive case study narratives in the editor
Case studies sell when they're skimmable. Problem in two sentences. Approach in three bullets. Outcome with one number. Prepare copy in a text file before you open SGEN — rewriting inside the editor is the most common reason the tutorial runs over 35 minutes.
Using only placeholder client work because of NDAs
Write a generic version. "A B2B SaaS startup in the analytics space" reads as credible without violating NDA. Run the generic version past the client if you're uncertain — most clients are fine with anonymized case studies on a portfolio.
Shipping the team grid on placeholder bios
The team grid is the highest-trust section of the site. Even a one-sentence "what you do here, what you did before" reads more credible than the starter's default text. Don't ship with placeholders.
Setting the budget dropdown to discourage clients you want
The budget dropdown signals your floor to prospects. If your minimum engagement is $25k, set the lowest bracket as "$10k–$50k," not "Under $10k." If you're early and want every inquiry, keep "Under $10k" as an option or replace it with "Tell us in the message."
If something does not work
Four symptoms come up most often. Each has a direct fix.
Index
Case Studies index is empty
Open each case study detail page. Confirm the case-study tag is in the Tags field (Pages → [case study] → Settings → Tags). The index auto-pulls pages tagged "case-study" — without the tag, the page is not picked up.
Services
Services page "Recent work" section is empty
Open the relevant case study and add a tag matching the service slug ("strategy," "design," "development," "operations"). Save. Refresh the services page. The auto-list pulls case studies tagged with the matching service slug.
Forms
Form submits but no email arrives
Confirm the Recipient email field is set (Contact → Form → Settings). Confirm the recipient mailbox accepts mail from noreply@sgen.com. Check Modules → Forms → Submissions — the entry is there even if delivery failed.
OG image
OG image does not appear on social share
Social platforms cache OG images aggressively. Use the platform's official share debugger (LinkedIn Post Inspector, X Card Validator, Facebook Sharing Debugger) — each has a "refresh" button that forces a re-fetch. Run the refresh once, then re-share.
Heads up The thirty-minute target is honest for a first-time user coming in with sample data. If you arrive without prepared case studies and team bios, add ten minutes. The tutorial is designed to be done in one sitting — stopping mid-build and returning the next day extends the time because you'll need to re-orient to where each step left off.