
5-minute SGEN tour
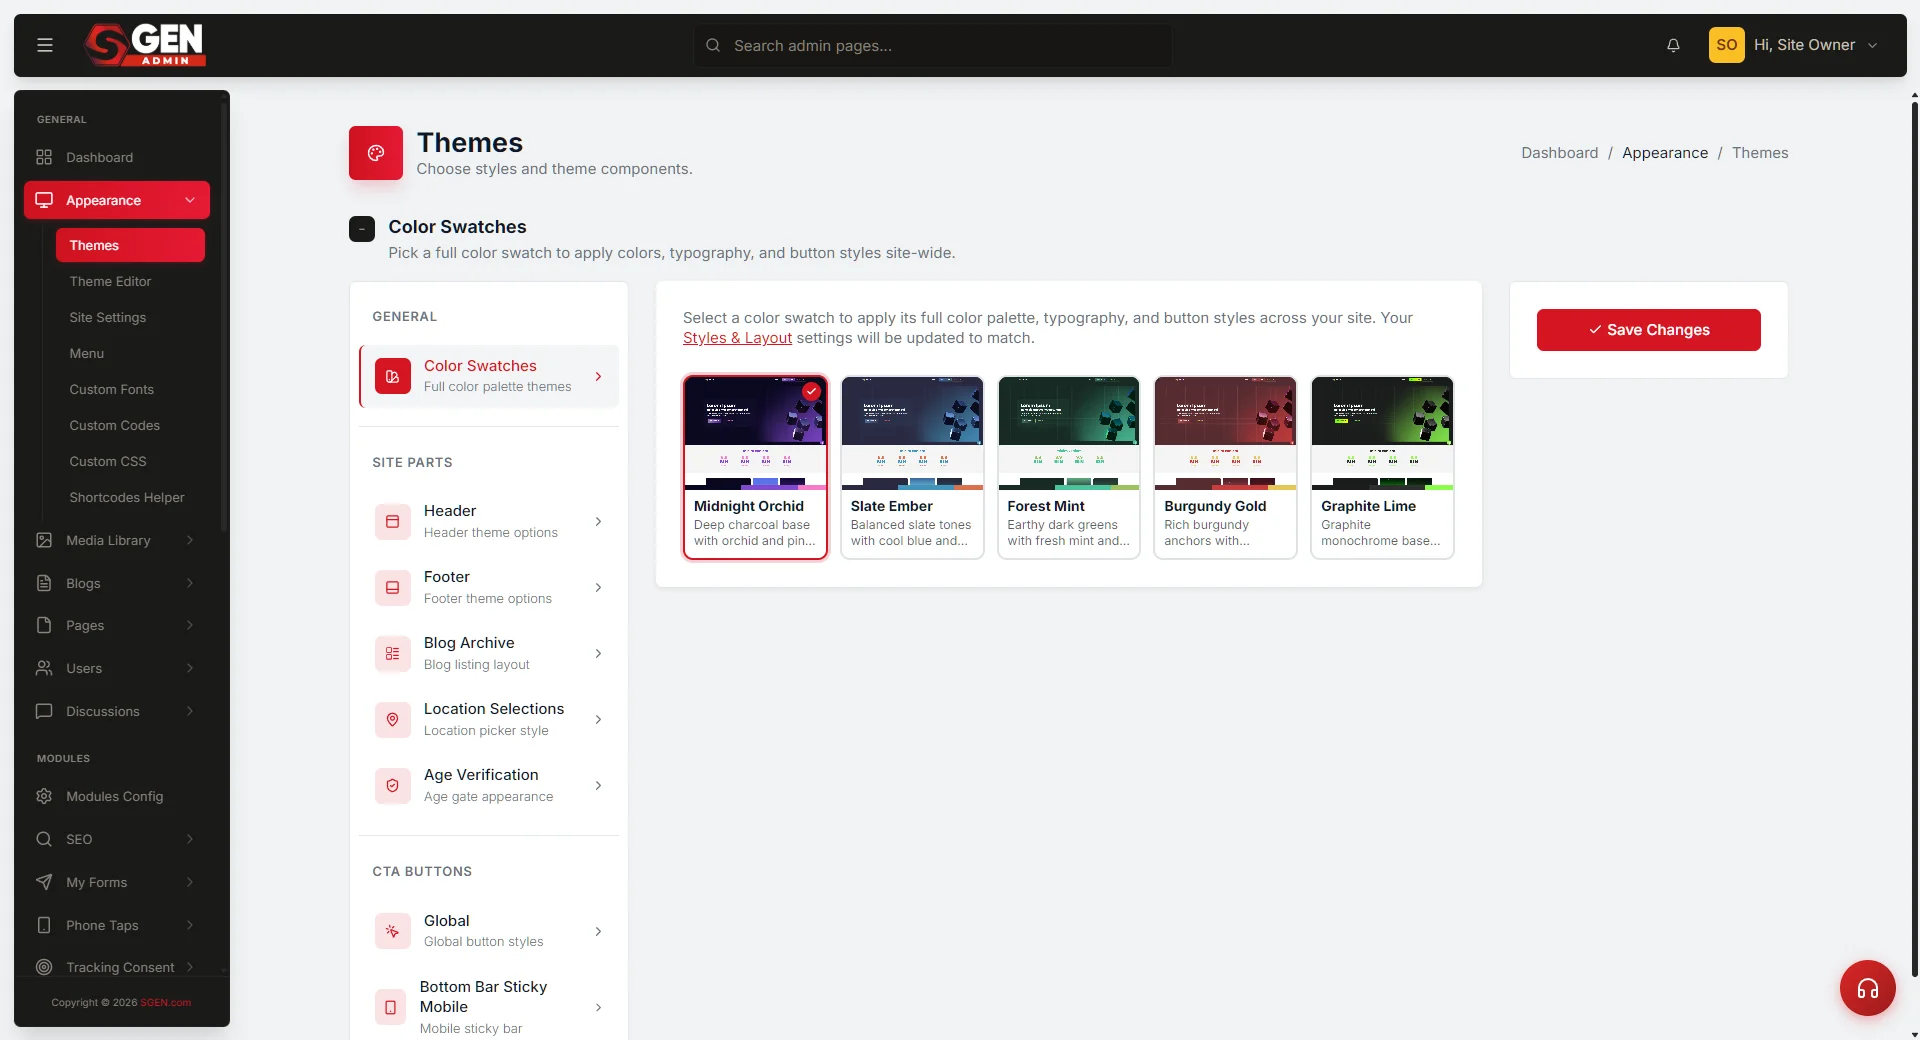 Themes Color Swatches tab showing the five preset swatch cards (Step 2 of the tour)." loading="lazy" style="width:100%;max-width:900px;height:auto;border-radius:8px;border:1px solid #e5e7eb;display:block;margin:12px 0">
⏱ 5-minute build · five steps, each one admin screen · skim the answer for the gist.
The 5-minute answer. SGEN takes you from a blank install to a live, public site in five steps, each a single admin screen. 1 — run the Setup Wizard to name your site and create your admin account. 2 — open Appearance → Themes and pick a colour swatch; it repaints every button, heading, and link site-wide. 3 — upload your first image in Media Library → Add New File/s (tick Convert to WebP before uploading). 4 — open Pages, click Edit on Home, confirm the skeleton loads in SG-Builder. 5 — open your domain in a new tab and confirm the title, swatch, and media URL all work. When all five check out, flip search-engine indexing on in SEO → Global SEO.
How to take the 5-minute SGEN tour
The fastest path from a fresh install to a live, on-brand site you can share. Five tasks, each mapped to one area of the admin. By the end you'll have a site name, a brand palette, an image in the library, a homepage skeleton, and a public URL. Stop at any step and come back — every change carries forward. Swap the sample values (your business, hello@yourdomain.com) for your own as you go.
What is this for?
A first-contact orientation, not a deep dive. It shows the five areas you'll use most in week one and gives you a working result in each before moving on. Every step links to the full reference doc for that area; the tour deliberately skips edge cases so you see the happy path without noise. It assumes a fresh install and that you're signed in (or about to run the wizard in Step 1).
Good use cases
- A new admin who just installed SGEN and wants to see everything working before going deeper.
- An agency confirming a fresh client install is clean before a handover call.
- A returning or new team member reading the screenshots to learn where each panel lives.
What NOT to use this for
- Final production decisions. Use the linked reference docs before committing your real swatch, logo, or page structure — swapping a swatch after hand-tuning Styles and Layouts means extra cleanup.
- A site you don't control. Step 1 commits irreversible changes to the site name and admin credentials.
- A substitute for the full docs. The tour is the happy path; the reference docs cover every field, edge case, and limitation.
How this connects to other features
- Setup Wizard — Step 1 at a glance; the full doc covers every field, error recovery, and the post-install SEO toggle.
- Appearance → Themes — Step 2; the full doc covers chrome presets and how swatches interact with Styles and Layouts tokens.
- Media Library — Step 3; the full doc covers batch uploads, optimisation, alt text, and captions.
Before you start
Have these ready:
- Your admin URL (like
yourdomain.com/sg-admin) and your admin email + password — or you'll create them in Step 1. - One product image under 10 MB (JPG or PNG).
- Five uninterrupted minutes, and a password manager open if you're running the wizard for the first time (it won't show the password back to you).
If you've already run the wizard and you're signed in, skip Step 1 and start at Step 2.
Where to go
The tour visits five admin sections in order:
- Setup Wizard — first-run only; skip if already done.
- Appearance → Themes — left sidebar, under Appearance.
- Media Library → Add New File/s — left sidebar, under Media Library.
- Pages — left sidebar.
- Pages → Home → Edit — opens SG-Builder; the Publish button is in its top bar.
Steps
1. Run the setup wizard — name your site
On a brand-new install, the first screen is the Setup Wizard (five screens: Welcome, Site Info, Admin, Theme, Review — run once per install). If you've already run it, skip to Step 2.
Click Start Setup, enter your site name, then your admin email and a strong password (use a real inbox — this is your login; copy the password into your manager before clicking Next). Pick a colour swatch on the Theme step (you'll confirm it in Step 2). On Review, double-check the admin email — a typo here needs a database reset to fix. Click Install Site; it commits in a few seconds and drops you in the dashboard.
Right after the wizard, open SEO → Global SEO and enable indexing when you're ready to be found — SGEN ships with it off so you can build privately.
Full reference: Create your SGEN site — Setup Wizard guide.
2. Pick a starter theme swatch
Open Appearance → Themes. The Color Swatches tab shows five presets — each commits a full set of typography, colours, and button styles site-wide, not just a background.
| Swatch | Character | Good for |
|---|---|---|
| Midnight Orchid | deep purple + silver | luxury, nightlife |
| Slate Ember | dark grey + warm amber | tech, professional services |
| Forest Mint | dark green + pale mint | food, wellness, nature |
| Burgundy Gold | deep red + gold | hospitality, food |
| Graphite Lime | charcoal + electric green | fitness, sustainability |
Click a swatch card, then Save Changes. Open your public site in a new tab and hard-reload (Ctrl/Cmd + Shift + R) — every button, link, and heading repaints to the palette.
Switching swatches merges the preset into your Styles and Layouts tokens. If you've hand-tuned colours there, note the hex values first — the new swatch may overwrite them.
Full reference: Pick or change your theme — Appearance guide.
3. Upload your first image to the Media Library
Every image, video, and document lives in the Media Library — upload once, reference anywhere. Open Media Library → Add New File/s.
Drag your image onto the drop zone (or Browse files). Before uploading, click Image optimization options, tick Convert to WebP, and set compression to Medium — marketing images typically shrink 60-70% with no visible loss. Click Apply, then Upload Files, and watch the progress reach 100%.
Hover any card for the Copy URL icon — paste that URL into a browser tab to confirm the image is live.
SVG files aren't accepted on this version — export as PNG first. Don't rename files from the Edit drawer on this release; the in-drawer rename reports success but doesn't change the filename on the server. Rename on your computer before uploading.
Full reference: Upload and manage media — Media Library guide.
4. Open Pages and confirm your homepage skeleton
The setup wizard created your homepage when the install committed. Open Pages — a fresh install has exactly one: Home (set as homepage, Published).
Click Edit on the Home row — SG-Builder opens to a skeleton: header, hero with a headline and CTA, footer. The CTA already matches your Step 2 swatch (no per-page colour config needed). For the tour, don't edit anything — just confirm the skeleton loads without errors, then close the editor tab.
5. Confirm your site is live
Your site is already public — the wizard published the homepage on install. Step 5 confirms the end-to-end chain and shows you where the Publish control lives for future edits.
- Open your domain in a new tab; confirm the page title reads your site name from Step 1.
- Confirm the colours match your swatch from Step 2.
- Paste the image URL from Step 3 into the address bar — it should load your photo directly.
- Back in the admin, open Home in SG-Builder and note the Publish button in the top bar — that's how every future edit goes live.
What success looks like
When all five steps are done:
- Your public site is live with your brand name in the browser tab and your swatch palette on the homepage.
- The admin is reachable at your admin URL with your email and password.
- At least one media file is in the library and loads at its public URL.
- Pages shows a Published Home page, and SG-Builder opens it without errors.
- The dashboard has no error banners.
You can confirm the first four in under a minute: open your domain, your admin URL, the media library, and Pages. One last thing before you call it done: SGEN ships with search-engine indexing off. When you're ready to be found, open SEO → Global SEO and flip it on — one toggle, one save. Skip it and your site is live but invisible to Google and Bing.
What to do if it does not work
- The wizard URL redirects to the homepage. It only runs once per install — skip to Step 2; your site is already configured.
- Themes doesn't repaint after Save. Hard-reload the public tab. If two reloads still show the old swatch, re-select it in Themes and Save again.
- Upload stalls and the file never appears. It's probably over 10 MB or an SVG — check type and size, and export SVGs as PNG.
- SG-Builder won't load Home. Confirm you clicked Edit, not View. If the canvas is blank, hard-reload the editor tab.
- The public site still shows skeleton text after Publish. Hard-reload the public tab. If it persists, reopen the page in SG-Builder and confirm Publish isn't still active (un-greyed = unpublished changes remain).
- The image URL returns blank or an error. Confirm the file appears in Media Library → All Media Files; re-copy the URL from the card in case it was truncated.
- The admin URL stopped working after the wizard. If you changed the Admin URL slug, your sign-in URL changed to
your-domain.com/your-slug/login. If you can't recall it, your installer or support can recover it.
Tips for the first week
- Set your logo first. Upload it to the Media Library, then pick it in Appearance → Header — a brand mark makes every screenshot look finished.
- Write the homepage headline before any other content. Even a rough working line beats skeleton text.
- Upload images in one batch with Convert to WebP + Medium compression set before you click Upload.
- Invite a teammate before you need one — Users → Invite, Editor role; they can add content the moment they accept.
- Hard-reload the public site after every publish to confirm visitors see what you built — the same-tab cache can show a stale copy for several seconds.
Next step
- Content: Pages → Home in SG-Builder — replace the skeleton with your headline, images, and CTAs.
- Products: Products → Add New Product — list your first item.
- Brand: Appearance → Header for your logo, then Styles and Layouts to fine-tune beyond the swatch.
- SEO: SEO → Global SEO — enable indexing when you launch.
- Team: Users → Invite — add your first teammate.