
Build an e-commerce page layout in SGEN
⏱ 5-minute answer below · full walkthrough ≈ 12 min · skim the step headers to move faster.
In short. An SGEN store is three surfaces working together: the product grid (browse), the product detail page (decide), and the checkout (commit). This guide takes you through all three — create categories, build out product records with descriptions and variants, review the public grid, spot-check a detail page, and walk through checkout end-to-end. Payment gateway and shipping must be configured in E-commerce Settings before you start; this guide covers layout and catalog configuration, not payment or shipping setup.
On this page: Before you start · Steps · What success looks like · Troubleshooting · Tips
Before you start
- Product images uploaded. The product editor pulls from the Media library. Upload all product visuals before creating records. Full detail: Media library.
- Product descriptions written. Write copy before opening the product editor — pasting is faster than composing there.
- Variant structure decided. Know your billing options, labels, and pricing for each product.
- Payment and shipping active. The checkout will not process without an active payment gateway and at least one shipping rule. Confirm both in E-commerce Settings first.
Go to E-commerce (or Store) in the left sidebar. The section includes Products, Categories, Orders, and Settings. Start in Products.
}}
Steps — Set up product grid, detail pages, and checkout
1. Create or review product categories
Go to E-commerce then Categories. Categories determine how the product grid is organized — without them, all products land in one undifferentiated list.
For each category:
- Click Add Category.
- Enter the Name and Slug (edit the auto-generated slug if needed).
- Add a Description if your theme displays category descriptions on the grid page.
- Click Save.
2. Create product records with descriptions and images
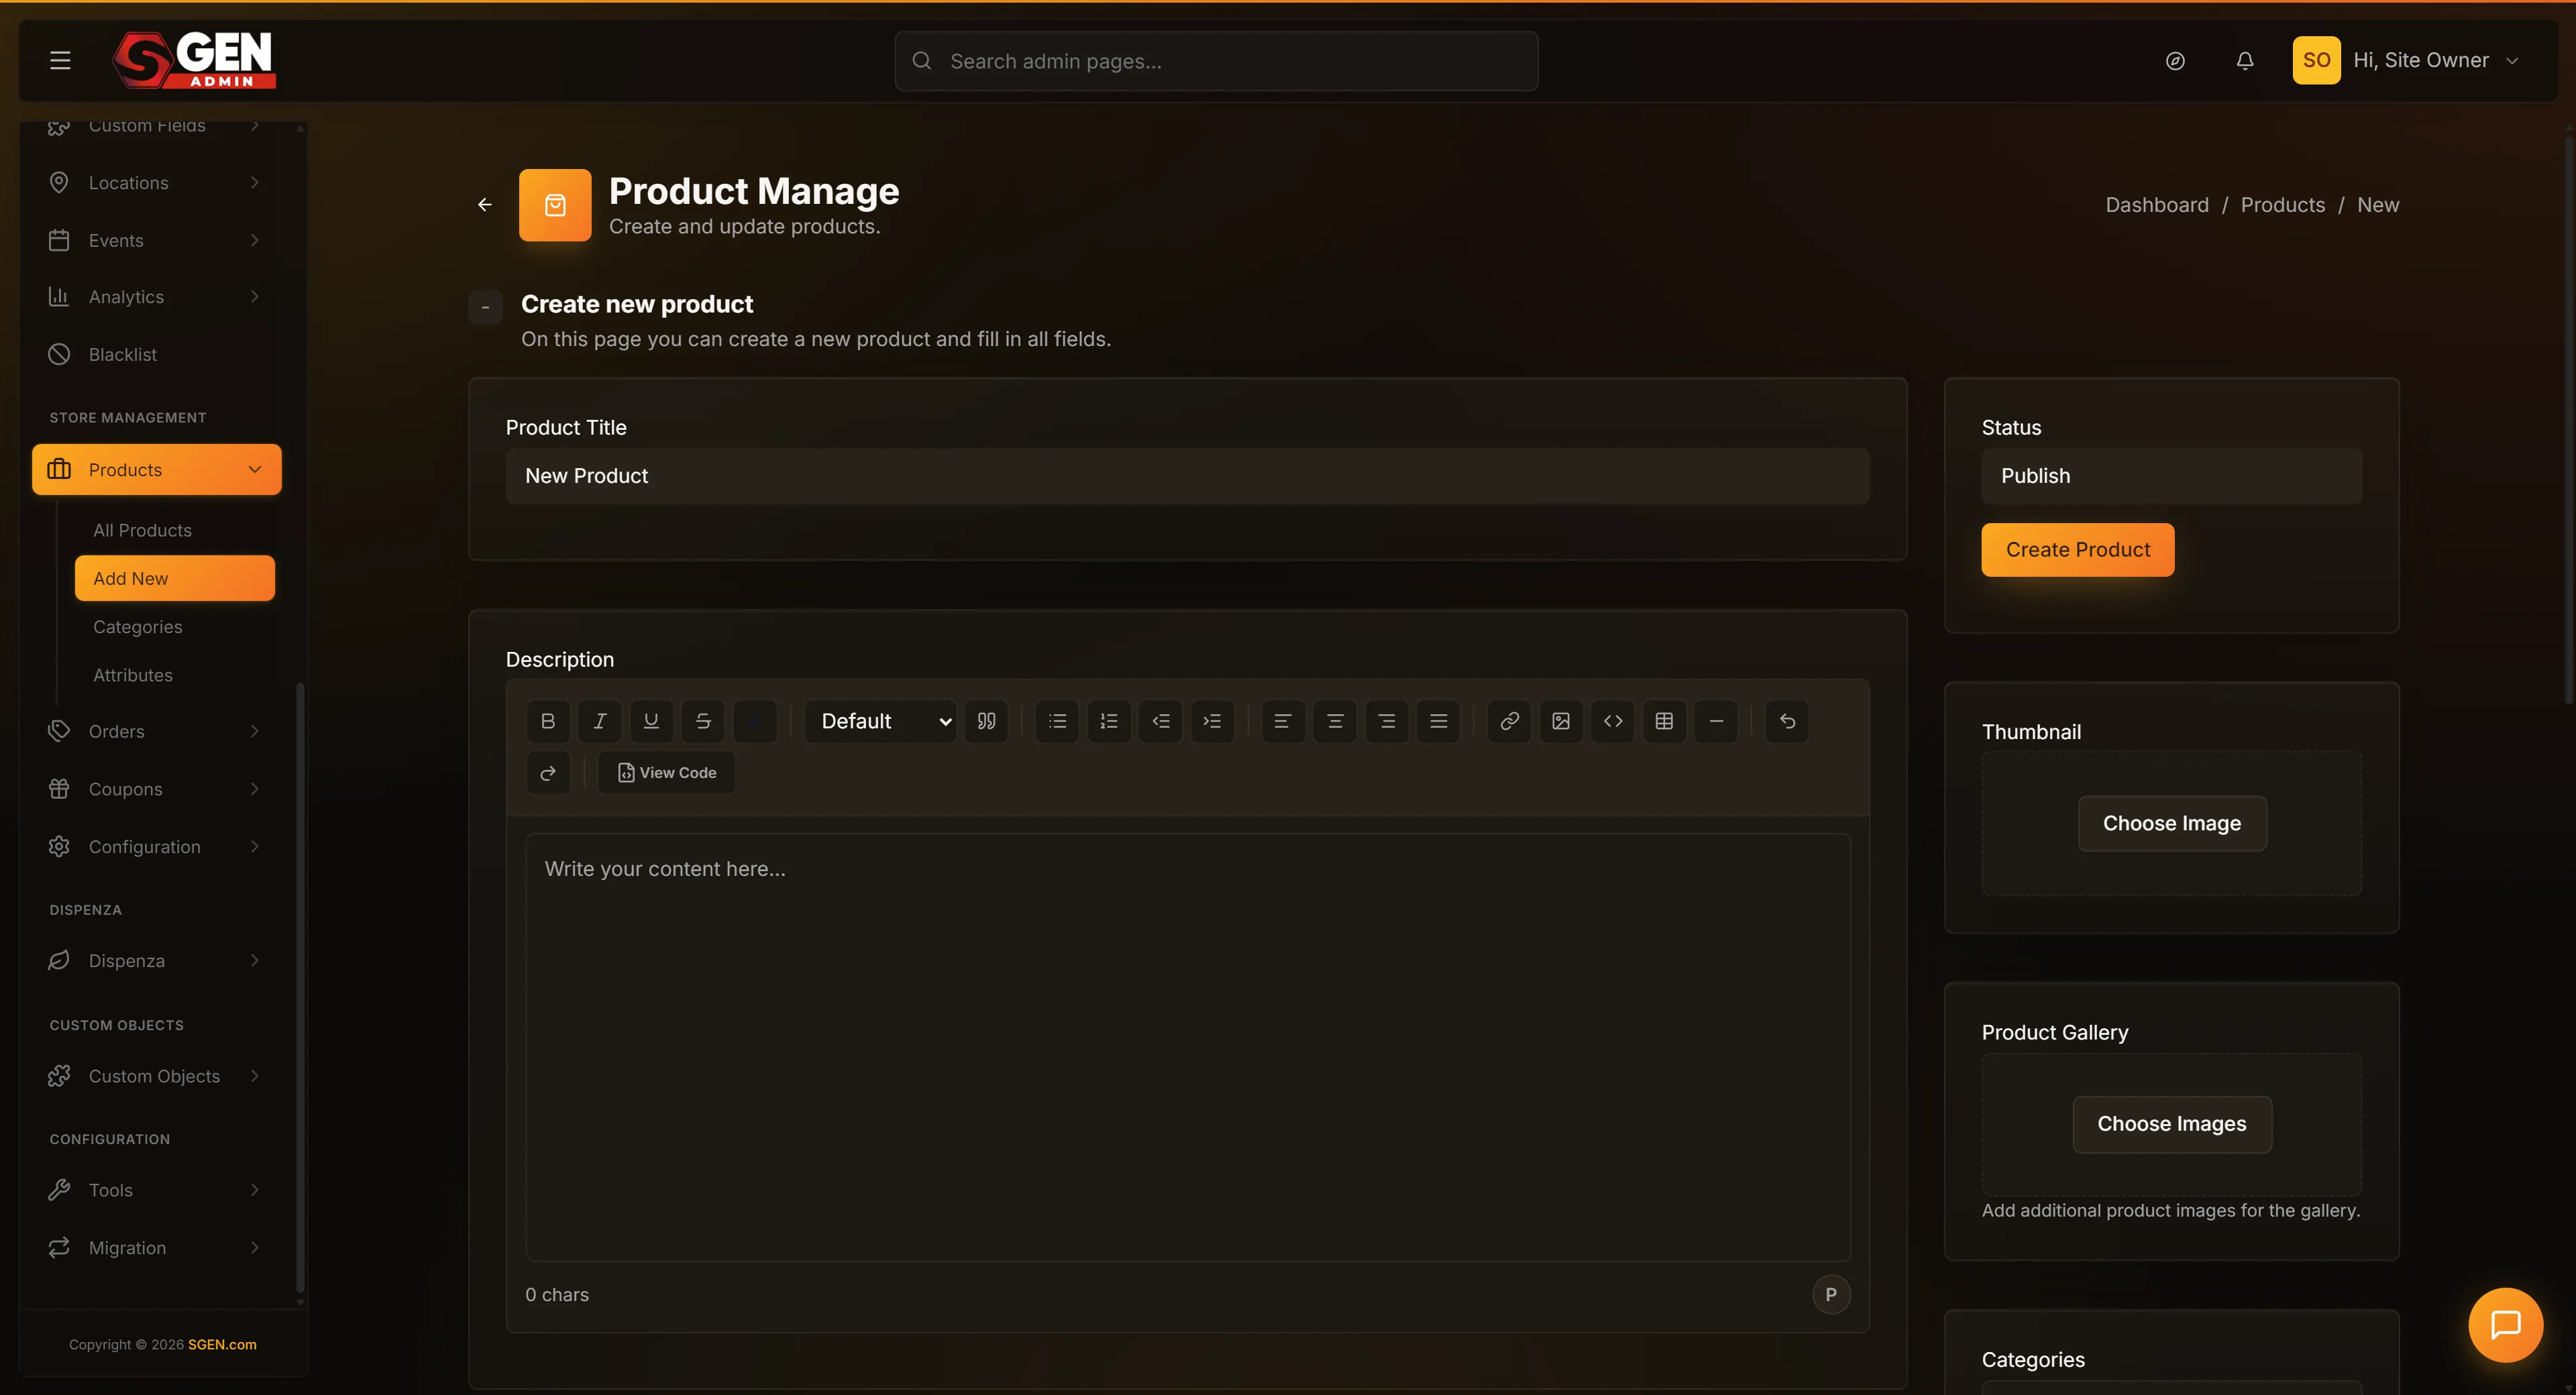
Go to E-commerce then Products. Click Add New Product or open an existing product to review it.
In the product editor, set:
- Product title — buyer-facing name as it appears in the grid and on the detail page. Write for the buyer, not the inventory system.
- Description — the full product story: what it does, who it is for, what it unlocks. Two to four paragraphs. Buyers read this before purchasing.
- Category — assign to the correct category. Uncategorized products may be hidden from category-filtered views.
- Product images — upload from the Media library or directly in the editor. The first image in the order is the featured image shown in the grid. Add at least one image per product; three or more gives buyers enough to decide.
- Status — keep as Draft while setting up. Publish only when description, images, and variants are all complete.
3. Configure product variants and pricing
Still on the product record, find the Variants section. For each variant:
- Click Add Variant.
- Set the Variant label — "Monthly" or "Annual."
- Set the Price. Variant prices are independent — they do not inherit from each other or from the base product price.
- Set the SKU and Stock quantity if you manage inventory in SGEN. Leave stock empty for unlimited (common for digital products).
After saving, preview the product detail page to confirm the variant selector displays correctly and each variant's price updates on selection.
4. Review the product grid layout
Open the product grid in a private browser window (your store URL — e.g., yoursite.com/shop).
Check:
- Products appear in the correct categories.
- The featured image for each product loads correctly.
- Product title and price are visible on each card.
- The "Add to cart" or "View product" action is visible.
- Category filter links appear if you have multiple categories.
If the grid shows products in the wrong order or missing categories, return to each product record and confirm the category assignment.
5. Review the product detail page
Click any product card in the grid to open its detail page. Review:
- Headline — the product title is the page H1.
- Images — all product images load. The gallery shows multiple images if you uploaded more than one.
- Description — visible and correctly formatted.
- Variant selector — present and functional. Selecting a variant updates the displayed price.
- Add to Cart button — present and active. Out-of-stock variants should show a different state.
- Price — matches the variant selected.
If the description is missing or images are broken, return to the product record and confirm the fields were saved correctly.
}}
6. Walk through the checkout flow
Add a product to the cart and complete checkout end-to-end in a private browser window. The SGEN checkout flow is: cart review → contact information → shipping method → payment → order confirmation.
At each stage, check:
- Cart — product name, variant, quantity, and price are correct. Cart total matches the product price plus any shipping shown.
- Contact information — form accepts email, name, and shipping address.
- Shipping — options match the rules configured in E-commerce Settings. At least one option is available at the correct cost.
- Payment — the payment form loads. Use your payment gateway's test card number for test transactions — not real card numbers.
- Order confirmation — the confirmation page loads and the order confirmation email arrives at the test address.
If a checkout stage fails, check the relevant settings: E-commerce → Settings → Shipping for shipping errors; payment gateway settings for payment errors.
What success looks like
- The product grid is visible at the store URL in a private browser window.
- All published products appear with correct images, titles, and prices.
- Category filter links appear and filter the grid correctly.
- Clicking a product opens the detail page with full description, images, and variant selector.
- Selecting a variant updates the displayed price.
- The Add to Cart button is active on in-stock variants.
- The checkout flow processes a test transaction end-to-end without error.
- The order confirmation email arrives after a test purchase.
What to do if it does not work
- Products not appearing in the grid. Confirm each product's status is Published, not Draft. Also confirm the product is assigned to a category — on some themes, uncategorized products are hidden from the grid.
- Product images broken or not loading. Check the product record to confirm images were saved. Broken image slots usually mean the image was removed from the Media library after being assigned. Re-upload and re-assign on the product record.
- Variant prices not updating on selection. Try the store in a different browser. If the problem persists, open each variant in the product editor and confirm the price is saved.
- Checkout failing at the payment step. Confirm the payment gateway is active and configured correctly in E-commerce Settings. In test mode, use the gateway's official test card numbers. If credentials are correct and payment still fails, contact your payment gateway's support team.
- No shipping options at checkout. Go to E-commerce → Settings → Shipping. Confirm at least one shipping rule is active and covers the destination you are testing from. Check whether a minimum order value on the rule is preventing it from appearing.
- Order confirmation email not arriving. Check the test email address and spam folder. If the email is not arriving at all, confirm outbound email settings in SGEN are configured with a valid SMTP or sending service.
Tips for a strong store setup
- Treat the product description as sales copy. It is often the last thing a buyer reads before clicking Add to Cart. Tell them what it does, who it is for, and what they get — not just a name.
- Keep variant labels buyer-friendly. "Monthly" and "Annual" are clear. Internal SKU codes are not. Variant labels appear in the selector the buyer interacts with.
- Test checkout before every campaign. Payment gateways and shipping services can change configurations without notice. Run a test transaction before driving paid traffic to the store.
- Review the mobile product grid before opening. Product grids often collapse to one column at mobile. Confirm the image, title, and price are legible on a 375px screen.
Checkout flow stages to verify
| Stage | What to check |
|---|---|
| Cart | Product name, variant, quantity, price correct; total = price + any shipping |
| Contact information | Form accepts email, name, shipping address |
| Shipping | Options match rules in E-commerce Settings; at least one option at correct cost |
| Payment | Payment form loads; use the gateway's test card number |
| Order confirmation | Confirmation page loads; confirmation email arrives at test address |