
Media Library
⏱ ~5 min read · upload and optimize assets, add alt text, find files fast, and understand how SG-Builder pulls from the library.
In short. The Media Library is your site's asset store inside the admin. You upload images, video, and documents here once, and SG-Builder draws from the same library whenever you pick an image, set a background, or link a file download. On upload you can convert images to WebP and compress them so pages load faster. Every asset carries a description (alt text) for accessibility and search, and you can have AI suggest that text automatically. The library is site-scoped — anything you upload is available on every page of that site.
On this page: Where to find it �� The asset model · Upload and optimize · Alt text and AI captions · Find a file · Work in batches · How SG-Builder uses it · Worked examples · Troubleshooting · Vocabulary
Where to find it
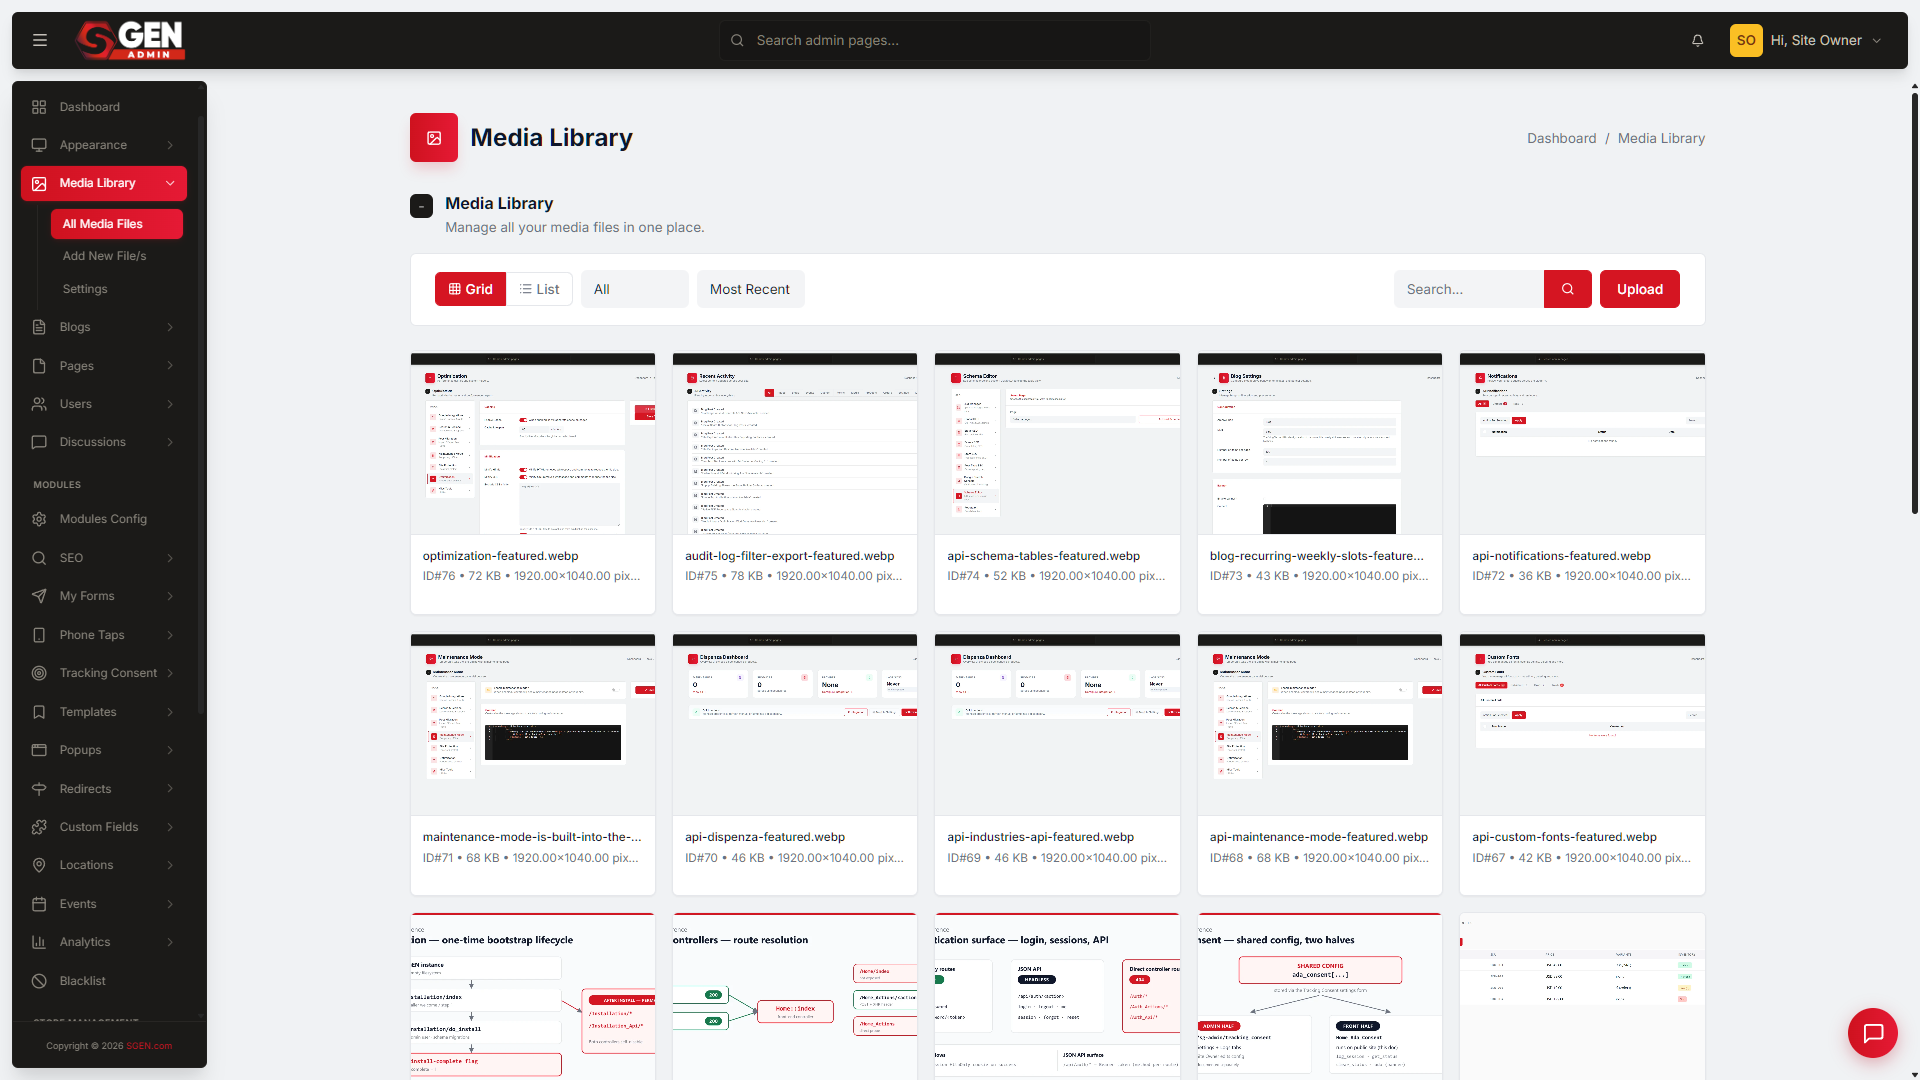
Sign in to your SGEN dashboard, open Site Manager, find your site, and choose Manage site → Login to staging (or live). Inside your site's admin, choose Media Library in the left sidebar. You'll land on the asset grid — every file on the site, with a thumbnail, filename, and size, plus an Add New File/s action and per-card edit and delete actions.
Authors and above can upload and reference assets; admins can delete files.
The asset model
Each uploaded asset carries three layers of information — what it is, how it displays, and how it's organized.
| Information layer | Fields |
|---|---|
| Identifying | Filename, type (image / video / document), size, upload timestamp, uploader |
| Display | Description / alt text (for images), focal point for cropping |
| Organization | Folders, tags |
Assets are site-scoped: everything you upload is available across every page and every SG-Builder session on that site, so you upload once and reuse anywhere.
Upload and optimize
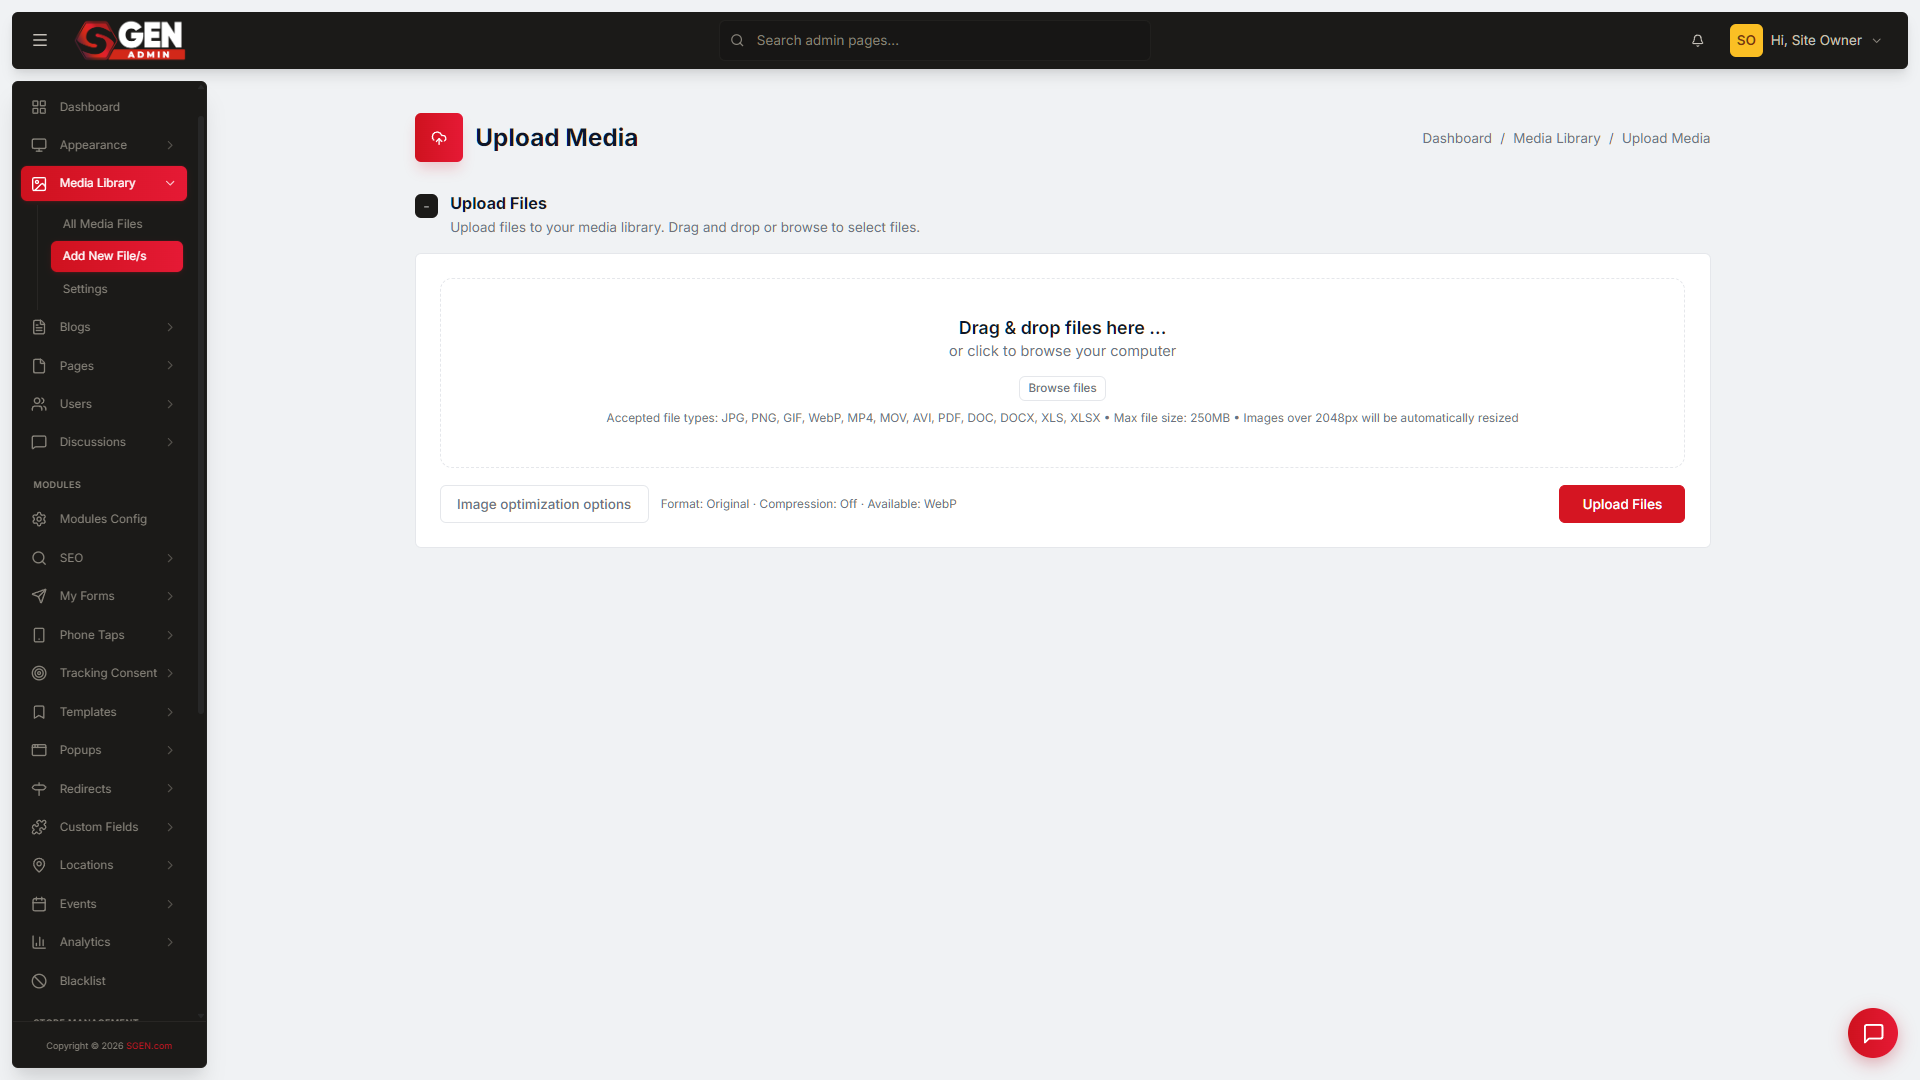
Choose Add New File/s to open the upload page. Drag your files onto the drop zone, or click Browse files to select them. You can add many files in one batch.
Before you commit the upload, decide whether to optimize. By default SGEN keeps your files exactly as you supplied them — format unchanged, compression off — so optimization is something you opt into per batch:
- Drop or browse to your files.
- Click Image optimization options below the drop zone.
- Tick Convert to WebP to re-encode images to a smaller modern format.
- Tick Compress Images and pick a level — Medium is the recommended default for photos.
- Click Apply, then click Upload Files.
These two settings apply to every image in that batch. They only affect images (JPG, PNG, GIF) — for PDFs and videos the toggles are unavailable, and those files upload as-is. Smaller, modern-format images mean faster pages, so it's worth turning these on for any photo-heavy upload.
Tip: give files a descriptive name before you upload —red-leather-armchair.pnginstead ofIMG_2847.png. A meaningful name reads better in your library and, if AI captions are on, produces a far better suggested description.
Alt text and AI captions
Alt text is a short description of an image that screen readers announce and search engines read. It's good for accessibility and for SEO, so it's worth adding to images that carry meaning.
To add or edit it, hover an image card and click the Edit (pencil) icon. A drawer opens on the right — type your description in the Description / Alt Text field (for example, "Red leather armchair on hardwood floor") and click Save.
To have SGEN suggest alt text automatically on every new upload, open Media Library → Settings, tick Enable AI Media Captions in the General card, and click Save Changes. From then on, each new image arrives with a suggested description already filled in.
How AI captions work — and their limits
On most SGEN setups the suggested caption is generated from the filename, not from the picture itself. A file named red-leather-armchair.png becomes "Red Leather Armchair"; a file named IMG_2847.png becomes "Image 2847," which isn't useful. Rename files descriptively before uploading for a good starting point.
The toggle affects new uploads only — images already in your library keep their existing alt text. To add a suggestion to an older file, open its Edit drawer and click Generate caption for that file.
Treat every suggestion as a draft. Review and rewrite it before the page goes live, especially where accuracy matters.
Note on renaming: the Edit drawer shows a file name field, but changing the name there does not stick on this release. If you need to rename a file, rename it on your computer and re-upload it.
Find a file
Once a library grows, use the search box above the grid to type a name or keyword, then click the magnifier to run the search. Use the Type filter to narrow to images, video, or documents. Your search keeps the current filter applied, so you can combine the two to zero in on what you need.
Work in batches
To act on several assets at once, tick the checkboxes on the cards you want — or the master checkbox to select all — then choose an action from the Action For Selected dropdown and click Apply. This is the fastest way to clear out files you no longer need.
When you delete an asset that's still referenced on a page, the platform warns you first so you don't break a live image. Confirm or unlink the reference before removing it.
How SG-Builder uses it
SG-Builder reads from the same Media Library at composition time, so there's no separate upload step inside the editor:
- Image block — browse the library to pick a source image.
- Background image — any block's background can reference a library asset.
- Video block — pick from the library or supply an external URL.
- Document download — link targets reference library files.
Because the library is shared, swapping an image on one page never affects the original file or any other page that uses it.
Worked examples
| Goal | What you do |
|---|---|
| Upload optimized photos | Add New File/s → drop your images → Image optimization options → Convert to WebP + Compress (Medium) → Apply → Upload Files. |
| Make images accessible | Hover a card → Edit (pencil) → type a description in Description / Alt Text → Save. Or enable AI Media Captions in Settings to pre-fill new uploads. |
| Swap a hero image | Open the page in SG-Builder → select the image block → open the source picker → choose a new library asset. The original stays in the library. |
| Clean up old files | Search or filter to find them → tick the cards → Action For Selected → Apply. Confirm if a file is still referenced. |
| Rename a file | Rename on your computer, then re-upload — in-library renaming doesn't persist this release. |
Troubleshooting
- My image didn't convert to WebP. The optimization options are opt-in per batch and default to Keep Original. Re-upload with Image optimization options → Convert to WebP ticked. The toggles don't apply to PDFs or video.
- AI captions aren't appearing. The setting affects new uploads only — older files keep their existing text. Confirm Enable AI Media Captions is on in Media Library → Settings, then upload a test image.
- A renamed file reverted to its old name. Renaming in the Edit drawer doesn't stick on this release. Rename on your computer and re-upload.
- I can't delete a file. Only admins can delete. If you are an admin and deletion is blocked, the file may still be referenced on a page — unlink it there first.
Vocabulary
| Term | Meaning |
|---|---|
| Asset | One media file — image, video, or document |
| Alt text | A short description of an image, read by screen readers and search engines |
| WebP | A modern, smaller image format SGEN can convert your images to on upload |
| Focal point | The per-image anchor the platform uses when cropping for different sizes |
| AI Media Captions | A setting that auto-suggests alt text on new uploads (filename-based on most setups) |
Related
- SG-Admin Overview — the parent surface.
- Pages — where assets appear on the site.
- Blogs — blog post media attachment.