
Manage site backups in SGEN
⏱ ~9 min read · quick-answer above the fold · full reference below.
In short. Go to Migration → Backups in your sidebar. Click Create a Backup! — SGEN bundles your entire database and uploads directory into a.sgenarchive. When the page reloads, the new row is at the top of the list. Rename it immediately (click the filename) to something meaningful likepre-theme-swap-20260423. To delete one row, click Delete in its Actions column. To remove several at once, tick the checkboxes and choose Delete from the Action For Selected menu, then click Apply. Bulk delete is permanent — no trash, no undo. Download important archives to off-server storage before deleting.
On this page: What this is for · Create a backup · Delete a backup · Bulk-delete · Troubleshooting · Best practices
How to create, rename, and delete full-site backup archives
The Backups panel lets you manage site backups in SGEN — point-in-time snapshots of your entire site, database content and uploaded media together, packaged into a single archive file. Each backup is a self-contained .sgen file you can rename for context, delete when no longer needed, or restore to roll the site back to that exact state.
Think of it as a safety net you own: create a snapshot before any risky change, proceed with confidence, and roll back with one click if something goes wrong.
What is this for?
SGEN backups are full-site archives. The complete database — pages, posts, products, users, settings — is bundled with the uploads directory into a single portable .sgen file.
Use the Backups panel in two main situations:
- Before a risky change — theme swap, product bulk-update, user role change, anything you would want to undo cleanly if it went wrong. Create the snapshot first, then proceed.
- Before a site migration — to move content between two SGEN installations, create a backup on the source site, download it, and restore it on the destination.
The panel shows your full archive inventory, each row displaying the filename, size, whether media files were included (the Media Snapshot column), and the creation date.
Auto-generated filenames follow a fixed pattern so you always know when a backup was taken and which site it came from:
`` sgen_yoursite.com-backup-20260422-140312.sgen └─ domain ───┘ └─ date ┘└─ time ┘ ``
The date-time stamp is YYYYMMDD-HHMMSS in the server's local timezone. Once the archive appears in the list, you can rename it to something human-readable without changing its contents.
What is covered
This panel covers three operations on full-site archives: create, rename, and delete (single or bulk). The panel is manual-only — there is no scheduled or automated backup feature here.
To restore a backup or import one to another site, use Migration → Import. To export individual content types (pages, posts, events) without a full archive, use Tools → Post Migration.
Examples
Example 1: Pre-deploy safety net. You are about to swap your site's active theme and bulk-update 40 product descriptions. Before touching anything, navigate to Migration → Backups and click Create a Backup! Once the archive appears in the list, rename it pre-theme-swap-20260423 so you can find it instantly if you need to roll back.
The archive is created in the background while the page waits. For a small site this takes a few seconds; for a site with a large uploads directory it can take a minute. When the page reloads, the new row is at the top of the list.
Here is what the Backups panel looks like with four archives in place, including the freshly created pre-deploy snapshot at the top:
After the backup is created, proceed with the theme swap. If anything breaks, click Restore on that row and the site reverts to the pre-swap state. If nothing breaks, the backup row sits there doing nothing — which is exactly what you want.
Example 2: Monthly retention cleanup. After several weeks the panel holds many archives and the backups directory is consuming several hundred megabytes of server disk space. Keep the most recent three plus any named pre-deploy archive, and delete the older ones.
Check the checkboxes next to the older archives, choose Delete from the Action For Selected menu, and click Apply. All checked files are removed in one step. The panel refreshes with a confirmation banner showing how many files were removed and how much disk space was freed:
Bulk delete is permanent — there is no undo and no trash step. Check carefully before clicking Apply.
Example 3: Rename an auto-generated archive for clarity. After Create a Backup! fires, the archive name contains the domain and timestamp but no context about why the backup was taken. A pre-launch snapshot auto-generates as:
`` sgen_yoursite.com-backup-20260422-140312.sgen ``
Click the filename text in the row — it becomes an editable inline field. Type a descriptive name such as post-product-launch-v2 and press Enter. The row updates in place without a page reload, and the rename is logged in the admin audit trail. Renaming only changes the displayed label — archive contents are not affected.
Here is what the inline rename editor looks like mid-edit:
Preview: Inline rename editor active on a backup row — a screenshot of this screen will be added here.
Fields
The Backups panel list view exposes these columns for each archive:
| Column | What it shows |
|---|---|
| Filename | The archive name. Auto-generated as sgen_. Click to rename inline. |
| Size | Archive file size on disk (database + uploads bundled). Larger media libraries produce proportionally larger archives. |
| Media Snapshot | Yes — uploads directory was bundled. No — uploads directory was empty, inaccessible, or skipped. A No backup can still be restored; media must be re-uploaded afterward. |
| Date Created | Server timestamp when the backup completed, in MMM DD, YYYY — H:MM am/pm format. |
| Actions | Per-row controls: Restore (rolls the site back to this snapshot), Rename (inline editor), Delete (permanent, with confirmation). |
The bulk-actions bar above the list adds: Action For Selected dropdown (Delete only) + Apply button. Checkbox column on the left selects individual rows; header checkbox selects all visible rows.
What NOT to use this for
- Automated / scheduled backups — the Backups panel is manual-only. Each archive is created only when you click the button. If you need regular automated snapshots, configure them at the hosting or server level outside SGEN.
- Partial content exports — every backup includes the entire database and uploads directory. If you only need to export a set of pages or products, use Tools → Post Migration instead.
- Database-only exports — the archive bundles the database and uploads together. There is no option to export just the database through this panel.
- Version history / revision browsing — backups capture the site state at the moment of creation. For per-post revision history, use the revisions panel on the individual post editor.
- High-frequency point-in-time snapshotting — creating a backup takes time proportional to your uploads directory size. Plan backup timing around low-traffic windows and avoid creating multiple archives in quick succession.
How this connects to other features
- Migration → Import — after downloading a backup from this panel, you upload it via the Import panel to restore or clone a site. Download and Import are the two halves of the same migration workflow.
- Tools → Post Migration (Import/Export) — an alternative scoped to individual content types (pages, blog posts, events) rather than the whole site. Use Post Migration when you want fine-grained transfers without touching settings, users, or media.
- Media Library — backup archives include the full uploads directory. Large media libraries produce proportionally large archives. Audit and prune the Media Library before creating a backup if disk space is tight.
- Settings — environment-specific settings (SMTP config, analytics tokens, API keys) are overwritten when a backup is restored. If you restore a staging backup to production, re-enter production settings afterward.
Before you start
- The Migration module must be enabled on your SGEN installation. If Migration is not in the left sidebar, contact your SGEN platform administrator to enable it.
- Your server must have enough free disk space to store the archive. A site with a large Media Library can produce archives of several hundred megabytes or more.
- You are signed in to SGEN as an Administrator. Standard editor accounts do not see the Migration sidebar item.
- For sites with a very large uploads directory, plan backup timing during a low-traffic window. The backup process reads and bundles the entire uploads folder, which can put a temporary load on the server.
Where to find it
- Log in to your SGEN admin panel.
- Click Migration in the left sidebar.
- The panel opens on Backups by default. Both
/sg-admin/migrationand/sg-admin/migration/backupsrender the same view — no redirect, no extra click needed.
Steps: create a backup
1. Click "Create a Backup!"
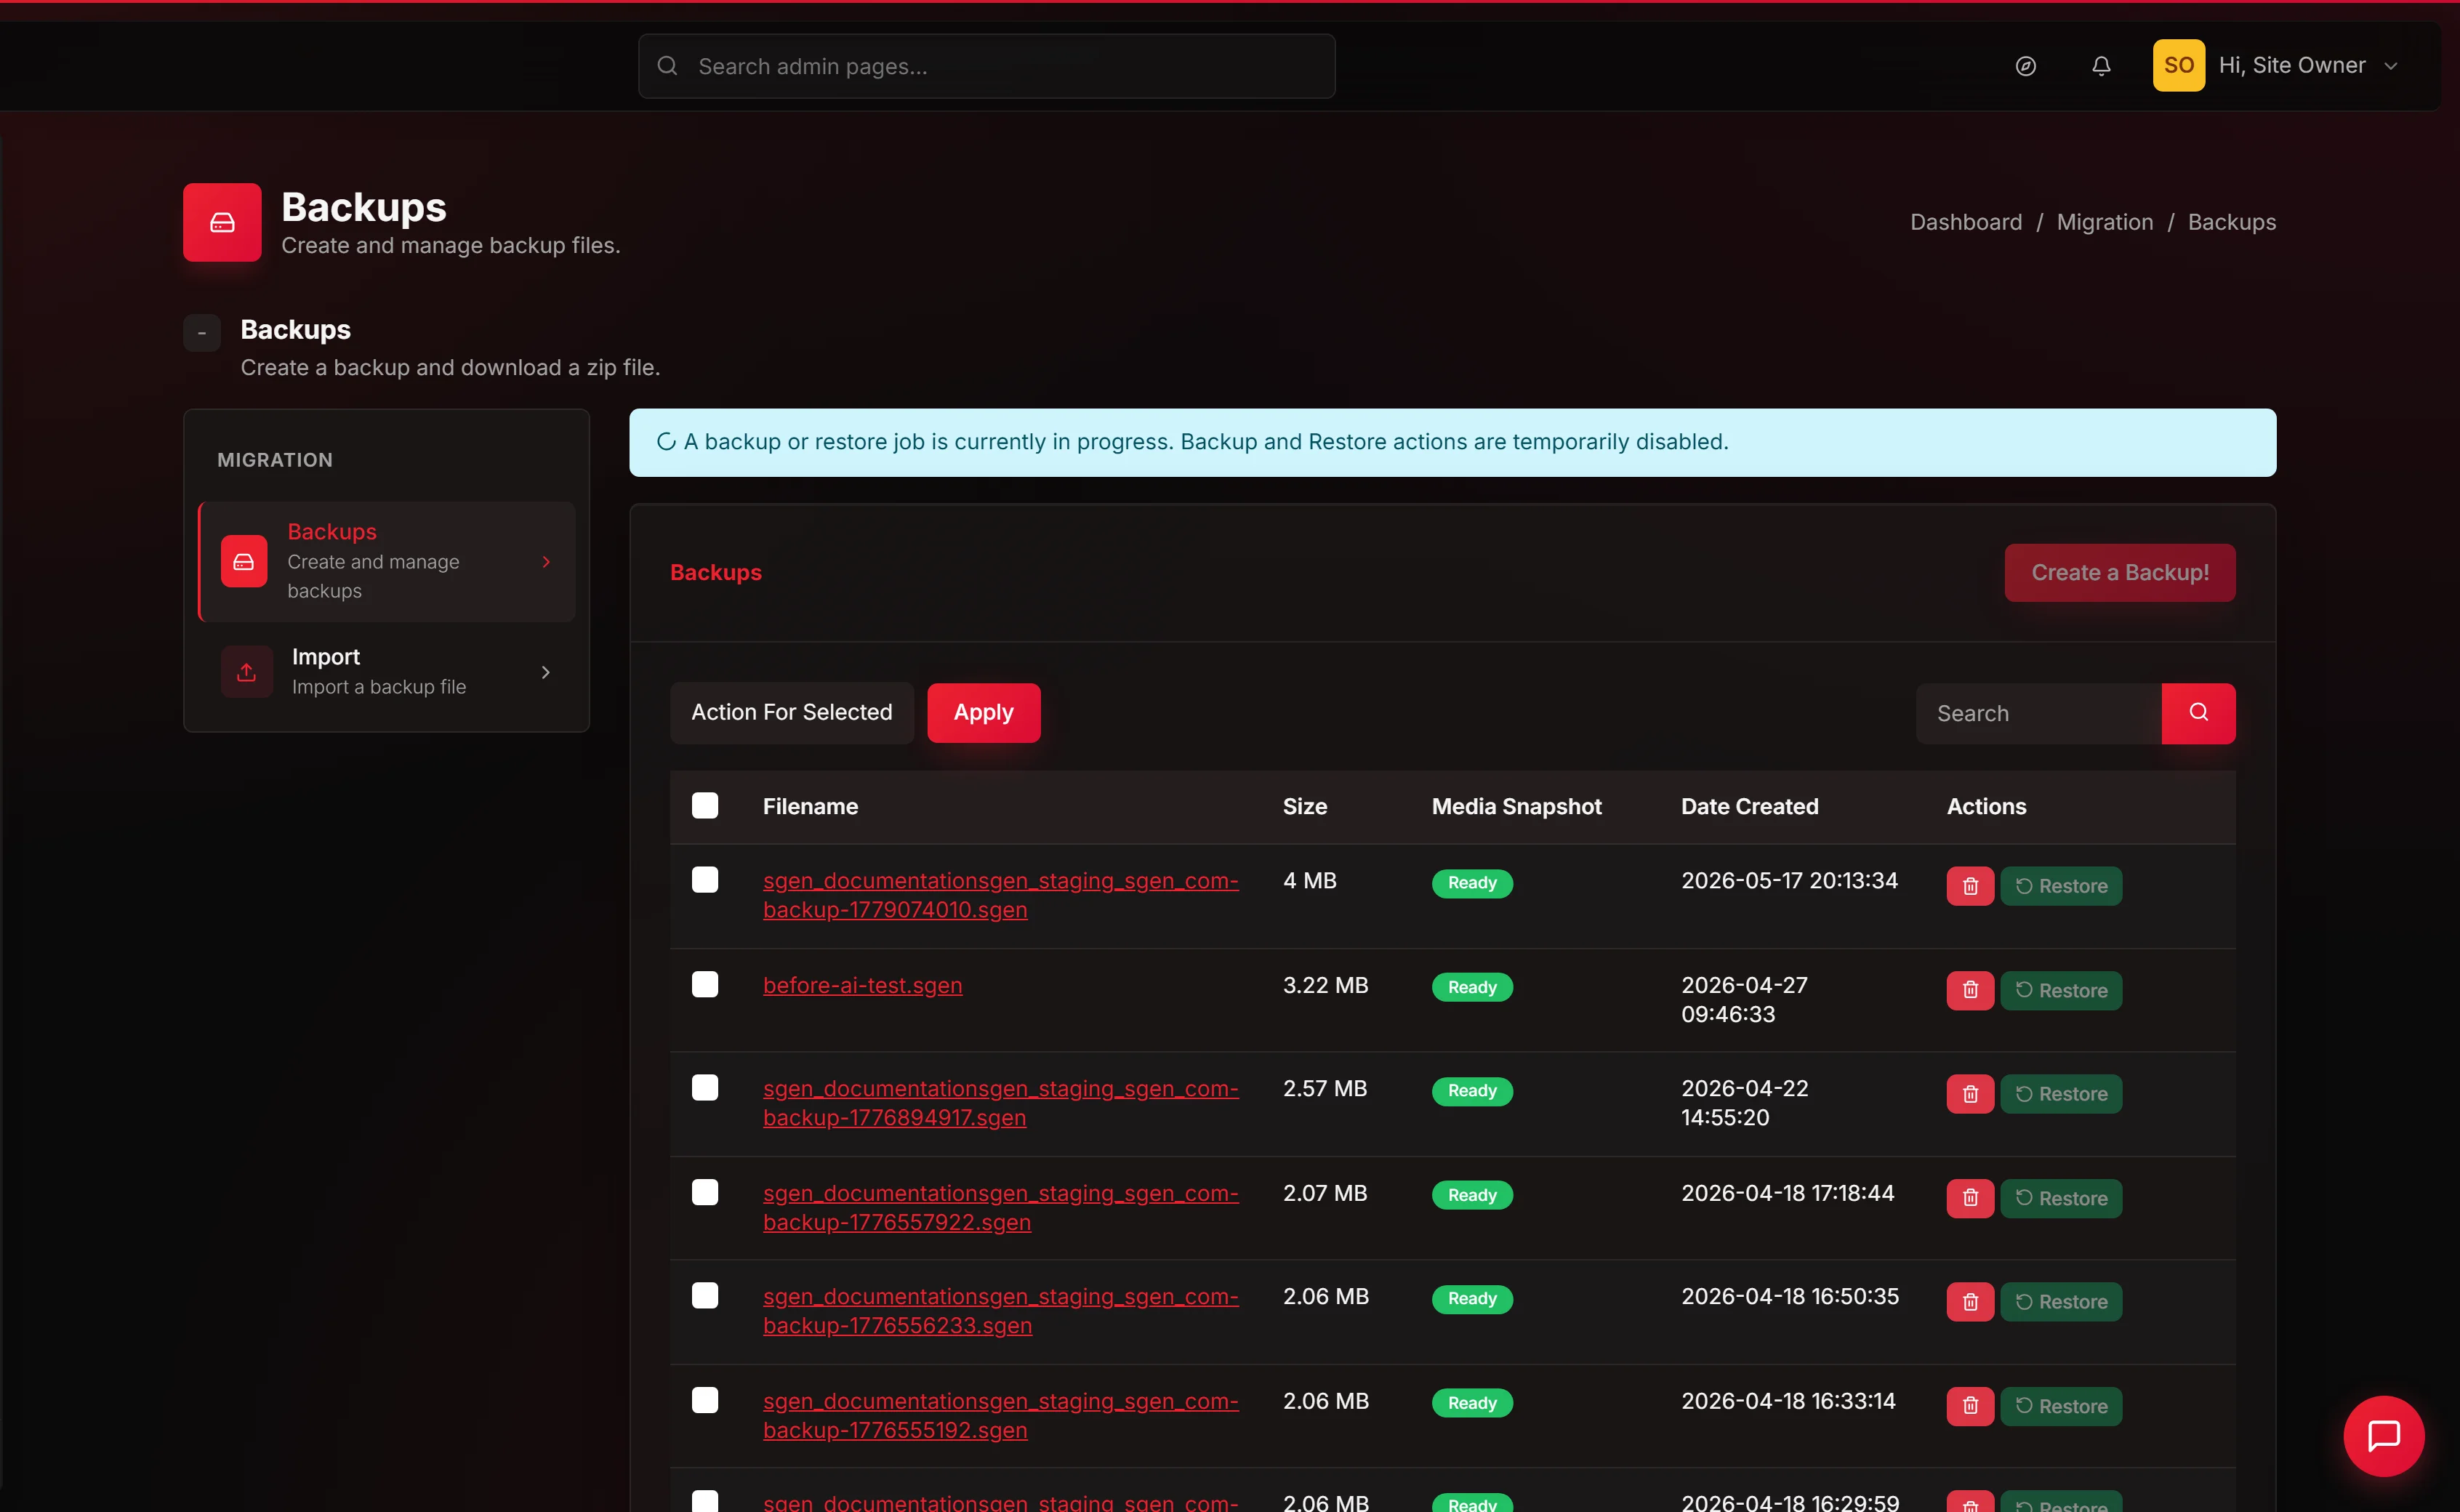
The button appears in the top-right corner of the Backups panel. Click it. SGEN generates a database dump and bundles it with the uploads directory into a single .sgen archive. The page reloads when the process finishes and the new archive appears as the top row in the list. There is no progress indicator during creation — the page will appear unresponsive until the process completes. For a typical site this takes a few seconds to a minute depending on uploads directory size.
2. Verify the new row
Confirm the archive appears with a filename in the format sgen_, alongside its file size, a Media Snapshot value of Yes, and the creation date. If the list was previously empty, the empty-state message disappears and the table appears. A green confirmation banner flashes at the top of the panel confirming the archive was written to disk:
3. Rename (optional)
Click the filename text in the row. The text becomes an inline editor. Type the new name and press Enter. The row updates in place without a page reload. Renaming only changes the displayed label — archive contents are unchanged. A good naming convention: describe the reason for the backup rather than the date, since the date is already baked into the auto-generated filename.
Steps: delete a backup
1. Click the Delete button on the row
Each row has a Delete button in the Actions column. Click it. A confirmation dialog appears before any file is removed:
2. Confirm the deletion
Read the confirmation message and click Delete. The row disappears from the list and the file is removed from the server. Deletion is permanent — there is no trash folder and no undo.
Steps: bulk-delete backups
1. Check the rows to delete
Click the checkboxes on the left of each row you want to delete. To select all visible rows at once, click the header checkbox at the top of the checkbox column. Double-check your selection before proceeding — bulk delete removes all checked rows in one step with no per-row confirmation.
2. Choose Delete from the dropdown
In the bulk-actions bar at the top of the list, open the Action For Selected dropdown. The only available bulk action is Delete. Select it.
3. Click Apply
Click the Apply button. All checked archives are deleted immediately. The panel refreshes and shows a confirmation message such as "Deleted 3 backup(s)." The rows are gone — the action cannot be reversed.
What success looks like
After a successful backup creation, the archive row appears in the list with the filename, archive size, Media Snapshot set to Yes, and the creation date. After a deletion, the row is gone from the list. After a rename, the new filename is visible in the row without a page reload.
The Backups panel after a successful create-and-rename cycle looks like this — the top row carries the descriptive name you typed; older rows retain their auto-generated names:
What to do if it does not work
- The Backups panel is not in the sidebar — the Migration module is not enabled on your installation. Contact your SGEN platform administrator.
- The backups list is empty when you expect to see archives — the list reads from the server's
backups/directory. If that directory was cleared during a hosting migration or by a server administrator, the panel shows an empty state. Creating a new backup will repopulate it. If you expected a specific archive that is now missing, it was deleted — restore from it is no longer possible:
- Backup creation stalls and the page never reloads — the server may be running out of memory or disk space while packaging a large uploads directory. Contact your hosting provider to check server resource limits. Ask your host to increase the PHP max execution time limit and verify adequate free disk space (at least 2× your expected archive size as working room).
- The "Create a Backup!" button appears but nothing happens — clear your browser cache and reload the Backups page. If the issue persists, confirm with your administrator that the server's
backups/directory exists and is writable. A permissions error on the backups directory silently swallows the click with no visible error message.
- Delete confirmation appeared but the row is still visible after confirming — refresh the page. If the row remains, the file may have been locked by another server process, or the server may have a permissions issue on the backups directory. Contact your hosting provider if the problem persists across multiple browser sessions.
- The rename field does not appear when you click the filename — click directly on the filename text link, not the surrounding row. If the click opens a detail view instead of the inline editor, use the Rename button in the row's Actions column as an alternative entry point.
- Media Snapshot shows "No" on a backup you expected to include media — the Media Snapshot column reflects whether the uploads directory was bundled at the time the backup ran. A "No" value means the uploads directory was empty, inaccessible, or very large and was skipped. A "No" backup can still be restored — media files will need to be re-uploaded separately after restore.
Tips for keeping backups useful
Name every backup you intend to keep. The auto-generated filename contains the date and time but no context. A name like pre-product-launch-v2 or before-theme-swap-apr-23 tells you immediately what the snapshot protects, without cross-referencing a calendar. Rename within a minute of creating — before the next task pushes it out of mind.
Create a backup before every significant change. Theme swaps, product bulk-updates, user role changes, new plugin installs — any change that touches multiple areas of the site warrants a snapshot first. The backup takes a minute; an unrecoverable mistake can take hours.
Keep a short retention policy. Disk space is finite. A rolling window of three to five backups — the most recent weekly snapshots plus any named pre-deploy archives — is sufficient for most sites. Prune older archives on a regular schedule.
Audit the Media Library before large backups. Archive size is dominated by the uploads directory. A site with 4 GB of accumulated media exports a 4 GB archive. Remove unused media before creating a snapshot you intend to keep long-term or transfer to another server.
Download a copy before deleting from the panel. The Backups panel lists archives stored on your server. If the server is lost or the hosting account is terminated, the archives go with it. For genuine disaster-recovery protection, download each named archive to an off-server location — a cloud storage bucket, a team shared drive, or a local backup disk.
Pair backups with a naming log. Keep a short text file alongside your downloaded archives — one line per backup, listing the filename, the date, and the reason it was created. Three months from now, when you are looking at six similarly sized .sgen files on a shared drive, the log tells you instantly which one to restore.
Test a restore before you need it. A backup you have never restored is an untested backup. On a staging site, restore a recent snapshot end-to-end at least once a quarter. Confirm the site loads, product data is intact, and media renders correctly. If the restore reveals a problem (corrupt archive, missing media, wrong site settings), you find out during a planned test — not during an emergency.
Next step
To move a backup to another SGEN site or restore a snapshot, use the Migration → Import panel. To export individual content types without a full-site archive, use Tools → Post Migration. To export a single post or page, see Export a post.
Once you are satisfied a change is stable, rename the archive to reflect the outcome — post-theme-swap-confirmed is more useful six months from now than the auto-generated date stamp. Delete any test archives you accumulated during the operation while you still know what each one was for. A clean backups panel — four or five clearly labelled archives — is a sign a site is being operated well.