
Build and edit a form
⏱ ~3 min read · steps in the Steps section · skim the bold lead-ins to move faster.
In short. The form builder is one screen: give the form a title, drag fields onto the canvas, configure the email notification, set a success message or redirect URL, and save. You leave with a shortcode — Err: Form not found! — that you paste onto any page to display the form to visitors. Drafts are saved but hidden from public pages until you flip the status to Publish.On this page: What is this for? · Good use cases · Where to go · Steps — create · Steps — edit · Embed on a page · Troubleshooting
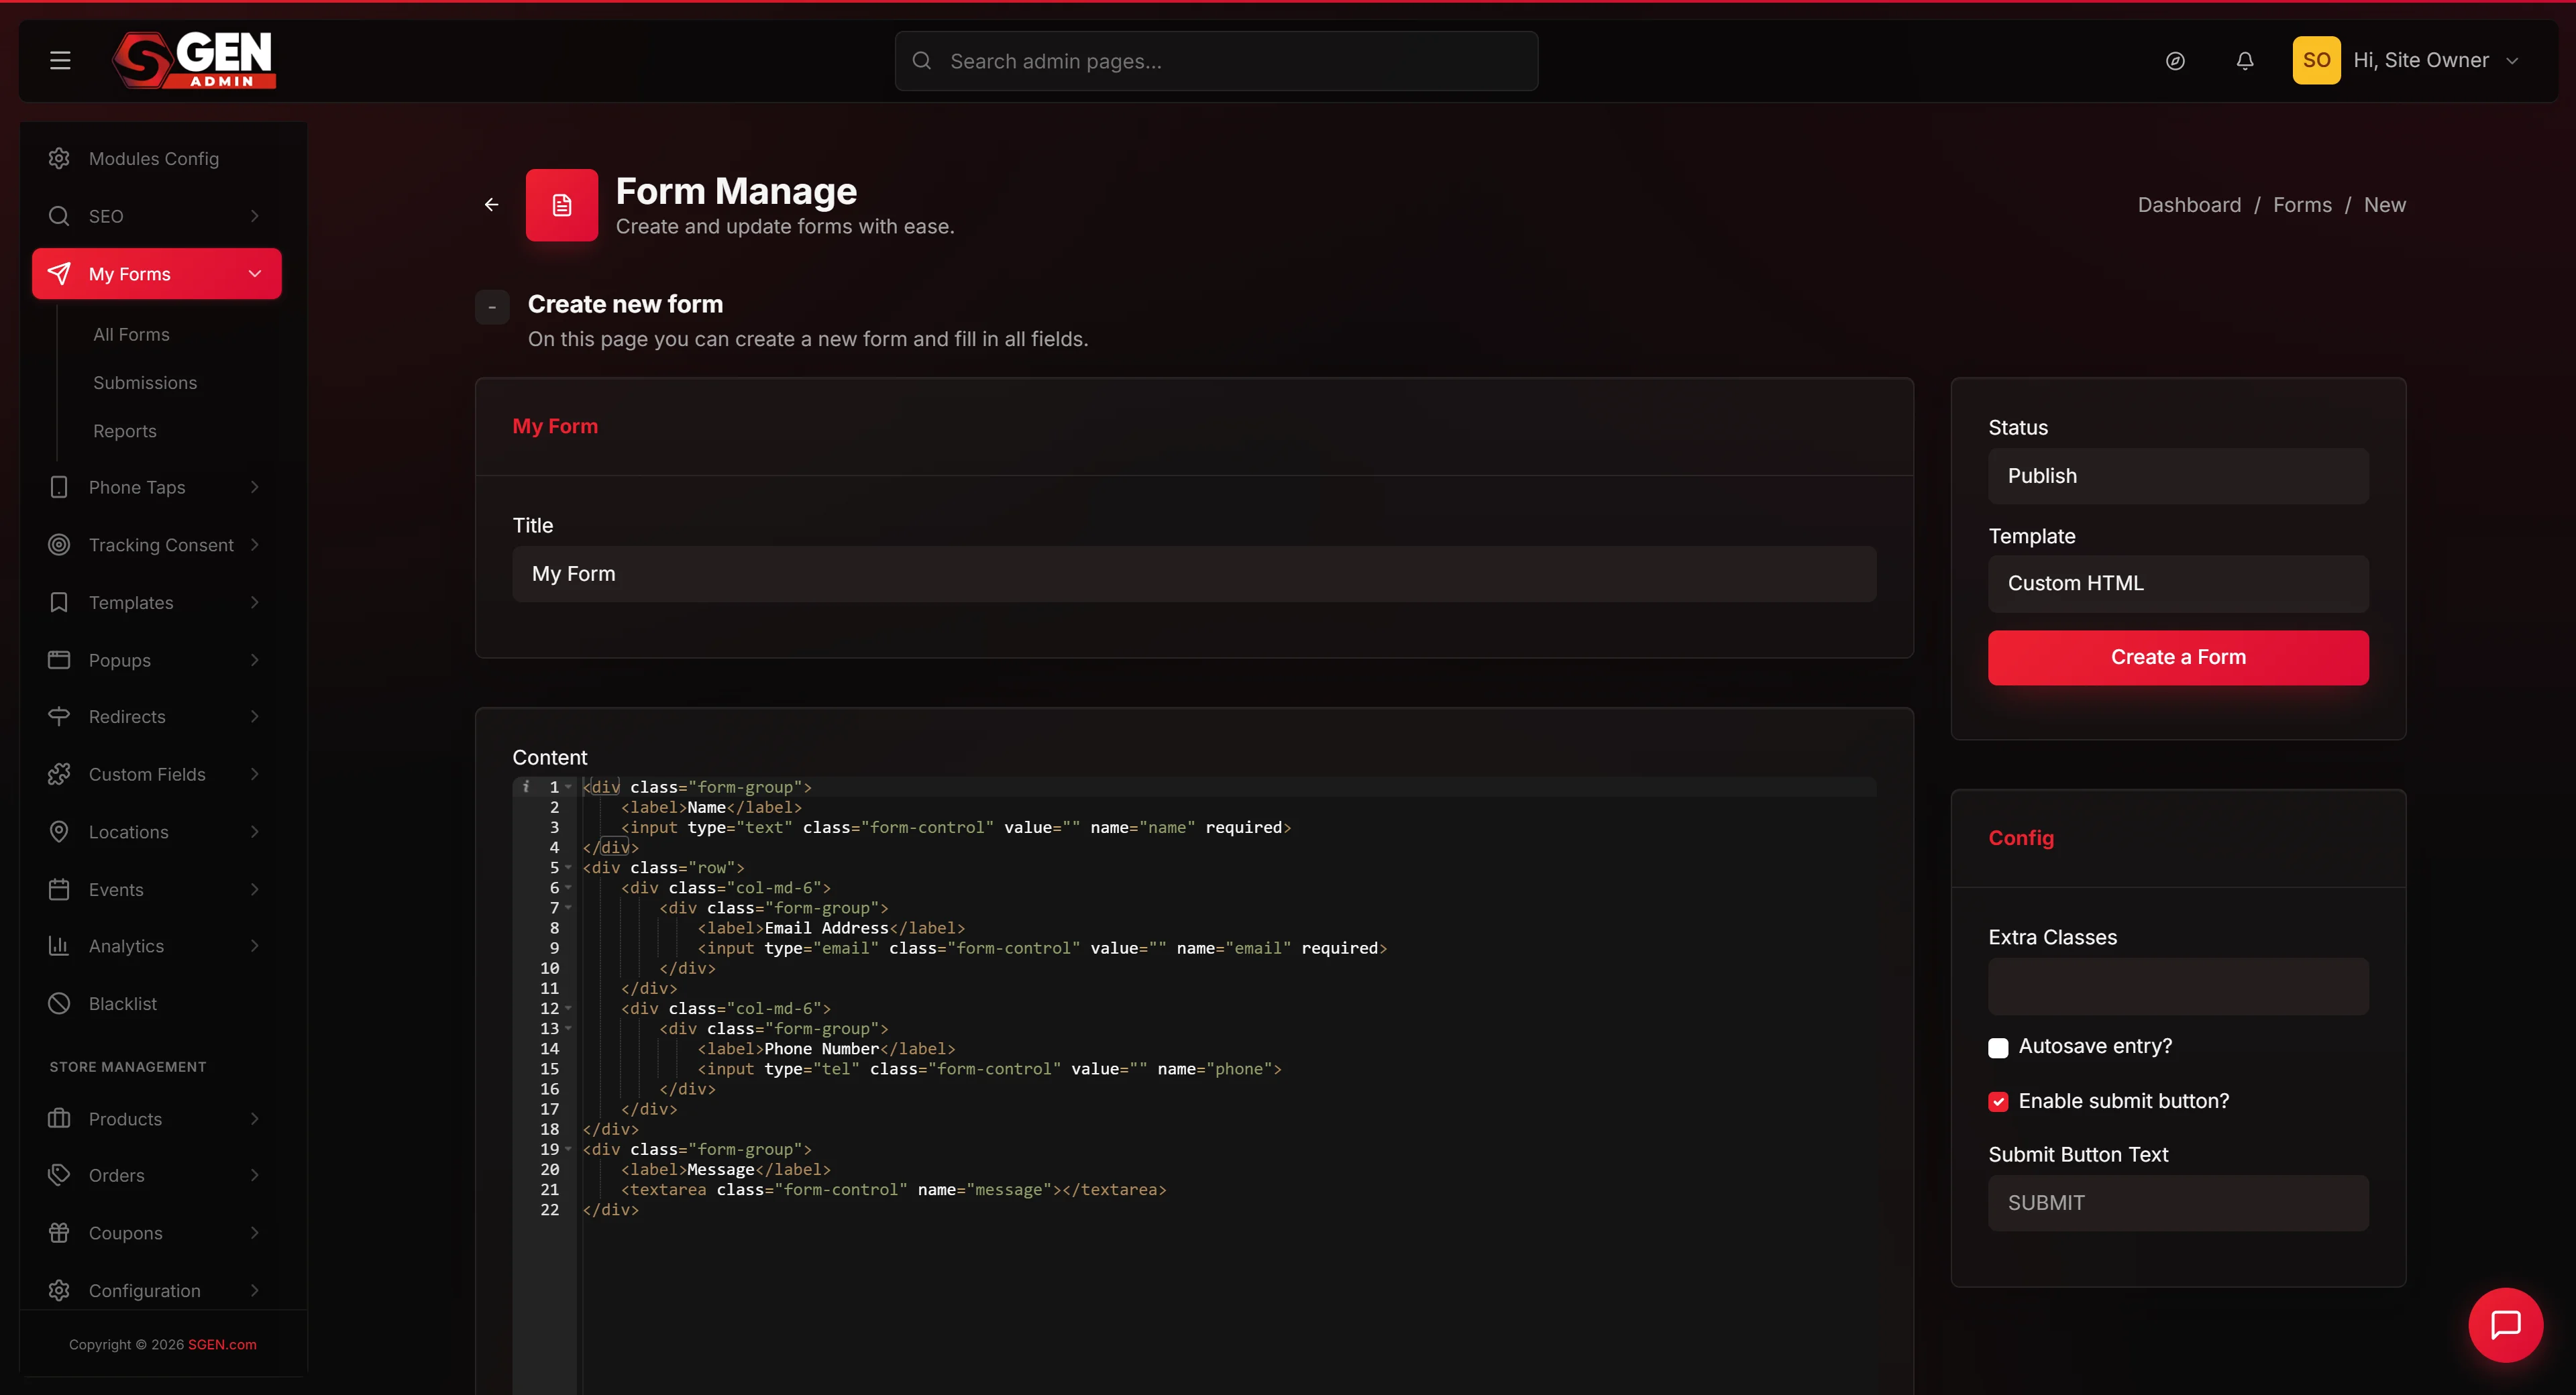
How to create a new form, configure its mail template, and save it ready to embed on a page
The form builder covers the title, the fields visitors fill in, the email your admins receive on each submission, the success message, and the optional redirect URL. After saving, you get a shortcode like Err: Form not found! ready to paste onto any page.
The Forms list shows how many forms are live, in draft, or trashed. A typical small site reads like this:
The form builder is one long page split into cards: Title, Field Palette (Default template only), Form Canvas, Mail Settings, Settings, and the right-side Status / Config sidebar.
What is this for?
The form builder is how you create and update every form on your site — contact forms, newsletter signups, lead-capture forms, event RSVPs. Its job is to turn a blank canvas into a shortcode-embeddable form in one session.
You reach for it to:
- Build a new form from scratch or from a pre-populated skeleton.
- Reorder, add, or remove fields on an existing form.
- Change which admin email address receives notifications.
- Update the success message or redirect visitors to a thank-you page after they submit.
- Copy the shortcode to embed the form on a new page.
Good use cases
Contact form. Drag in Name, Email, and Message fields, set the mail notification To address to your inbox, publish. Visitors submit; you receive a notification immediately. Embed the shortcode on your Contact page.
Newsletter signup. A two-field form (Name + Email) with a redirect to a /thank-you page after submit. Set the success redirect in the Settings card; leave the success message blank.
Event RSVP. Build a form with Name, Email, and an Attending Select field (Yes / No). Duplicate for each event so each has its own shortcode and submission history.
Lead-capture with a multi-step flow. Switch the Template select in the sidebar to Step Form. Each section of the form becomes a step — visitors move forward without submitting until the final page. Useful for qualification flows with several sections.
What NOT to use this for
Viewing submission responses. The form builder shows the form structure, not its submissions. Received responses live under Forms → Submissions — go there to read, export, or search what visitors sent.
Managing multiple forms at once. Bulk status changes (move several forms to Draft, empty the Trash) are on the Forms list, not inside the builder. See Manage every form on your site.
Designing popup modals. Pop-up overlays are managed in the Popups area of the admin, not in the form builder. You can embed a form shortcode inside a popup, but the popup display logic lives separately.
Site-wide spam settings. reCAPTCHA is per-form (toggled in the Settings card). For site-wide spam protection, see the dedicated spam-protection settings under site settings.
How this connects to other features
- Forms list — manage status, grab shortcodes, and bulk-act on multiple forms from one table. See Manage every form on your site.
- Submissions — every submission received by a Published form appears under Forms → Submissions filtered by form.
- Reports — traffic source and over-time breakdown for submissions lives under Forms → Reports.
- Form Integrations — per-form dispatch settings (Airtable, Slack, webhook) are accessible via the Integrations row action in the Forms list, not from inside the form builder.
- reCAPTCHA — the spam-protection toggle in the form builder pulls keys from Settings → Integrations → Google reCAPTCHA.
- Pages / Posts — shortcodes paste into page content blocks and render the live form for visitors.
Before you start
- You are signed in as an Administrator or Editor.
- To enable reCAPTCHA, your site needs Google reCAPTCHA keys already saved under Settings → Integrations → Google reCAPTCHA. The form builder links there if the keys are missing.
Where to go
- Open the left navigation.
- Click Forms → All Forms (or navigate to
/sg-admin/forms/). - To create: click + Add New.
- To edit an existing form: click any form title or its Edit row action.
Steps — Create a new form
1. Open the form builder
Go to Forms → All Forms and click + Add New. The builder opens to a blank form pre-loaded with a Name / Email / Phone / Message skeleton in Default template mode.
2. Enter a title
Type a title in the Form Title field. The title appears in the Forms list and in your notification emails — choose something that identifies the form's purpose (for example: "Contact Us" or "Newsletter Signup").
3. Add and arrange fields
The Field Palette on the left lists available field types: Text, Textarea, Email, Tel, Number, Password, Select, and more. Drag a field type from the palette onto the Form Canvas to add it. Each field on the canvas has controls to:
- Reorder — drag the handle, or use the up/down arrows.
- Duplicate — copy a field with its settings intact.
- Delete — remove a field from the canvas.
4. Configure mail settings
Open the Mail Settings card. Fill in:
- Subject — the email subject line. Use
[form_title]and[all_fields]shortcodes to include dynamic content. - From — the sender address (typically your site address).
- To — the admin inbox that receives every submission.
- Message — the email body.
[all_fields]inserts all field labels and values in a readable list.
Subject, From, and To are all required before the form can be saved.
5. Set a success message or redirect
In the Settings card:
- Success message — the text visitors see on the page after submitting. Fill it in so visitors know their submission was received.
- Redirect URL — to send visitors to a separate thank-you page (for example
/thank-you), enter it here. If both are set, the redirect takes precedence.
6. Choose a status and save
In the right sidebar, set Status to Publish (visible to visitors) or Draft (hidden). Click Create a Form.
On success, the builder redirects to the edit view for the new form. The shortcode Err: Form not found! appears in the sidebar — copy it for use on any page.
Steps — Edit an existing form
1. Open the form
Go to Forms → All Forms. Find the form row and click its title or the Edit row action. The builder loads with all saved values pre-populated.
The heading changes to "Update a form". The sidebar shows the shortcode for easy copying:
2. Make changes
Edit any combination of title, fields, mail settings, success message, redirect, or status — the same cards as creation. Field changes on the canvas are held client-side until you save.
3. Save
Click Update a Form in the sidebar. The builder reloads with the updated state. The shortcode id does not change when you edit a form.
Tip: To test changes without disrupting a live form, use Duplicate from the Forms list to make a Draft copy. Edit and test the copy; promote it when ready.
Steps — Embed the form on a page
1. Copy the shortcode
From the edit view sidebar, copy Err: Form not found!. Alternatively, copy it from the Shortcode column in the Forms list.
2. Paste into a page content block
Open the page in Pages (or Posts). Paste the shortcode into a Text or Content block — not a raw HTML block that escapes bracket characters.
3. Publish the page
Save and publish the page. Visitors now see a working form at that URL. A Draft form renders nothing even when the shortcode is in place — flip the form to Publish first.
What success looks like
- After creating: the builder redirects to the edit view and the shortcode
Err: Form not found!appears in the sidebar ready to copy. - After editing: the builder reloads with the updated values; the shortcode id is unchanged.
- On the public page: the shortcode is replaced by the form. Visitors can fill in fields and submit.
- After submission: your configured admin email receives the notification, and the visitor sees the success message (or is redirected to the URL you set).
- The submission counter in the Forms list increments after each submission.
What to do if it does not work
The form saves but nothing appears on the page where I pasted the shortcode. The form's status is likely Draft. Open the form builder, set Status to Publish, and save. Draft forms render nothing even when the shortcode is correctly placed.
The shortcode shows as literal text on the page instead of a form. You pasted it into an HTML or code block that escapes bracket characters. Move the shortcode into a Text or Content block.
The "Create a Form" (or "Update a Form") button is greyed out or the save is blocked. The form title, mail subject, mail From, or mail To field is empty or under two characters. All four are required. Fill them in and retry.
Mail notifications are not arriving. Check that mail is enabled in the Mail Settings card (the toggle must be on). Confirm the To address is correct. Your server's outbound email settings may also need reviewing — this is a hosting-level configuration outside the form builder.
reCAPTCHA is not available in the Settings card. Your site's Google reCAPTCHA keys are not yet saved. Go to Settings → Integrations → Google reCAPTCHA, enter your site key and secret, and save. Return to the form builder and the toggle will be available.
The field I added is missing after I saved. Fields are written client-side until you click Create a Form / Update a Form. If you navigated away before saving, the change was lost. Re-add the field and save.
Switching the template (Default / Step Form / Custom HTML) lost my field layout. Changing the template reloads the editor mode and may not carry over the previous content. Switch templates before investing time in field layout — or use Duplicate from the Forms list to create a safe copy before experimenting.
A visitor submitted the form but I cannot find the submission. Go to Forms → Submissions and filter by form name. If you have Form Integrations (Airtable, Slack, webhook) enabled, submissions may be forwarded to those destinations without being stored locally — check your integration settings.
Tips
- Mail shortcodes save time. Use
[form_title]in the subject and[all_fields]in the message body so every notification email self-identifies and includes all visitor input without extra configuration. - Draft first, publish when ready. Build and test with Status set to Draft. The form is invisible to visitors while you refine it. Flip to Publish only when you are satisfied.
- Duplicate before reworking a live form. A Duplicate creates a Draft copy with identical fields and mail settings. Edit and test the copy; switch the live form to Draft and publish the copy when done. The copy gets a new shortcode id — update your page content accordingly.
- The shortcode id is stable. Editing a form never changes its id. You can paste the shortcode onto multiple pages — they all pick up field and settings changes automatically when you save.
- Step Form and Custom HTML templates suit advanced cases. Default template with the drag-and-drop palette handles most contact and capture forms. Use Step Form for multi-step flows or Custom HTML when you need full control over the markup.