
Switch Your SGEN Theme Safely
Switching themes in SGEN preserves your content — pages, posts, media, forms, and URLs all survive. What can break is your custom styling: any CSS or code that targets the old theme's class names dies the moment the new theme loads. This is the 6-step protocol that gets you across safely, with a tested rollback ready if you need it.
Content survives, styles may not
Pages, posts, media, Custom CSS, and URLs all carry over. Theme-bundled component styles, template HTML, and theme-specific menu positions do not.
Staging first — always
Every step in the protocol runs on staging before touching live. Visitors never see a broken state while you adapt CSS and verify.
Snapshot is your rollback
Create a named backup before any changes. If the live switch reveals issues that cannot be fixed in 30 minutes, restore from snapshot — no negotiation.
What survives a theme switch
Before you plan anything, know the terrain. Most of your site carries over intact. What fails is anything tightly coupled to the old theme's class names or DOM structure.
Survives
Content and configuration
Pages and posts · Media library · Forms and form submissions · Custom CSS (loads on every theme — but may need selector updates) · Custom Codes · SGB Additional CSS (scoped to the page, not the theme) · URL structure and slugs · Users, roles, and permissions · Integrations · Analytics and attribution data.
Does not survive
Theme-coupled elements
Theme-bundled component styles · Template HTML (new theme's templates replace) · Theme-specific menu rendering and positions · Default colors, spacing, and typography (resets to new theme defaults) · Theme-specific custom fields · Sidebar widgets tied to theme positions · Theme-specific shortcodes · Theme settings — logo, colors, and brand kit need re-configuration.
When a theme switch is the right call
A theme switch is right when the underlying structure of the site needs to change — different page templates, different menu rendering, different footer model. Not when you want a fresh coat of paint.
Good reasons
Use the protocol for these
Your current theme is being deprecated · You are rebranding and the new design needs a new theme · You inherited a site on an old theme and want to modernize · A new SGEN theme ships that matches your direction better.
Wrong tool
Do not switch themes for these
Fixing a single visual bug — patch the CSS instead · Wanting different colors — update CSS custom properties · One page needing a different layout — rebuild that page in SG-Builder · Changing 2 days before a launch — wait until after. Allow 1–2 weeks of buffer minimum.
The safe-switch protocol — 6 steps
Run every step in order. Steps 1–5 happen entirely on staging. Step 6 is your live switch, timed for a low-traffic window.
1
Snapshot the current site
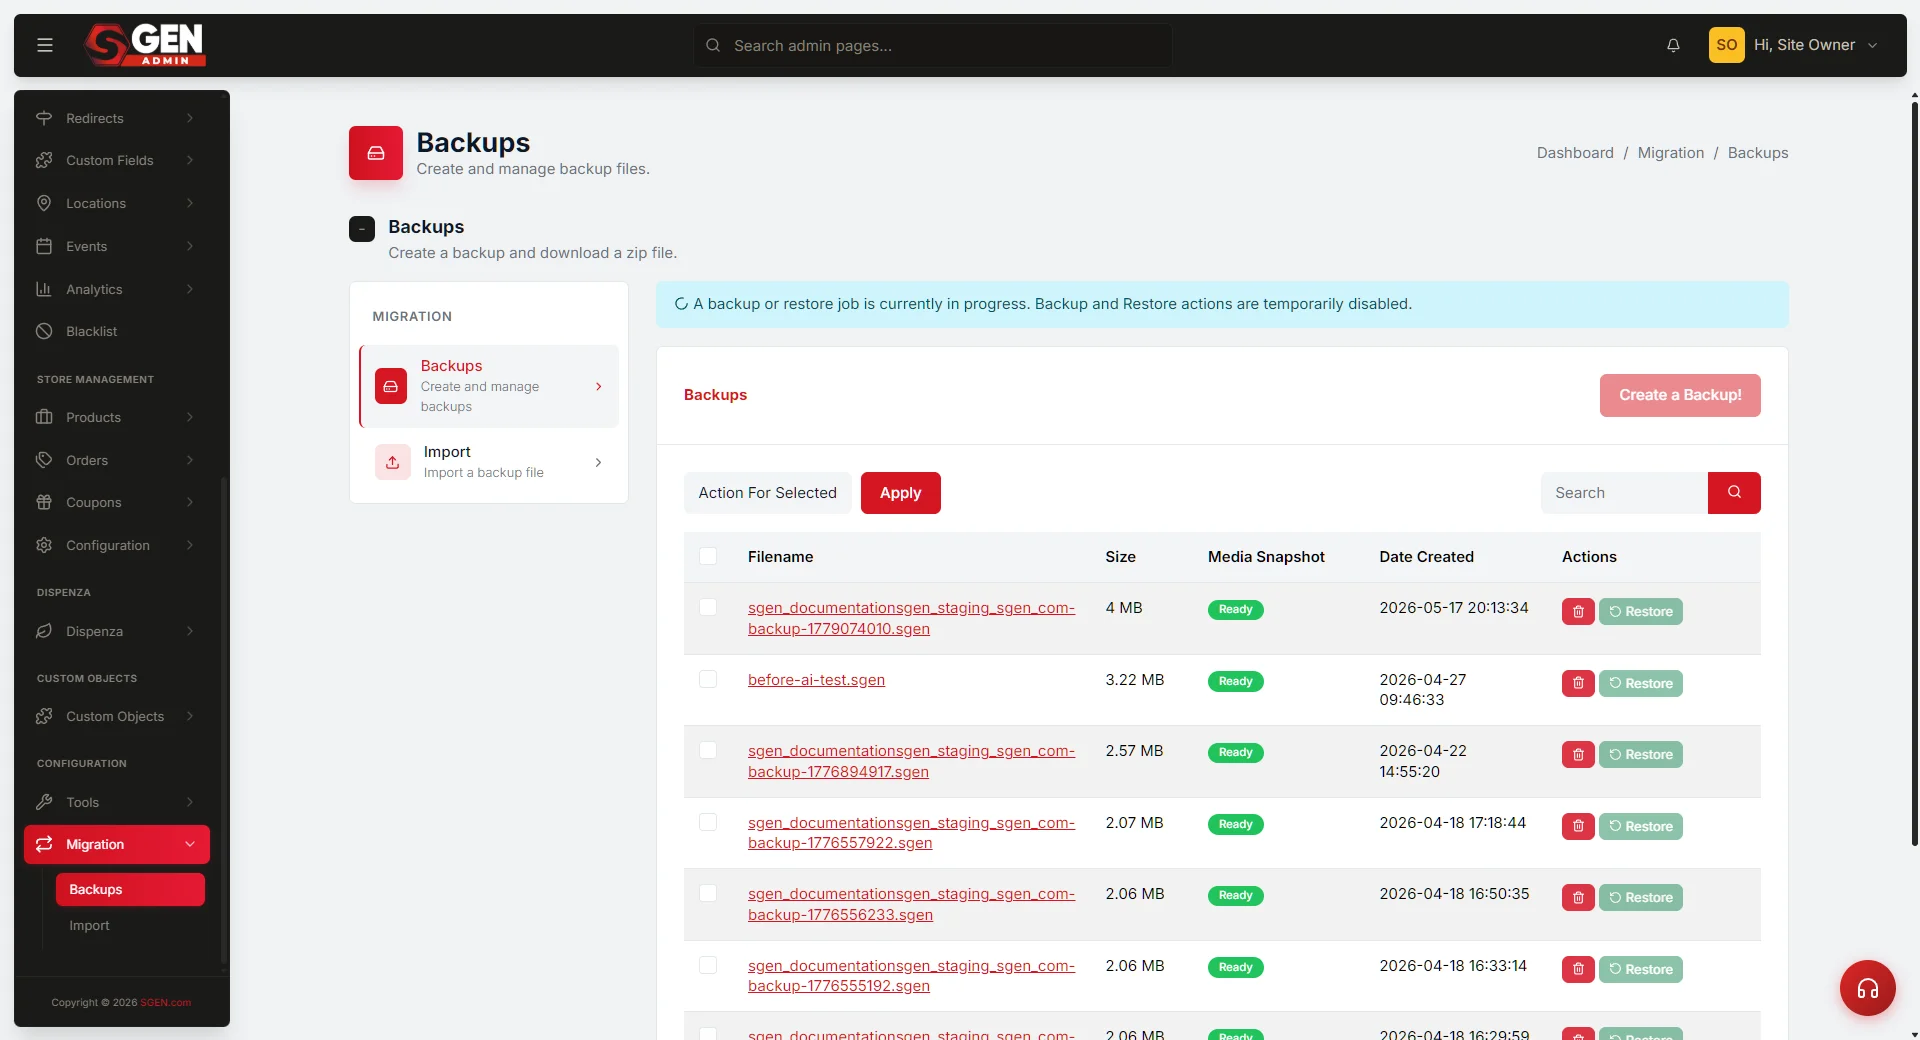
Go to the admin → Operations → Backups → Create backup. Name it pre-theme-switch-YYYY-MM-DD. Confirm the backup is downloadable and restorable before proceeding. This is your rollback — it must exist before any other step.
2
Inventory what is coupled to the current theme
Open these surfaces and note every theme-coupling signal. This list becomes your fix-after-switch work.
Custom CSS
Search for selectors that reference theme-specific class names — for example .theme-old-foo or .old-theme-header. Those selectors target nothing after the switch.
Custom Codes
Any script that targets theme-specific DOM — for example document.querySelector('.theme-old-banner'). Update to use stable data- attributes or IDs before the switch.
SGB pages
Components that use theme-specific blocks. If your current theme ships a custom block, the new theme will not have it. Note which pages need a rebuild with native SG-Builder components.
Menus, footers, and templates
Note menu position and nesting — some themes render menus differently. If footer markup is theme-bundled, it will not carry over. Customized page templates may be theme-scoped.
3
Preview the new theme on staging
Push the site to staging (the admin → Operations → Stage & Live → Push to staging). On staging, switch the theme. Walk every major page: home, 3–5 highest-traffic pages, blog index, a blog post, a contact form page, and an ecommerce or product page if applicable. Categorize every regression as "design intent change" (acceptable — new theme has new opinions) or "broken" (must fix before going live).
4
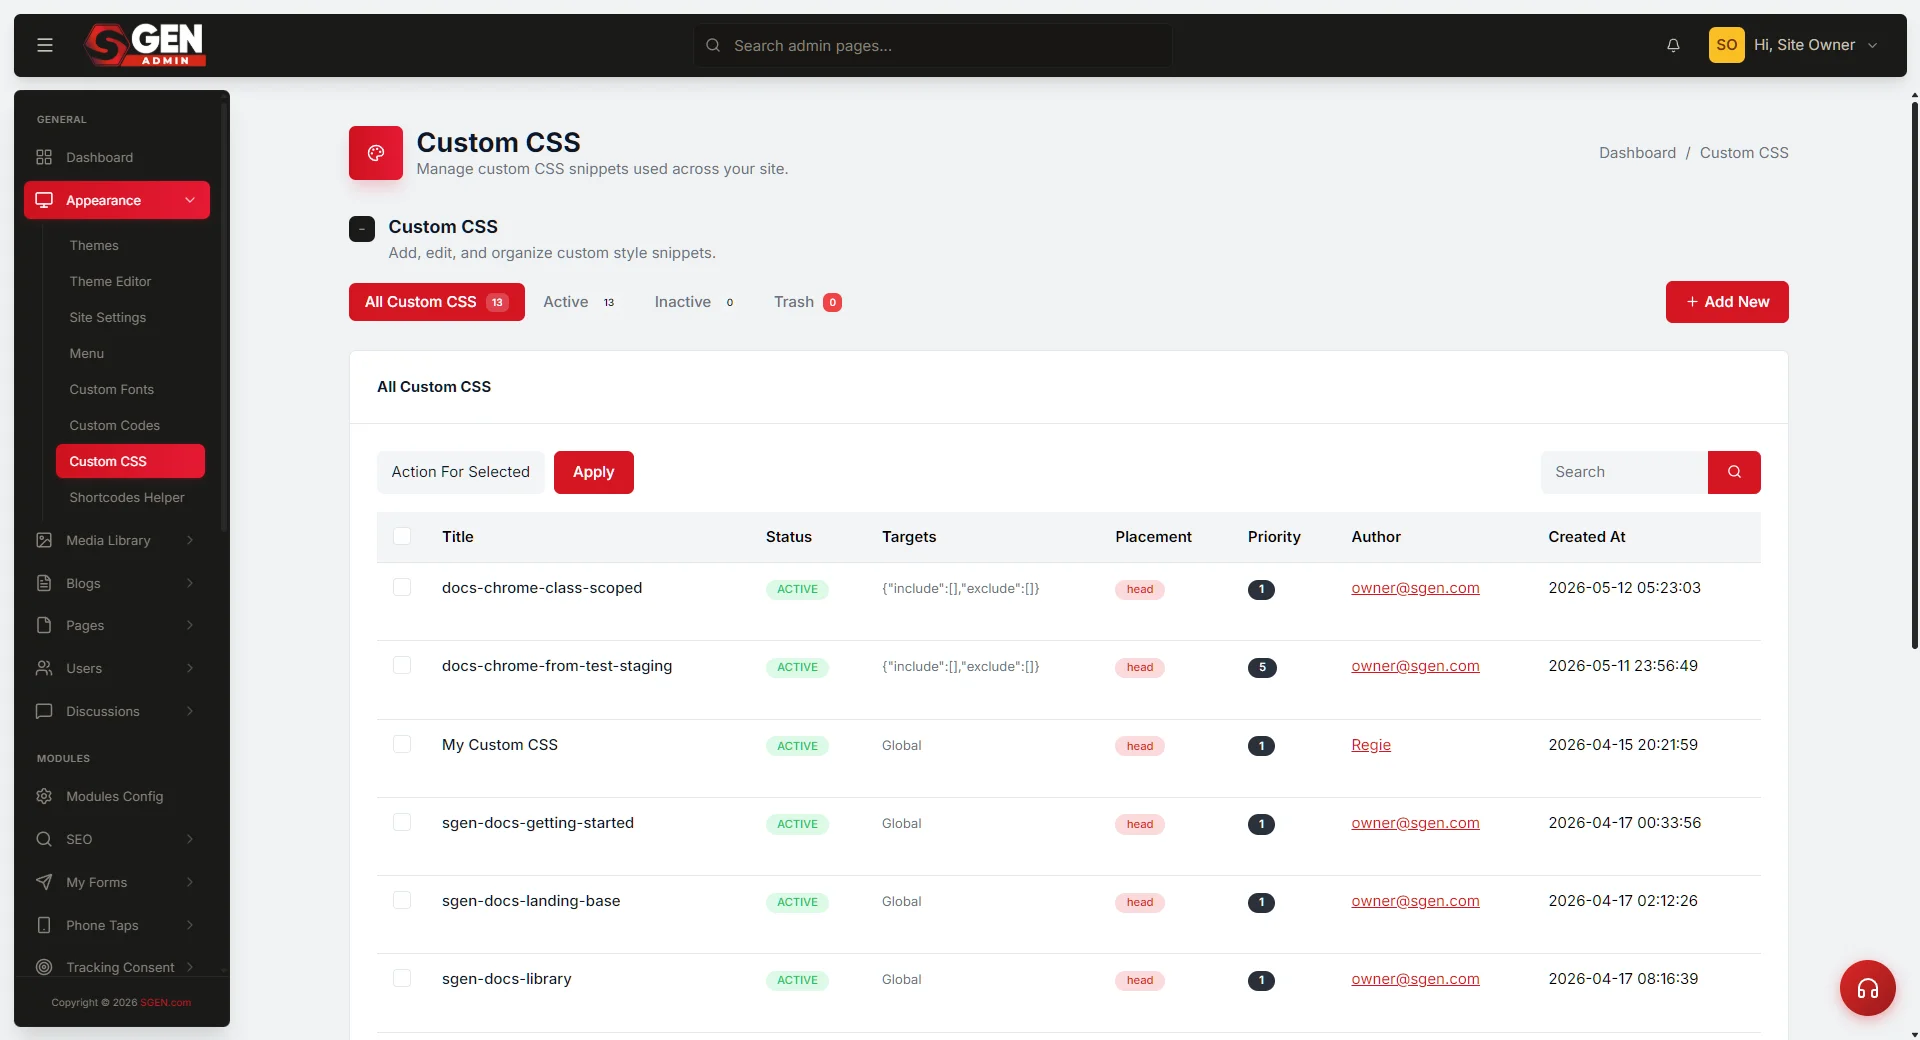
Adapt Custom CSS for the new theme
The Custom CSS file survives the switch and continues to load. But theme-coupled rules now target nothing. Remove dead selectors that reference old theme classes. Add new selectors for new theme classes where needed. Re-verify CSS custom properties — for example --brand-blue — still flow to all of the new theme's components. The new theme may use different variable names.
5
Verify Custom Codes
If Custom Codes target theme-specific DOM, update or remove them. Common patterns to check: tracking scripts attaching to specific buttons by class name; chat widget positioning anchored to theme-specific elements; custom analytics that count theme-specific page sections. Update these to use data- attributes or stable IDs that will survive future theme changes.
6
Switch on live and verify within 1 hour
Schedule the live switch for a low-traffic window. Go to the admin → Appearance → Theme → switch to the new theme. If you have been working on staging only, push staging changes to live via the admin → Operations → Stage & Live. Then immediately verify: top 5 pages render correctly at desktop and mobile · forms submit and notification emails arrive · analytics and tracking fire on the new theme's DOM · sitemap.xml regenerated correctly. If anything is broken: restore from the snapshot taken in step 1. Do not try to patch under live traffic.
Recognizing theme-coupled code
Theme-agnostic code uses CSS custom properties and semantic class names. Theme-coupled code uses the old theme's specific class names. Spot the difference before you switch.
Custom CSS — what breaks vs what survives:
/* These selectors WILL BREAK after a theme switch */
.theme-brightside-header { ... }
.old-theme-btn-primary { ... }
#brightside-footer-widget { ... }
/* These are theme-agnostic and WILL survive */
:root { --brand-charcoal: #3b2010; }
body { font-family: var(--font-base); }
.btn-primary { background: var(--brand-charcoal); }
Custom Codes — what breaks vs what survives:
// This WILL BREAK after a theme switch (targeting theme-specific DOM)
document.querySelector('.brightside-nav-toggle').addEventListener('click', ...)
// This is theme-agnostic (uses stable data attribute)
document.querySelector('[data-nav-toggle]').addEventListener('click', ...)
These are illustrative patterns. Confirm exact class names from your own theme's DOM before adapting.
Anti-patterns to avoid
These are the most common ways teams make a theme switch more painful than it needs to be.
Switching on live first, fixing issues as they appear
Visitors hit broken pages while you are debugging. Switch on staging first — always. Theme switches are not cheap to revert under live traffic.
Trusting that Custom CSS will catch everything
Only if you authored Custom CSS to be theme-agnostic. If your CSS targets theme-specific class names, much of it dies on switch. Audit first.
Deleting Custom CSS and starting fresh
You lose months of styling decisions for no reason. Adapt — do not restart. Remove the dead selectors; add new ones for the new theme's classes.
Testing only the homepage
Test at least 5 pages: homepage, a high-traffic content page, a blog post, a contact or form page, and a product or feature page. Each has different component patterns that interact with the theme.
Updating Custom CSS after the live switch
The right order is: adapt Custom CSS on staging first, verify, then switch on live. If you switch on live first and then fix CSS, your visitors see the broken state while you are editing.
Timing guidance
The right window depends on why you are switching and what is at stake.
Rebrand
Major rebrand
Schedule a 2-week window. Allow 1 week of cleanup and staging verification before any campaign launch.
Deprecated
Deprecated or retiring theme
Start the protocol at least 2 weeks before the deprecation date. Do not wait for the last week.
Inherited
Inherited site modernization
No urgency — pick a low-traffic period. Well-structured Custom CSS (design tokens separated from one-off rules) means fewer selectors to update.
Pre-launch
2 days before a launch
Do not switch. Wait until after the launch. A theme switch 48 hours before a campaign is high-blast-radius for zero benefit.
Worked example — Your Store rebrand
A team moved the Your Store apparel brand site from a minimal dark theme to a warmer editorial theme as part of a rebrand. Here is what they found and how long it took.
What the inventory found
Custom CSS: 2 theme-specific selectors (.old-dark-header, .old-dark-footer) — updated to new theme classes · Custom Codes: 1 chat widget targeting .old-dark-nav — updated to a stable data attribute · SGB pages: 3 pages using a "Dark Feature Block" shipped with the old theme — rebuilt using native SG-Builder Hero and Text components · Menus: 2 menus needed re-assignment to new theme menu positions · Theme settings: brand colors and logo needed re-configuration in the new theme's brand kit.
How the protocol ran
Snapshot created: pre-theme-switch-2026-04-15 · Inventory completed in 45 minutes · Staging switch and CSS/Custom Codes adaptation: 4 hours · Review walk: 30 minutes; 2 minor visual regressions found and fixed · Live switch at 10 PM (low-traffic window): 5 minutes · Verification at 10:05 PM: all clear. No visitor-visible issues. Total active work time: one afternoon.
Rollback plan
Have this plan ready before you flip live. If the switch reveals issues that cannot be fixed in 30 minutes, do not patch under live load — restore.
How to restore
Go to the admin → Operations → Backups → select pre-theme-switch-YYYY-MM-DD → restore. Restoration takes 2–5 minutes for most SGEN sites. After restoration, the live site is back to the pre-switch state.
After a rollback
A rollback is not a failure — it is the protocol working. Go back to staging, identify and fix the issue that caused the rollback, re-verify staging, and re-schedule the live switch for the next low-traffic window.
If something goes wrong
Common issues after a theme switch and where to look first.
Buttons lost their styling
Custom CSS targeted theme-specific button classes. Open Custom CSS and search for old theme class names. Update the selectors to the new theme's button classes.
Tracking stopped firing
Custom Codes target theme-specific DOM. Open Custom Codes and check for old theme class names in your tracking snippet. Update the selectors.
Homepage layout is broken
The new theme uses different header or footer templates. Rebuild the homepage wrapper structure, or pick a theme variant closer to your previous layout.
Menu disappeared
Theme-specific menu position. Go to Appearance → Menus and re-assign menus to the new theme's menu slots.
Where to find it in the admin
All the surfaces referenced in this protocol.
Appearance
Theme controls
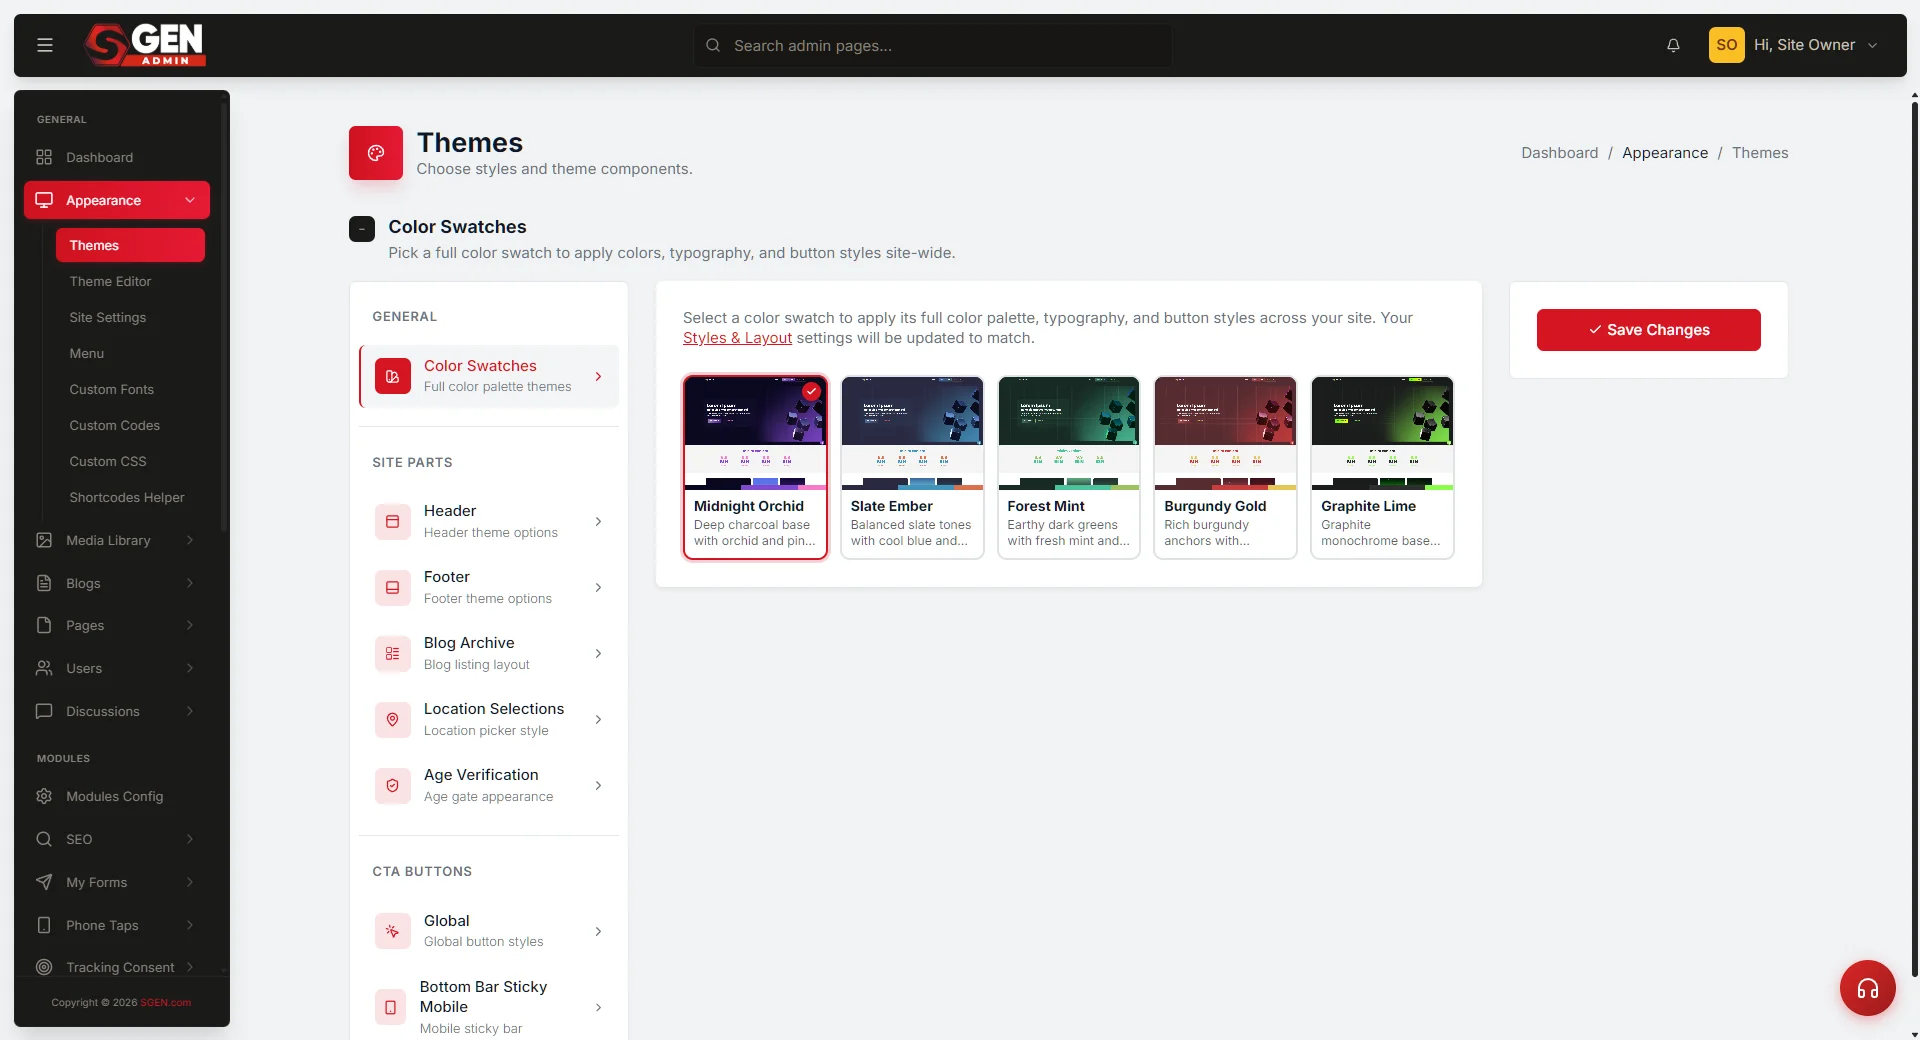
Theme picker: the admin → Appearance → Themes · Theme settings (brand kit, header, footer): the admin → Appearance → Theme settings · Custom CSS: the admin → Appearance → Custom CSS.
Operations
Snapshot and staging
Snapshot before switch: the admin → Operations → Backups → Create backup · Staging push: the admin → Operations → Stage & Live.
Heads up The platform does not warn you before a theme switch. Once you flip, the live site renders with the new theme immediately. That is exactly why you run the full protocol on staging first.