
How to create a new page on your site
⏱ 2-min answer below · full page ≈ 8 min · skim the bold lead-ins to move faster.
In short. A page is a stand-alone URL on your site — About, Contact, Pricing, landing pages. Go to Dashboard → Pages → Add New, pick a template, fill in the title and content, set your SEO fields, and click Save. The whole flow takes about five minutes. Creating a page does NOT add it to your nav — do that separately under Appearance → Menus after publishing.
On this page: Before you start · Steps · What success looks like · Troubleshooting · Examples · Tips
How to create a new page on your site
A page is a stand-alone area of your website — not a blog post. Examples include About, Contact, Pricing, FAQ, Terms of Service, and your homepage. The editor is a main content area with a right sidebar: main holds your title, slug, content, and optional Page Banner and SEO sections; the sidebar holds the publish controls (status, parent page, template, thumbnail) and the Save button.
The same editor is used for creating and editing pages. The only difference is that on a new page the form is empty and the button reads Save; on an existing page the form is prefilled and reads Update.
What is this for?
Use Add New when you want a fresh URL on your site. The page can be simple (a single block of text) or rich (a full landing page with a hero image, embedded form, and CTA). None of the choices you make — template, parent, status, slug — are permanent; you can change any of them later by clicking Edit in the Pages list.
When to use something else instead:
| Goal | Use this instead |
|---|---|
| Write a blog post | Dashboard → Blog → Add New |
| Copy an existing page | Duplicate action in the Pages list |
| Edit an existing page | Edit on the row in the Pages list |
| Change header, footer, or menus | Dashboard → Appearance |
| Upload images | Dashboard → Media |
| Set site-wide SEO defaults | Dashboard → Settings → SEO |
How this connects to other features
- Templates — When you click Add New, a template chooser appears. Templates are managed under Dashboard → Appearance → Templates. If the chooser is empty, check that surface first.
- Navigation menus — Creating a page does NOT add it to your nav automatically. After publishing, go to Dashboard → Appearance → Menus.
- Media library — The Page Banner background and Thumbnail are pulled from your Media library. Upload images first under Dashboard → Media if you haven't already.
- SG-Builder — For complex layouts, click Edit with SG-Builder after saving. That opens the visual drag-and-drop editor.
- Redirects — If you change a page's slug after launch, set up a redirect under Dashboard → Redirects so existing links don't break.
Before you start
Make sure you are logged in as an admin and can see the orange Add New button in the Pages list. If the button is missing, your account doesn't have page-creation permission — ask your admin to upgrade your role.
Have your page title, draft text, and any images ready. You can paste from a Google Doc or Word file — the editor preserves bold, lists, and headings. If your page will live under a parent, confirm the parent already exists before you begin.
Where to go
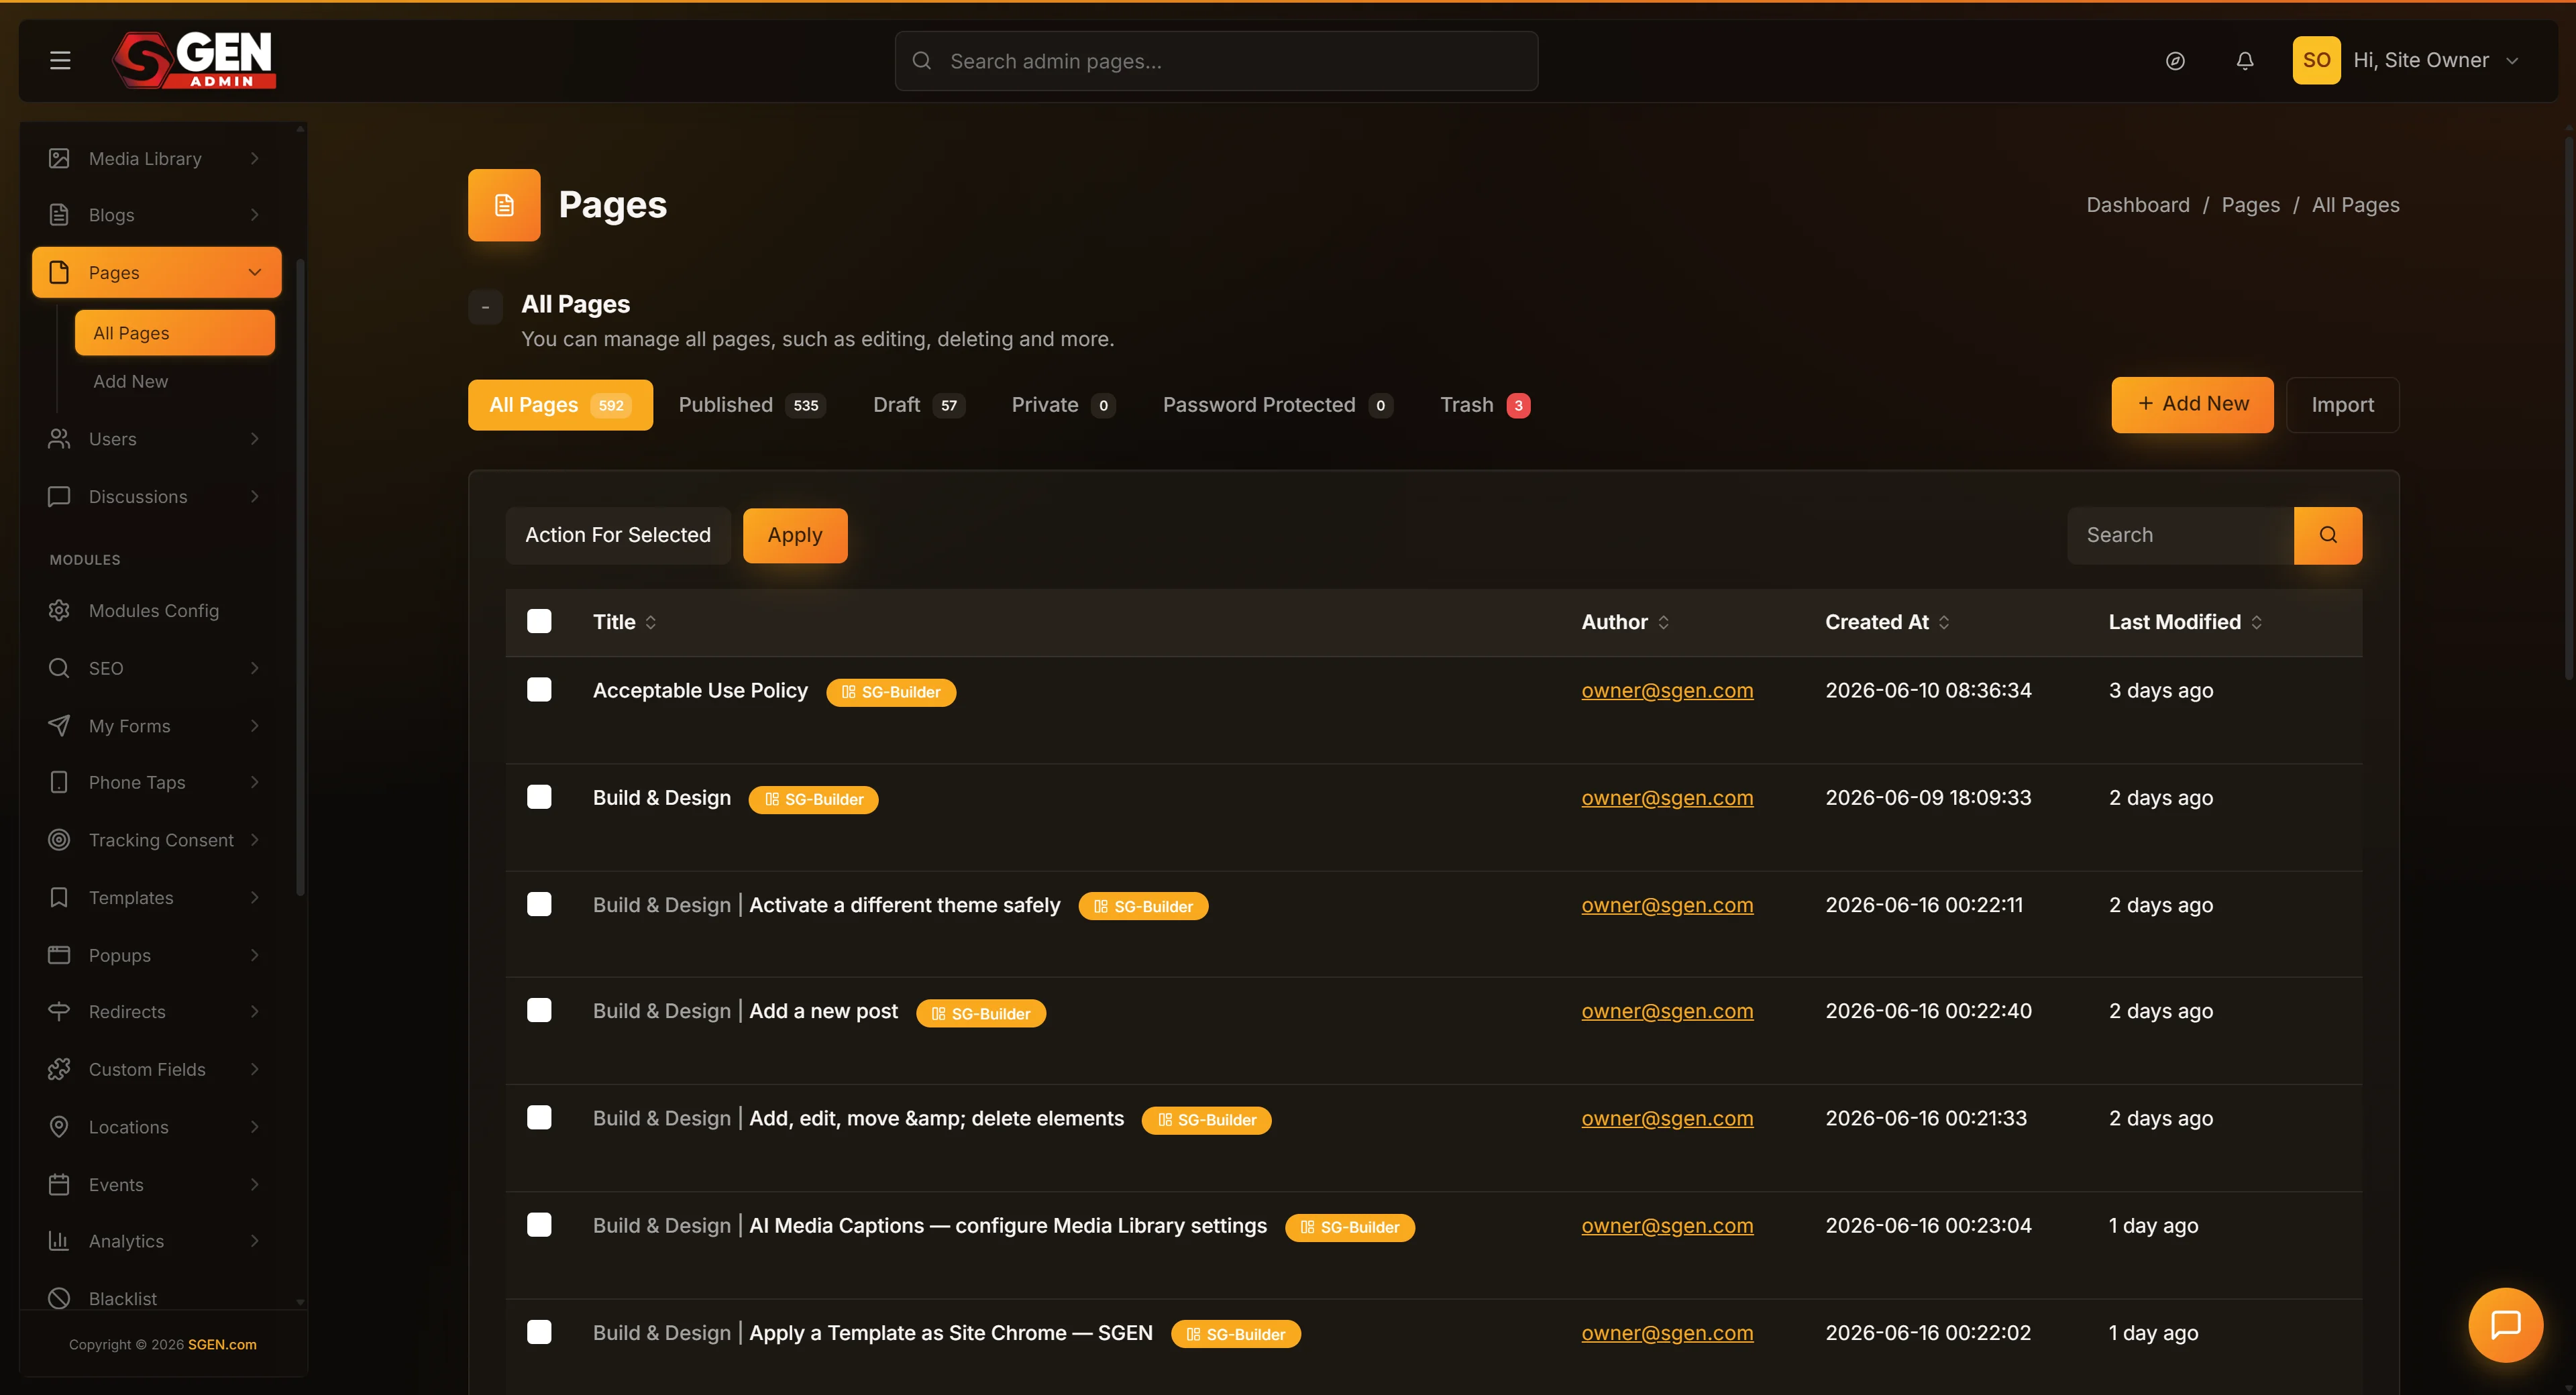
Open the admin sidebar, click Pages, then click the orange Add New button in the top right. You'll land on the new-page editor.
Steps — Create your first page
1. Pick a template or start blank
When the form loads, a template chooser appears. Pick whichever fits your page — or choose Blank for full control. You can change the template later from the sidebar dropdown.
| Template | Best for |
|---|---|
| Default | Typical content pages (About, Contact, Privacy Policy) — includes site header and footer |
| Landing | Marketing pages where you want to remove the site nav and footer |
| Sidebar | Pages with a related-links column or filter widgets |
| Blank | When you plan to build the entire layout in SG-Builder |
2. Fill in the title and slug
Type the page name in Title — this is what shows in browser tabs and your sitemap. As you type, Permalink auto-fills with a URL-safe version (About Us → about-us). Click into Permalink to override it: common reasons are shortening (/about), removing stop words, or matching an old URL.
3. Add your content
Click into Content and type or paste your body text. If you picked a template, placeholder content appears — replace it with your real copy. For longer pages, use H2 headings to break up sections, bulleted lists for scanability, and three-to-four sentence paragraphs. To embed a form, paste a shortcode like [contact_form id="3"] into the content area.
4. Set Page Banner, SEO, and thumbnail
Scroll below Content to the Page Banner card. If you want a hero image and headline at the top of the page, fill in the background image, headline, subheadline, text color, and CTA buttons. Below that is the SEO card — add an SEO Title (aim for 50–60 characters), SEO Description (150–160 characters), and SEO Image (landscape 1200×630 works across most platforms). In the sidebar, click Thumbnail to pick an image from Media.
5. Save the page
In the right sidebar, the Status dropdown defaults to Publish (live immediately). Change it to Draft to keep working in private — drafts are visible to logged-in admins but not public visitors. Click the orange Save button. A success banner appears and the form updates to show the page's permanent ID, an Update button, and a View History button. To skip straight to visual editing, click Edit with SG-Builder instead — that saves the page and opens it in the drag-and-drop editor.
What success looks like
After clicking Save, a green success banner reads something like "Page saved successfully!" The form header changes from "Create new page" to "Update [your title]", and View History appears in the top-right toolbar. If you set status to Publish, open a new tab and visit your site at the slug you chose (for example /about-us). If you set status to Draft, use the Preview link in the toolbar to see it without going live.
What to do if it does not work
- Add New button does nothing or bounces to the login screen. Your session has expired — log in again.
- Template chooser shows no templates. Go to Dashboard → Appearance → Templates, confirm at least one Page template exists, then return and click Add New.
- Save shows "Title is required" despite having a title. Click out of the title field first (triggers the blur event), then click Save.
- Page disappears from the Pages list after saving. The list defaults to showing only Published pages. Click the Drafts tab to find it.
- Save spinner runs forever. Reload the page — SGEN preserves your typing via flashdata, so the form usually restores intact.
- "Slug already in use" error. Another page has the same slug. Edit the Permalink field to something unique.
- Public URL returns 404 after publish. Wait a minute and refresh (page cache). If it persists, confirm Status is Publish and check whether a Redirects rule is intercepting the URL.
- Page Banner image isn't showing. Re-open the image picker and re-select — typed paths are ignored; the picker stores an internal ID.
- Can't find the page in the Pages list. Use the search box at the top of the list. Also check the All / Published / Drafts / Trash tabs.
Example 1: About Us page from scratch
Naomi wants a simple About page. She clicks Add New, picks Blank, types "About Us" in Title, lets the Permalink auto-fill to about-us, pastes three paragraphs of company history into Content, sets an SEO Title, picks a thumbnail, and clicks Save. The page is live at /about-us in seconds. She then adds it to the main nav under Appearance → Menus.
Example 2: Landing page for a campaign
The marketing team needs a focused page for a Black Friday sale. They click Add New, pick Landing, type "Black Friday — 30% Off Everything" in Title, edit Permalink to black-friday-2026, fill Content with offer details, toggle Is a landing page? to On (strips the site header and footer), set a Page Banner hero image, and click Save. The page goes live at /black-friday-2026 ready for paid traffic. After the campaign they flip Status to Draft — or set up a redirect to the regular Shop page.
Example 3: Contact page with an embedded form
Customer Support clicks Add New, picks Default, types "Contact" in Title, pastes [contact_form id="3"] into Content with a short paragraph about response times above it, sets Status to Publish, and saves. Visitors at /contact see the page with the form embedded inline; submissions appear in the Forms area of admin.
Example 4: Draft pricing page nested under a parent
The wholesale team clicks Add New, picks Sidebar, types "Wholesale Pricing" in Title, builds a comparison table in Content, sets Parent to "Wholesale" (URL becomes /wholesale/pricing), saves as Draft for team review, then flips to Publish the next day.
Tips
- Save early, save often. Click Save after every chunk of work — it's instant. Use Drafts for in-progress work.
- Pick a thumbnail. Pages without one look bare in the Pages list and won't get a social-share preview card.
- Mind your SEO fields. What you type in SEO Title and Description is what Google displays — make it specific to this page, not generic to your whole site.
- Use clean slugs.
/about-ushelps SEO and is easier for visitors to remember than/page-37. - Use parent pages. Setting a Parent nests the URL (
/about/teaminstead of/team) and signals site structure to search engines. - Preview before publishing. The Preview button opens a private tab so you can catch typos and broken layouts first.
- Landing-page toggle is page-scoped. It only hides site chrome on this single page — no other page is affected.
- Don't forget the menu. Page creation does not auto-add the page to your nav. Visit Appearance → Menus after publishing.
- Watch for slug collisions. If a blog category and a page share the same slug, one will get a number appended. Pick distinct slugs from the start.
Next steps
- Add the page to your navigation: Dashboard → Appearance → Menus.
- Add it to your sitemap: Dashboard → Settings → SEO.
- For richer layouts, open the page in SG-Builder — the visual drag-and-drop editor available from this same form.
- If it's part of a campaign, set up a redirect or short URL via Dashboard → Redirects.
- Read Editing existing pages for updates, removals, and history.
- Read Page editor fields explained for a full reference of every field and tab.