
Edit an existing popup
The popup editor lets you update any popup already on your site — change the wording, swap a promo, adjust which pages it appears on, or take it offline while you work on it. Most edits touch one or two fields and take under two minutes. Changes go live immediately for Published popups.
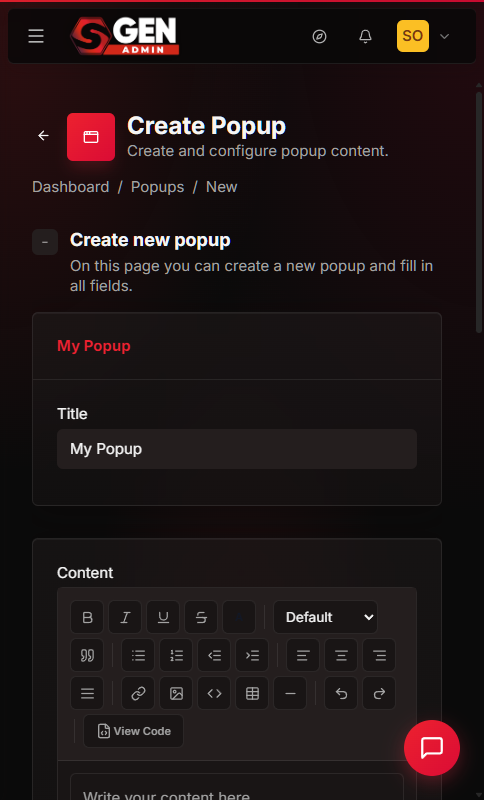
Same form, pre-filled
The edit page is the same form used to create a popup, but already filled with the current values. Change only what you need.
Status controls visibility
Published means live on your site. Draft means saved but hidden. Switching between them is a one-click pause — no deletion required.
No undo on save
Saving overwrites the previous version permanently. Copy the content elsewhere before editing if you need a backup of high-stakes copy.
What you can edit
The Edit form updates one popup at a time. Every field is editable: title, body content, display options, and status. The hashcode (for example, #sgp_47) is permanent and auto-assigned — it cannot be changed. The meta panel on the right shows when the popup was created, last modified, and by whom.
Content
Title and body
Title — the internal admin label. Visitors never see it. Update it to keep your list scannable.
Body — what visitors see when the popup appears. Use the Text Editor or paste HTML directly, including tags like <h2> for a headline and <p> for paragraphs.
Display
Status and options
Status — Published (live) or Draft (hidden). Controls whether the popup fires on your public site.
Autoload — fires on page load vs only via hashcode click.
Popup Width — pixel width of the overlay panel.
Disable Close Button — show or hide the X icon visitors use to dismiss.
Avoid Multiple Popup — opt in or out of the one-at-a-time rule.
How to edit a popup — step by step
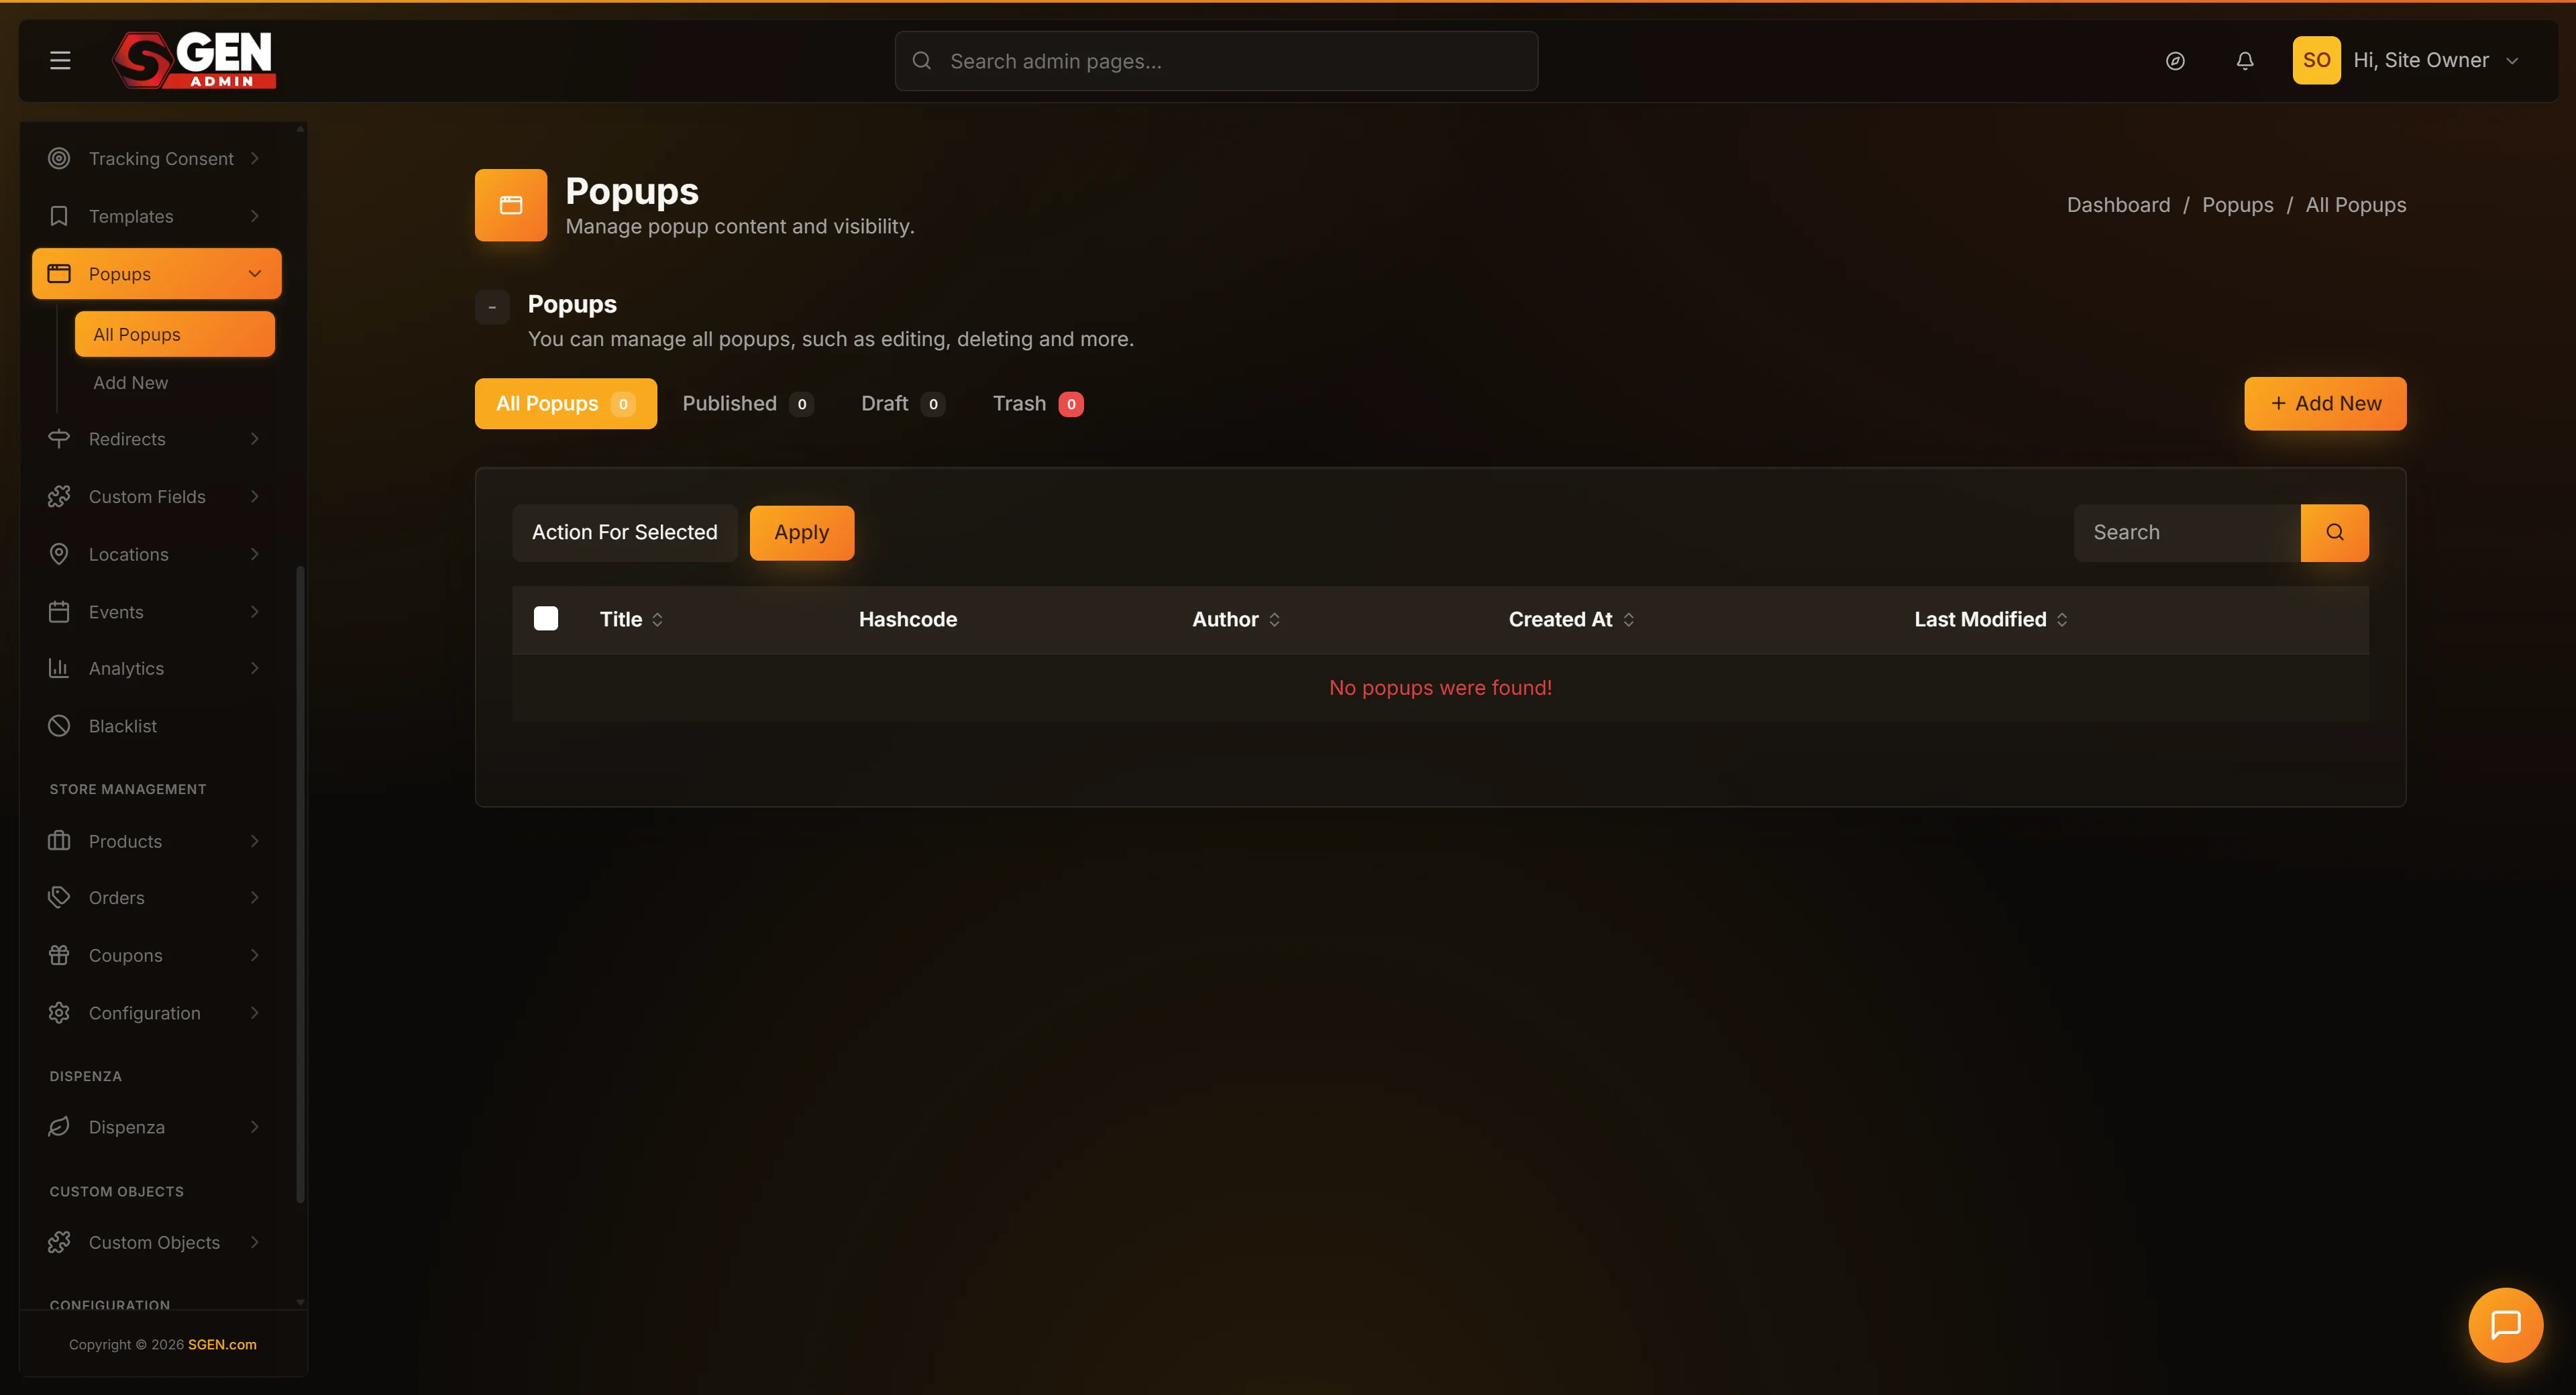
From your dashboard sidebar, go to Popups. Find the popup you want to change and follow these steps.
1
Open your popup list
Click Popups in your dashboard sidebar. You will see a table of every popup with filter tabs at the top — All Popups, Published, Draft, Trash. If you don't see the popup you want in All Popups, check the Draft tab (popups you've started but not published) or the Trash tab (popups moved to Trash but not permanently deleted).
2
Click Edit on the row
Hover over the row to reveal row-actions, then click Edit. The editor opens with the popup's current title, content, configuration, and status already filled in. You can also reach the editor directly if you've bookmarked a specific popup's edit page — the ID is the number after #sgp_ shown in the meta panel on the right.
3
Make your changes
Update whichever fields you need. Most edits are a single field — a promo code, an expiry date, or a status switch. If you're unsure what a checkbox does, hover the question-mark icon next to it. If you're not sure whether to check a box, leave it as it was — most checkboxes have safe defaults.
4
Click Update a Popup
The button at the bottom of the form saves your changes. After saving, you'll see a green confirmation banner and the page reloads with the saved values. The Modified date in the right column updates to today. If the popup is set to Published, visitors see the changes on their next page load — there is no separate publish step.
5
Verify on your live site
Open your site in a new private (incognito) browser window — this gives you the cleanest visitor's-eye view. Browse to the page where the popup should appear and confirm it shows your updated content. A private window is a fresh visitor, so the popup will show even if "Show only to first-time visitors" is enabled.
Common use cases
The popup editor is built for fast, repeated edits. Here are the patterns that come up most often.
Update a promo or contact email
Edit one field, save, done. Changes go live immediately for Published popups. No separate publish step.
Take a popup offline temporarily
Switch Status from Published to Draft. The popup is hidden from all visitors instantly. Switch back to Published when you're ready — no deletion, no recreation.
Refresh seasonal content
Reuse an existing popup (title, hashcode, and configuration intact) with updated body copy instead of creating a new one. Move it to Trash after the season, then restore from the Trash tab next year.
Fix a typo or broken link
Edit the body field, click Update a Popup. The fix is live immediately on Published popups.
What this editor is not for
A few things the popup edit form does not do — and what to use instead.
Limitation
Previewing visitor output
The editor shows the form, not a live render. To preview, save as Published and visit your site in a private browser window.
Limitation
Version history
Saving overwrites the previous content with no undo. Copy the old content elsewhere before editing if you need a backup.
Limitation
Scheduling
There is no "publish on date" feature. Save as Draft, then switch to Published manually when you're ready.
Limitation
A/B testing
The editor stores one version. For a comparison, create two separate popups and rotate which is Published.
Troubleshooting
If something doesn't work as expected after saving, work through these checks before escalating.
Changes don't appear on the live site
Check the Status dropdown — if it's set to Draft, your changes are saved but not visible to visitors. Switch to Published and save again. Then open your site in a private browser window; if you're using your normal browser, you may have already dismissed the popup. Also confirm the popup's configuration matches the page you're viewing — for example, a popup set to show only on the home page won't appear on a product page.
Clicking Edit opens a "page not found" screen
The popup may have been permanently deleted by another team member. Check your popup list — if it doesn't appear in any tab including Trash, it's gone and can't be recovered. Otherwise, you may be following a stale bookmark. Go back to the Popups list and click Edit fresh from there.
The Edit form opens with the wrong content
Confirm you're editing the right popup — check the Title at the top of the form against your list. If you have multiple popups with similar titles, the hashcode in the right column (for example, #sgp_47) is a unique identifier. Close any extra browser tabs showing other popups and start fresh from the popup list.
"Edit with SG-Builder" opens empty
This option is currently in beta and known to load empty. Go back to your popup list, click the standard Edit row-action, and edit your content in the HTML field directly.
The save button doesn't seem to do anything
Check your internet connection — if it dropped during the save, the request may not have completed. Look at the top of the edit form for an error banner — for example, an empty Title field prevents the save and shows a red banner. Try a hard refresh of the page (Ctrl+Shift+R on Windows, Cmd+Shift+R on Mac) to clear any stale form state.
Heads up: Published edits go live immediately — there is no staging step for popups. If you need to make changes without affecting visitors, switch the Status to Draft first, make your edits, then switch back to Published when you're ready.