
Menus
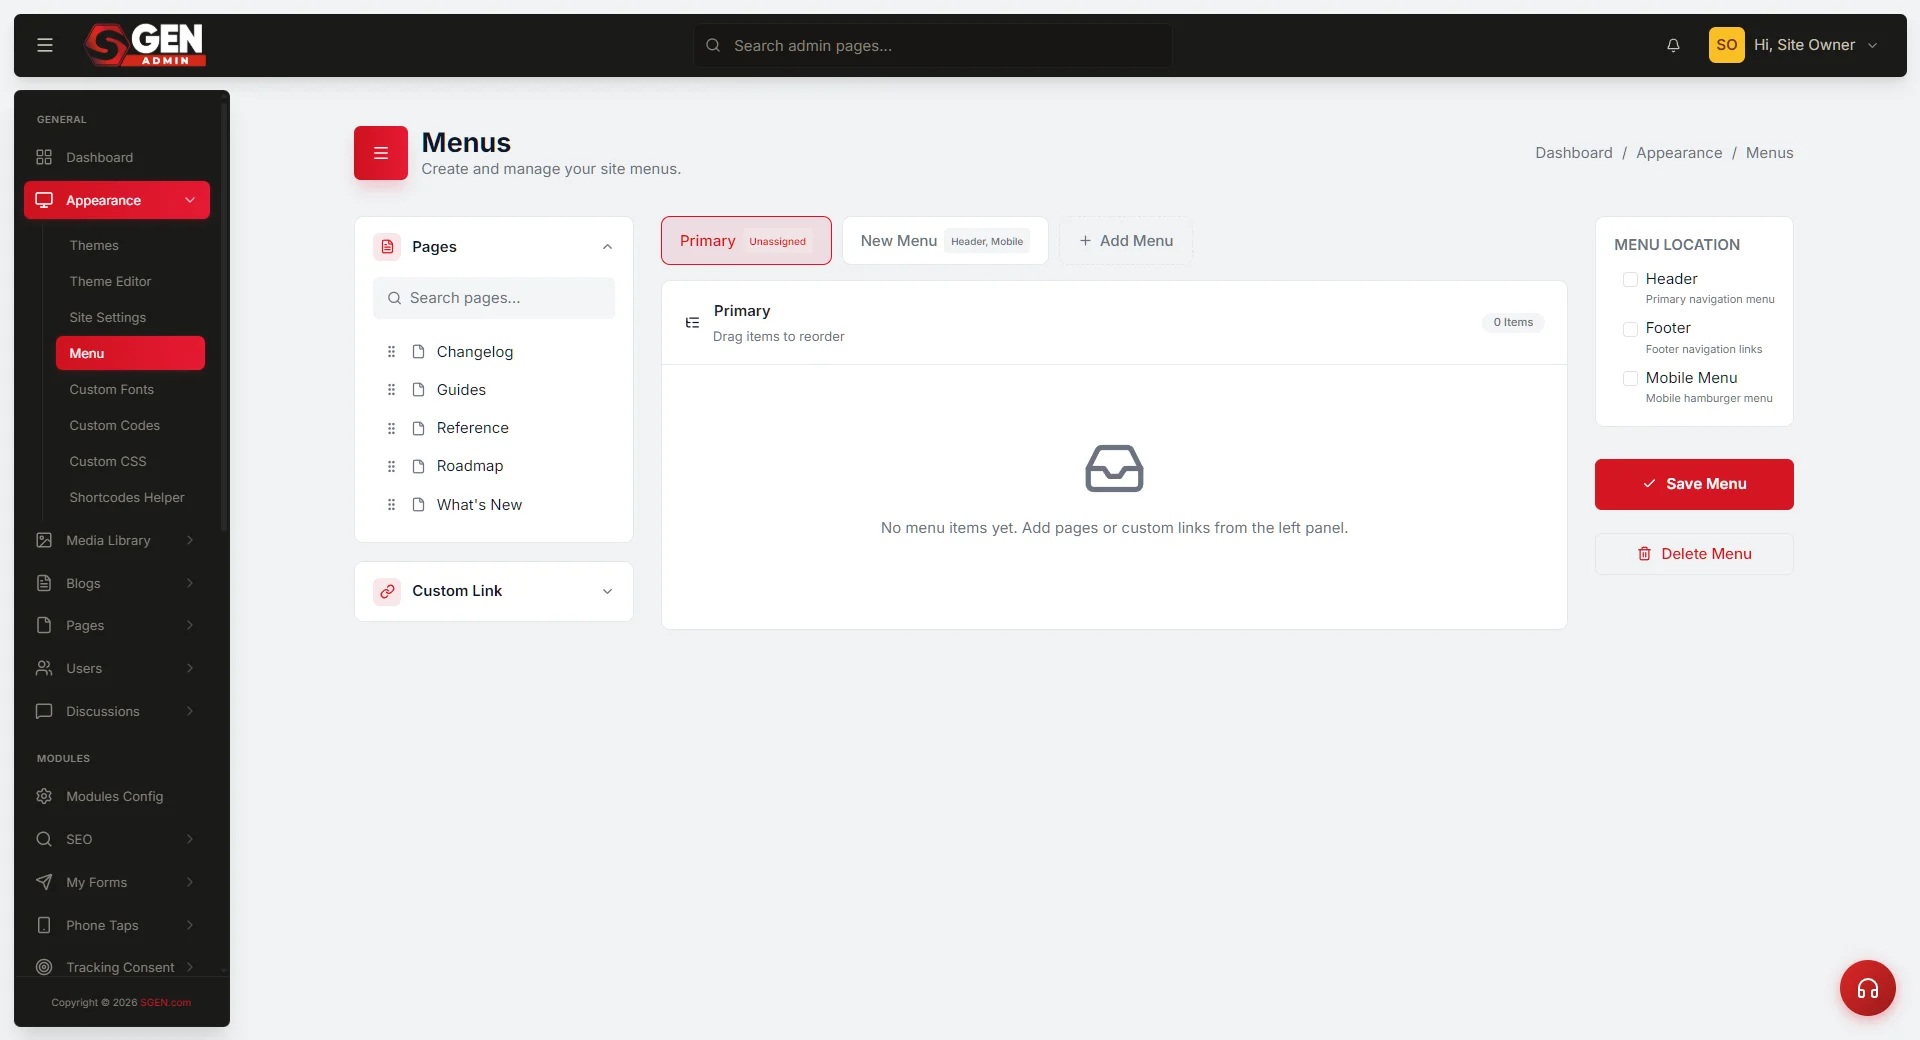
⏱ ~3 min read · reference page — skim the Steps and troubleshooting table for the fastest path.
In short. Menus is the SG-Admin surface for site navigation. Build one or many named menus, add items (pages, external URLs, or anchors), nest and reorder by drag-drop, then bind each menu to a theme location — header, footer, mobile drawer, or a custom location. Mega-menus are built through nesting; no separate plugin required. SG-Admin sidebar → Menus to start.
On this page: Registry vs structure · Anatomy of a menu · Steps · Troubleshooting · Field reference · FAQ
Menus is part of SG-Core — navigation is a site constitutional surface, not an optional add-on. The same controls handle a simple header link list and a multi-column mega-menu.
Not this module:
- Visual appearance of the nav bar — that lives in Appearance.
- Page route/slug changes — use Pages. A renamed page does not automatically update menu items pointing at the old route.
- Per-visitor or role-based visibility logic — Menus is static-structure only.
Before you start:
- Confirm the destination page or URL exists.
- Decide which theme location the menu should bind to (header, footer, mobile drawer, custom).
Where to find it: SG-Admin sidebar → Menus. The landing view lists every menu on the site. Open a menu to edit its structure; open the location bindings panel to assign menus to theme locations.
Menu vs Menus — the registry split
Two surfaces, related but distinct:
| Surface | What it is | When you open it |
|---|---|---|
| Menus (the index) | Registry of every menu on the site | Adding a new menu, deleting an unused one, scanning what exists |
| Menu (singular) | One specific menu's structure | Editing items, reordering, nesting, binding to a location |
} The registry is the entry point. Every edit happens inside a specific menu.
Menu Builder vs Menus module — clearing up the term
Two different things share the word menu in SGEN:
- Menus (this page) — the admin module that defines site navigation. Top header, footer, mobile drawer, mega-menu.
- Menu Builder — the in-builder navigation component used when constructing a navigation block inside SG-Builder. Reads from a menu defined in this module.
If you need to add a top-level item to the rendered header, you are in the right module. If you are inside the SG-Builder editor placing a navigation component on a custom page, that is the Menu Builder — different surface, same data source.
Anatomy of a menu
A menu is a named structure made of ordered items. Each item has:
| Field | What it sets |
|---|---|
| Label | The text shown to visitors |
| Destination | Internal page, external URL, or anchor link |
| Parent | None (top-level) or a parent item (nested) |
| Order | Position within its level — drag to reorder |
| Open behavior | Same tab or new tab |
| Visibility | Toggle to hide without deleting |
A menu has zero, one, or many location bindings. A menu with no binding still exists in the registry — it is not yet rendered.
Nesting and hierarchy
Nest items by dragging an item under another item — it becomes a child. Children can have grandchildren. The render depth supported on the site depends on the theme; deeper nesting beyond the theme's render depth still saves, but extra levels do not appear.
Drag to:
- Reorder at the same level.
- Demote (indent) under the item above.
- Promote (outdent) back to the parent's level.
Mega-menu structures
A mega-menu is a navigation panel that opens below a top-level item and displays a wider grid of sub-items, often grouped into columns. In SGEN, a mega-menu is built using nesting plus the theme's mega-menu layout for the target location.
Authoring path:
- Create the top-level item that opens the mega-menu.
- Nest child items under it for each column heading.
- Nest grand-child items under each column heading for the column contents.
- Bind the menu to a location that the theme renders as a mega-menu.
Steps
1. Open Menus.
From the admin sidebar, click Menus. The registry loads and shows every menu on the site. If this is the first menu on the site, the list is empty.
2. Create or select a menu.
- To create: click New Menu, name it, and save. The new menu opens with an empty item list.
- To edit an existing menu: click its name in the registry. The structure view loads.
3. Add an item.
Click Add Item. Pick a destination:
- Page — choose from the site's published pages.
- External link — paste the full URL.
- Anchor — choose a page and add the
#section-id.
Set the label, then save. The item appears at the bottom of the current level.
4. Reorder and nest.
Drag the item to its position. Drop it under another item to nest it. The structure saves on each move.
5. Bind to a location.
Open the Location bindings panel. Pick a theme location (Header, Footer, Mobile Drawer, or a theme-defined custom location) and assign the menu. Save. The menu now renders at that location on the public site.
6. Verify on the site.
Open the public site in a new tab. The menu renders at the bound location. If you do not see the change, hard-refresh the page to clear cached navigation markup.
What success looks like
After save, three observable outcomes confirm the menu is live:
- The registry shows the menu with its current item count and location bindings.
- The structure view inside the menu shows items in the saved order and nesting.
- The public site renders the menu at every location it is bound to.
What to do if it does not work
| Symptom | Likely cause | Fix |
|---|---|---|
| Menu does not appear on the site after binding | Theme caches navigation markup | Hard-refresh; if cached at the CDN layer, give it the cache window to clear |
| Item points to the wrong page | Destination page was renamed; menu item still holds old route | Open the item, re-pick the destination, save |
| Drag-drop does not reorder | Browser session timed out | Reload the page; sign in if prompted; reorder again |
| Nested items render flat on the site | Theme location does not support nesting at that depth | Bind the menu to a location that does, or shorten the nesting depth |
| Mega-menu shows as a plain dropdown | Theme location is not configured for mega-menu render | Switch the binding to a mega-menu-capable location, or update the theme location config |
| Item visibility toggled off but item still shows | Cache | Hard-refresh; if persistent, save the menu again to force a publish |
Examples
Example 1 — Adding a new section to the main header
A new Pricing section page shipped, and the team wants it visible from every page of the site.
Open Menus → open Main Header → click Add Item → pick the new Pricing page → label it Pricing → save → drag into position between Product and Customers. Public site shows Pricing in the header after the next page load.
Example 2 — Building a mega-menu for the Solutions section
The Solutions item in the header should open a 3-column panel: By Industry, By Role, By Use Case.
Open Menus → open Main Header → confirm Solutions is the top-level item → add three children under it (one per column heading) → add sub-items under each column heading for the actual links → bind the menu to the Header (mega-menu) location → save. The Solutions item now opens a wider panel.
Example 3 — Swapping the footer menu for a localized site section
A help-center sub-section needs a different footer with help-specific links.
Open Menus → click New Menu → name it Help Footer → add the help-specific items → bind it to the Footer (help section) location defined by the theme. The main footer remains unchanged on the rest of the site.
Reordering and renaming
Reordering happens entirely in the structure view. Drag an item up or down to change its position within the level. Drag an item under another item to nest it; drag a nested item out to promote it back to the parent level.
Renaming an item is a two-step:
- Click the item to open its detail panel.
- Edit the label, save. The new label replaces the old one on the next public-site render.
Renaming changes the visible text only. The destination URL the item points at does not change unless the destination is also edited. If the underlying page slug changes elsewhere (in the Pages module), the menu item still points at the old slug until edited — this is the most common cause of broken menu links after a site reorganization.
Hiding vs deleting an item
Two ways to remove an item from the rendered menu:
| Action | Effect | When to use |
|---|---|---|
| Hide | Item stays in the structure, does not render | Temporary removal — campaign that paused, seasonal item, A/B testing visibility |
| Remove | Item is removed from the structure entirely | Permanent removal — item is gone, not coming back |
Hiding is reversible from the same toggle. Removal is reversible only by re-adding the item from scratch, so default to hide when in doubt.
Multiple menu locations on one site
A theme defines its menu locations. Common locations are Header, Footer, and Mobile Drawer; the theme can also define custom locations like a sidebar menu, a section-specific menu, or a help-center menu.
Each location accepts one menu binding. The same menu can bind to multiple locations — useful when, for example, the desktop header menu and the mobile drawer menu should mirror each other. To keep them separate, create a second menu in the registry and bind it to the second location.
Edge cases worth knowing
A few menu behaviors that surprise first-time operators:
- A menu with no location binding is still saved. It exists in the registry and can be bound to a location later. This is useful for staging a new menu structure before it goes live — build it, review it, then bind it.
- Two menus bound to the same location is not supported. Each location accepts one menu. Binding a second menu to a location replaces the first binding; the first menu stays in the registry, no longer rendered at that location.
- An empty menu renders as nothing at its location. No warning, no fallback. If a header location goes blank on the site, an empty menu is the most likely cause.
- External links open in the same tab by default. Toggle the open-behavior field on the item to switch to new-tab.
- Item visibility is per-item, not per-location. Hiding an item hides it everywhere the menu is bound. There is no per-location item visibility toggle.
Frequently asked questions
Can the same item appear in two menus? Yes, but you add it twice — once in each menu. The two are independent items after that. Editing one does not change the other.
Can a menu item link to an anchor on a specific page? Yes. Pick the page as the destination, then append #section-id in the destination field. The render passes the anchor through to the rendered link.
What happens to the menu if a destination page is removed? The menu item stays in the structure, pointing at the removed slug. The rendered link will return a not-found result on the public site. Edit or remove the item to fix the broken link.
Does Menus support role-based visibility per item? No. Menus is static-structure only — what is bound, renders. Per-visitor or per-role visibility logic lives in the theme or in a Custom Codes block, not in this module.
Can I export and import a menu structure? Site backup (the .sgen backup format) includes menu definitions. Per-menu export/import as a standalone is not exposed in the current Menus surface.
Why do my changes not show up immediately on the public site? Two most likely causes: page-level cache (hard-refresh fixes it) or CDN-layer cache (wait the cache window). If neither is the cause, save the menu again to force a publish cycle.
Glossary
| Term | Meaning |
|---|---|
| Menu | A named navigation structure with ordered items |
| Menus | The registry of every menu on the site |
| Item | A single navigation entry inside a menu |
| Destination | Where an item points — page, external URL, or anchor |
| Parent | The item one level above a nested item |
| Location | A spot on the rendered site where a menu can bind (Header, Footer, Mobile Drawer, custom theme locations) |
| Binding | The link between one menu and one location |
| Mega-menu | A wider panel that opens below a top-level item, often organized into columns |
| Menu Builder | The in-builder navigation component inside SG-Builder that reads from a Menus-defined menu |
Field reference — what each field on an item controls
When an item opens in the detail panel, the fields below are exposed. Field names match the in-product UI. Required: Label, Destination type, and Destination value. All others are optional with sensible defaults.
| Field | What it controls |
|---|---|
| Label | The visible text on the rendered link |
| Destination type | Page / External link / Anchor |
| Destination value | The specific page, URL, or anchor target |
| Open behavior | Same tab or new tab |
| Visibility | On or off — item exists either way, only renders when on |
| Parent | The item one level above; controls nesting |
| Order | Position within its level (set by drag-drop, also editable directly) |
| CSS class (optional) | A custom class on the rendered list item, for theme-level styling |
| Description (optional) | A subtitle shown under the label where the theme supports it (mega-menu columns often use this) |
Related reading
- SG-Admin Overview — parent surface and where Menus sits in the broader admin map.
- Pages — most menu items point at a page; this is where pages are created and managed.
- Appearance — the theme layer that defines which menu locations exist on the rendered site.
Menu item — field reference
| Field | What it controls |
|---|---|
| Label | Visible text of the item |
| Destination | Internal page, external URL, or anchor |
| Parent | Item this nests under |
| Order | Position within its level |
| Open behavior | Same tab or new tab |
| Visibility | Toggle to hide/show the item |